
Free 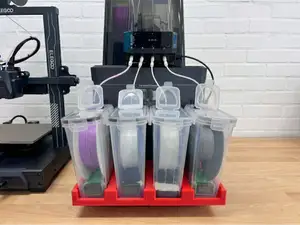
Elegoo Centauri Carbon 2 Drybox Spool Mount System
MakerWorld
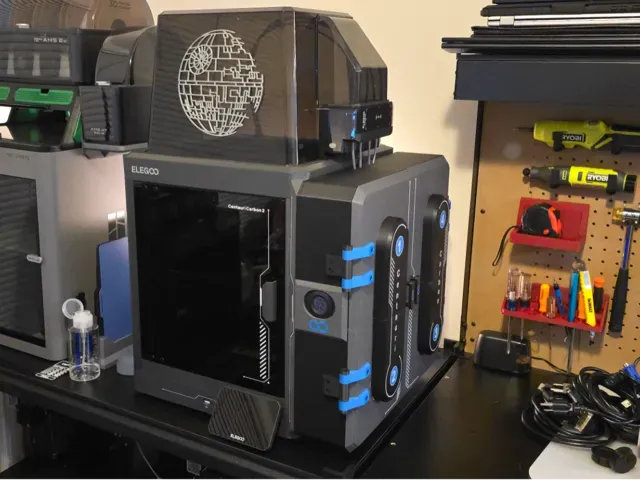
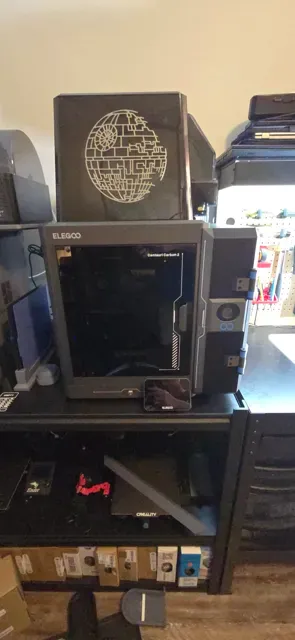
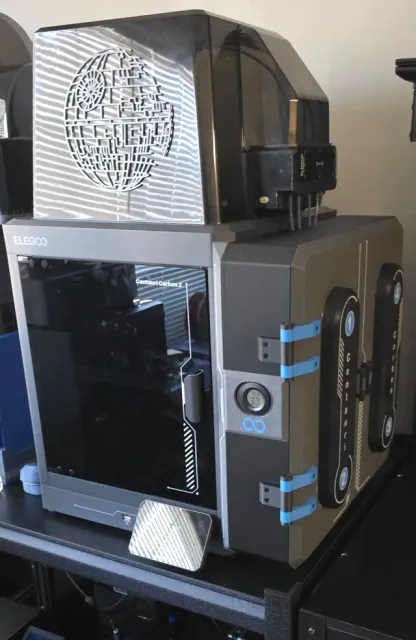
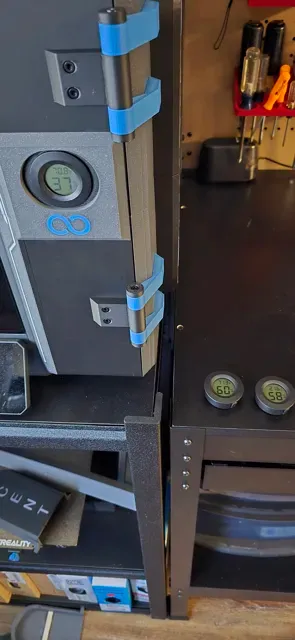
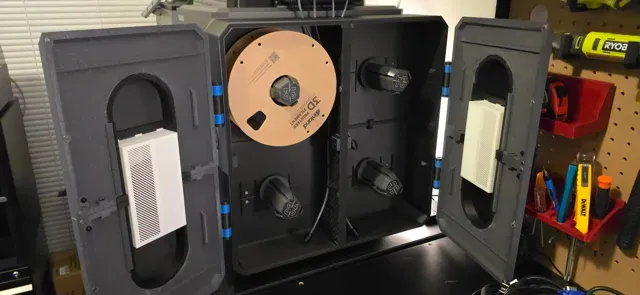
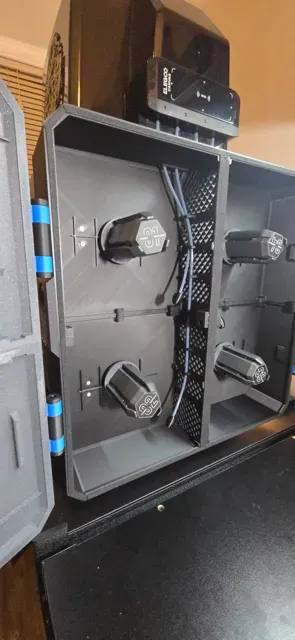
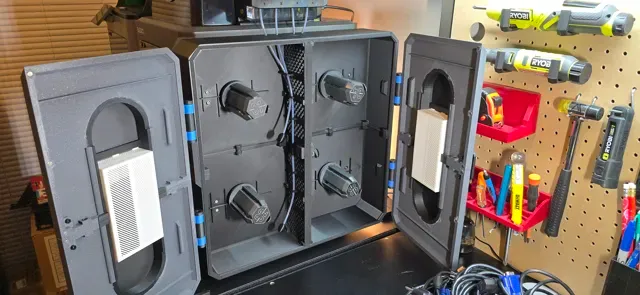
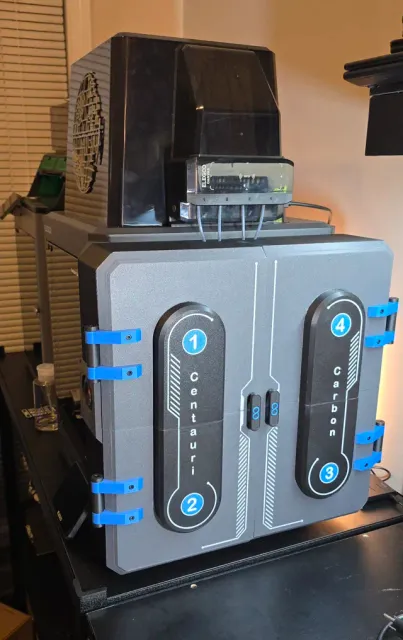
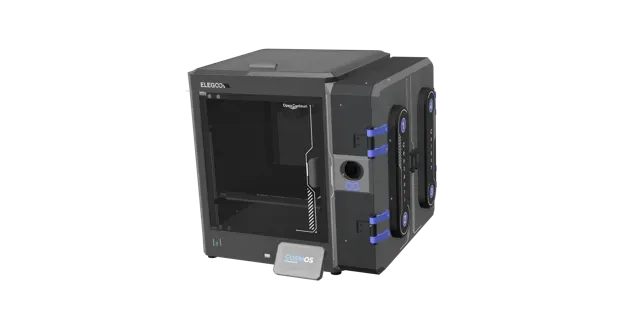
Hello, I'm Lee, and I'd like to share my design for a side-mounted enclosed Dry Box for the Centauri Carbon 2.
I have really enjoyed my new CC2, but I have always felt that it was lacking an enclosed MFS. I felt like all my filament was getting dusty and absorbing moisture. So, I visited all the maker websites looking for a solution, but I found that most designs were somewhat lacking or cumbersome to use.
After coming up short in my search, I decided to make one myself. This design is mostly airtight and can maintain humidity levels at least 15% to 20% lower than the surrounding environment. It utilizes the existing retracting spools and mounting points, and I also tried to preserve the printer's unique design and aesthetic.
It took a lot of effort and time, but I am quite proud of the outcome. I designed every piece to print without supports and tried to make assembly as easy as possible. Almost everything screws together, and glue is used only as a sealant, not for structural strength.
I have included a customizable plate to hold a hygrometer, and I designed the enclosure to mount to the side of the printer so it does not need to be disassembled for routine maintenance or when the printer needs to be moved.
With all that being said, I've decided to share this design for free, and I hope you all love it as much as I do.
Update: I added a version for the Centauri Carbon 1. I don't own one of these printers so please verify mounting locations before printing. I found a very accurate model of it online so it should be good. I added new instructions but the only difference between the 2 is the mounting locations of the main body.
Update: Corrected LL door file and added a new mount for the CC1 devices and instructions.
Features
- All parts of this model are designed to print without supports and were printed in PLA. - All pieces screw together, and glue is used only for sealing purposes, not structural support. - The box mounts to the side of the CC2 using the existing spool retraction mounting holes. - It is designed with two large desiccant boxes to help keep filament clean and dry. - Many of the parts require a multi-filament system to print the graphical designs, but they can also be printed without one. - Assembly instructions are attached. - Link to Assembly Instructions Hardware Required
Self-Tapping Socket Head Screws
- 18 × M4x14 - 18 × M4x12 - 4 × M4x10 Flat-Head Countersunk Hex Screws
- 8 × M3x8 - 8 × M3x10 or M3x12 - 8 × M3x4x5 heat-set inserts Additional Components
- 24 × 6x3 mm neodymium magnets - 1 small round hygrometer - 1 roll of 1/4" × 1/16" weather stripping with adhesive backing - Small amount of thick CA glue - Approximately 1.6 m (5.3 ft) of PTFE tube
0.2mm layer, 2 walls, 15% infill UPDATE: I re-uploaded the Print Profile. I had the wrong Desiccant box in the file. Sorry!!
UPDATE 2: Uploaded New File with correct LL Door.
Features
- All parts of this model are designed to print without supports and were printed in PLA. - All pieces screw together, and glue is used only for sealing purposes, not structural support. - The box mounts to the side of the CC2 using the existing spool retraction mounting holes. - It is designed with two large desiccant boxes to help keep filament clean and dry. - Many of the parts require a multi-filament system to print the graphical designs, but they can also be printed without one. - Assembly instructions are attached. - Link to Assembly Instructions Hardware Required
Self-Tapping Socket Head Screws
- 18 × M4x14 - 18 × M4x12 - 4 × M4x10 Flat-Head Countersunk Hex Screws
- 8 × M3x8 - 8 × M3x10 or M3x12 - 8 × M3x4x5 heat-set inserts Additional Components
- 24 × 6x3 mm neodymium magnets - 1 small round hygrometer - 1 roll of 1/4" × 1/16" weather stripping with adhesive backing - Small amount of thick CA glue - Approximately 1.6 m (5.3 ft) of PTFE tube
CC1 0.2mm layer, 3 walls, 15% infill CC1 0.2mm layer, 3 walls, 12% infill
UPDATE: Added a new Mount for the CC1 spool holder. Also added CC1 mount instructions.

![(CC2) [v1.1] Elegoo Centauri Carbon 2 Screen Cover](https://cache.polyzon.org/api/img?url=https%3A%2F%2Fmakerworld.bblmw.com%2Fmakerworld%2Fmodel%2FUS8b3681663e4215%2Fdesign%2Fda49c9fa76fce3d9.jpeg&w=300)

%2Fhttps%3A%2F%2Ffbi.cults3d.com%2Fuploaders%2F15236594%2Fillustration-file%2F15c5de89-d6dc-4848-91a8-389f1105fe7b%2FCentauri-Carbon-2-PTFE-Tube-Clip-Holder-v1-bottom.png&w=300)

Names are used only to indicate the source of a result. Polyzon is not affiliated with the listed sites.
Comments