
Free 
Blobifier for Voron 2.4 350mm Printer
Printables




Revision 1: 2025-11-15
- Revise Amazon links per currently available items - Reflect Happy Hare's incorporation of Filamentrix's Filament Cutter into its code base Introduction
The Voron 2.4R2 with Happy Hare provides a means to cut off the filament end before the filament unloads eliminating any need to do tip forming. Cutting off malformed filament tips eliminates the possibility that a bulbous filament end could jam during unload/reload. The cutoff portion of the filament is left in the cold part of the hot end and is purged to a waist tower or via Blobifier or equivalent purge facility when the next filament is loaded to the hot end. For more information on these mods:
Filametrix: https://github.com/sorted01/Filametrix Blobifier: https://github.cdrowen/Blobifier ERCF: https://github.com/Enraged-Rabbit-Community/ERCF_v2 Happy Hare: https://github.com/moggieuk/Happy-Hare The standard Filametrix installation contains two files ( depressor_mount.stl and depressor.stl ) with are included for convenient reference. These files are gantry mounted and act as a fixed point extending into the print area. The depressor provides a solid surface on which the print head can move against in order to cut the filament. This method works very reliability but has one major drawback: The depressor arm and screw extend more than 20mm into the print area, reducing the print area accordingly. This could reduce the x axis of the entire print bed by the same amount depending on where the mount is positioned. Having an obstacle protruding so far into the print area also invites damage to the print head if it is commanded into this area for any reason, e.g. purge area for Blobifier .
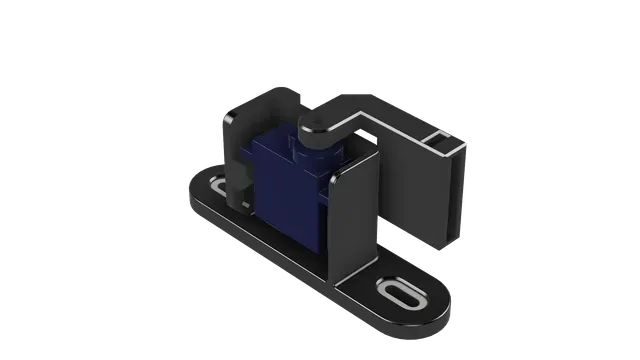
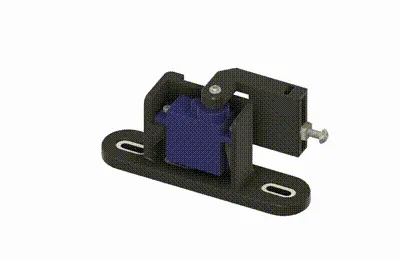
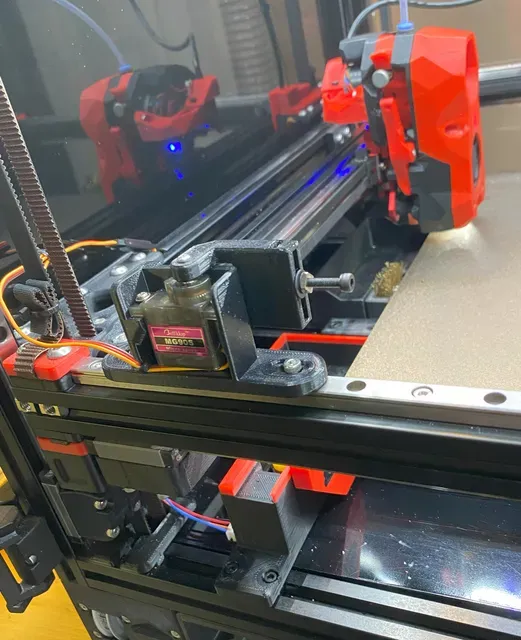
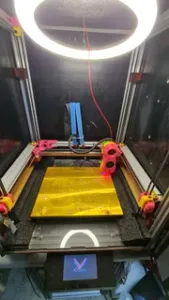
The Gantry Servo Mount uses a common servo (MG90S) to swing the depressor screw into position only when needed during the filament cut cycle. At all other times the depressor is retracted from the print area.
The Servo Mount is designed to be mounted on the left gantry leg using the existing extrusion backer fasteners. Several slotted holes are provided for mounting flexibility. A minimum of two fasteners are required for mount stability.
The suggested position for the servo mount is in the far aft left corner of the print area just above the Blobifier servo. This minimizes the amount of print area impacted Filametrix .
I have wired the servo to the ERCF MBB pin PA3 but any servo capable port should work. This requires routing the three servo wires through the z axis cable chain to allow for gantry movement in the z axis.
This model was recreated from scratch in Fusion 360. I have attached the current version of the model for those who wish to iterate on my design.
Activation:
The Gantry Servo feature is built into Happy Hare but must be activated and the servo angles calibrated. The following files in Klipper Configuration (/mmu/base/) must be updated as indicated below:
mmu_macro_vars.cgf:
variable_gantry_servo_enabled : True ; True = enabled, False = disabled variable_gantry_servo_down_angle: 160 ; Angle for when pin is deployed variable_gantry_servo_up_angle : 30 ; Angle for when pin is retracted
variable_cutting_axis : "x" ; Mount Axis variable_pin_loc_xy : 19, 351 ; x,y coordinates of depressor pin The two angles in the above file must be adjusted according to individual installations. They should be close but could vary a little. The enable variable is set to false as a default and must be changed to true to activate the servo action. Update the depressor pin location. I my case it is at the most extreme aft left gantry extrusion.
mmu_hardware.cfg
[mmu_servo mmu_gantry_servo] ; Define Servo pin: mmu:PA3 ; Servo Connection Pin to mcu maximum_servo_angle:180 ; Max Servo Angle minimum_pulse_width: 0.00075 ; Pulse Width Limits for PWM maximum_pulse_width: 0.00225 initial_angle: 30 ; Servo Angle at Power Up/Reset Change initial_angle to the stowed position angle. In my case 30° causes the Servo Arm to stow but yours is likely to vary a little depending on how the Servo Arm was installed on the servo.
The pin variable must be set to the port that the servo is plugged into. In my case I used one of the ports on the ERCF BTT MMB mcu but any port supplying 5Vdc and capable of PWM output should work.
Useful Commands:
- _FILAMETRIX_GANTRY_SERVO_DOWN (Extends Servo Arm ) - _FILAMETRIX_GANTRY_SERVO_UP (Retracts Servo Arm ) - SET_SERVO SERVO=mmu_gantry_servo ANGLE={angle} where {angle} is any angle between 1 and 180. Use this command to determine the angles to enter into the files above. - _mmu_cut_tip - Deploys the Gantry Servo Arm , - Moves the print head to the depressor and performs the filament cut, - Moves the print head away from the depressor , - Stows the Gantry Servo Arm . BOW
QTY P/N Description Source
1 MG90S Servo https://www.amazon.com/MG90S-Helicopter-Servos-Arduino-Project/dp/B0CNL755KP
2 M2x10 Self-Tapping Screws https://www.amazon.com/uxcell-100pcs-Stainless-Phillips-Tapping/dp/B01KXTUCM8
1 M3x16 BHCS Screw https://www.amazon.com/uxcell-M3x16mm-Thread-Button-Socket/dp/B01B1ODJCO
2 M3x5.4x1.8 Thin Square Nuts https://www.amazon.com/gp/product/B07NVPQHN2
1 M3 Flat Washer https://www.amazon.com/HELIFOUNER-Pieces-Washers-Diameter-Thickness/dp/B0B5GXMVRG





Names are used only to indicate the source of a result. Polyzon is not affiliated with the listed sites.