
Free 
MK4S Nozzle Replacement Tool
Printables
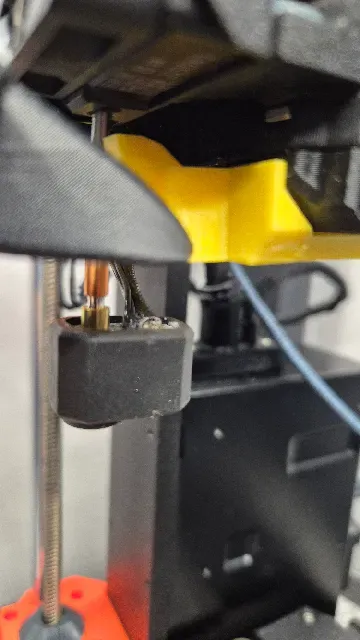
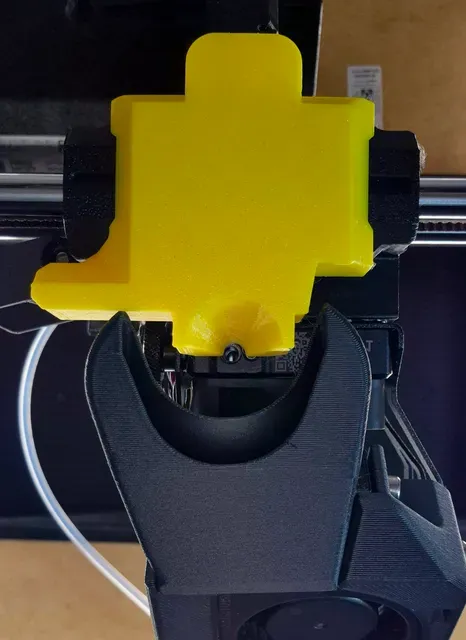
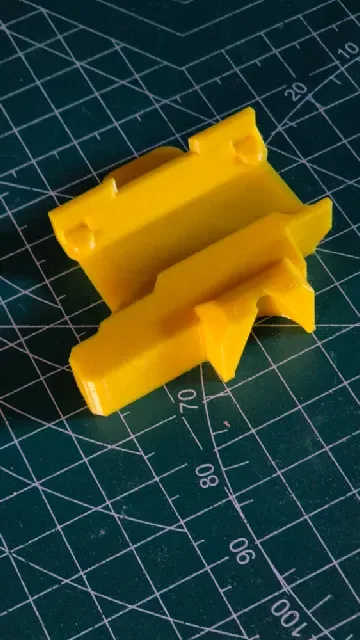
The original version holds the heat block to exchange just the nozzle. But if you want to exchange the complete heatblock with installed nozzle it is difficult to hit the hole to insert the nozzle tube, at least on the MK4s. This tool helps. :-)
Hot End Change Procedure
- Remove filament from the MK4s Nextruder. - Cool down the MK4s Nextruder hot end. - Open the cooling fan door. - Open the Love Board Cover. - Release the Heater Power and Temp Sensor Cable and pull the cable out of the duct. - Loosen the two thumbscrews holding the Nextruder Nozzle in place. - Pull out carefully the complete hot end. - Snap on Nextruder Hot End Center Tool. - Carefully plug in the new Hot End leaded by the tool until the pipe just passes the lower thumbscrew. - Tighten the lower screw slightly or hold the Hot End. - Remove the Nextruder Hot End Center Tool. - Release the lower screw while holding the Hot End. - Now insert the Hot End completely, align it, and tighten both thumbscrews. - Feed the cables back through the cable duct, connect them and close the part cooling fan door and Love Board Cover Done !
Die Originalversion hält den Heizblock, um nur die Düse auszutauschen. Aber wenn man den kompletten Heizblock mit eingebauter Düse austauschen will, ist es zumindest beim MK4s schwierig, die Bohrung zum Einsetzen des Düsenrohrs zu treffen. Dieses Werkzeug hilft. :-)
Hot End Wechsel - so wirds gemacht!
- Entferne das Filament aus dem MK4s Nextruder. - Lass das Hot End des MK4s Nextruder abkühlen. - Öffne die Klappe des Kühlgebläses. - Öffne die Love Board-Abdeckung. - Löse das Strom- und Temperatursensorkabel der Heizung und ziehe das Kabel aus dem Kanal. - Löse die beiden Rändelschrauben, die die Nextruder-Düse in Position halten. - Ziehe das komplette Hot End vorsichtig heraus. - Klemme das Center Tool für das Nextruder Hot End an. - Stecke das neue Hot End vorsichtig ein, bis das Rohr gerade an der unteren Rändelschraube vorbeigeht. - Ziehe die untere Schraube leicht an oder halte das HotEnd fest. - Entferne das Nextruder Hot End Center Tool. - Löse die untere Schraube, während du das Hot End festhälst - Setze nun das Hot End vollständig ein, richten es aus und ziehe beide Rändelschrauben fest. - Führe die Kabel durch den Kabelkanal zurück, schließe sie an und schließe die Lüfterklappe und die Love Board-Abdeckung. Fertig!


Names are used only to indicate the source of a result. Polyzon is not affiliated with the listed sites.
Comments