
Free 
F1 Sign LED With Color Sequences!
MakerWorld


Description
Welcome to My Page!
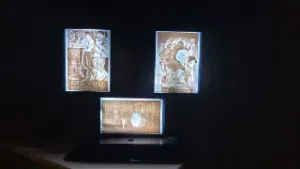
This is an F1 sign printed using black PLA filament. For backlighting, I’ve used WS2812B 5050SMD LED light strips powered by an Arduino Nano with a USB-C connection. The design is optimized to fit on a single build plate, requiring minimal assembly. If you’re comfortable with soldering and uploading a program to an Arduino, this project will be a breeze!
PRINTING TIPS
- The F1 Face should be printed at 100% infill! if not this will result in lines from the infill showing through the lens. BE SURE TO HAVE A CLEAN BUILD PLATE !!!! Any strings or debris will show in the lens. - The housing can be printed at your desired infill. I like to print this at 15% infill with 2 walls. This seems to be plenty strong! In the full plate 3MF file, I have added tabs on the corners of the body. I found the chamber blower fan can cause warping on the small corners. Please add tabs if you choose to print the body separately to ensure this won't happen. - The Arduino holder can follow suit with the housing with the exception of supports. I chose to have it standing up with the brim of the holder in the air supported by tree supports. This works well in my situation.
Assembly
*Required*
- 1x housing - 1x F1 face - 1x Arduino Holder - 1x Arduino Nano - 1x 6x6mm momentary push button - plastic glue or if preferred hot glue (not super glue as it will leave white splotches) - WS2812B 5050SMD LED light strips, or any single color LED strip if Preferred, Coding becomes irrelevant if single color LED strips are used, as well as the Arduino as a single color LED strip only needs 5V+ power from a spliced USB cord. - 24-26 AWG wire - Soldering supplies First, take the housing and with a little glue, press fit the push button into the square slot. Measure out LED strips and cut them to length. to fit with a little room from the walls on either end. Take the Arduino and locate pins A7 (Data Pin), 2 (Button pin), GND (Ground), and VIN (USB 5V+). VIN will go to +5V on the LED strip, GND to GND on the LED strip, and one of the pins on the button. Pin 2 will go to the other side of the button. And lastly, A7 will go to Din on the LED strip. When connecting the 3 LED strips together, simply just wire the likewise terminals together (+5v to the next +5v on the strip, Do to Din on the next strip, and GND to the next GND). IF YOU WISH TO HAVE ONE LED STRIP, just stick it to the wall on the inside of the housing. Solder everything together using your wire. Place the wired Arduino inside of the holder and secure it with glue. Place the holder with the Arduino into the housing and secure the brimmed surface that overlaps with a little glue. Peel off the adhesive backing to the LED strips and stick them on! You should now have a housing secured with an Arduino holder, an Arduino, LED lights, a button, and everything wired together. Please at this time plug in your Arduino and upload the code. When it finished uploading, you should see the LEDS come to life. Test the functionality of the button and LED lights. PLEASE NOTE, at the top of the code, you will see a #define BRIGHTNESS, BAND_SIZE, SPEED, and NUM_PIXELS, please adjust this to your needs and liking. After ensuring all is working, secure the F1 face to the body with a little glue ensuring not to get any on the outside of the body. F1 sign is assembled and ready!
Arduino Code
**IMPORTANT**
Will Need to add the Adafruit_NeoPixel.h Library found in the Arduino library manager!
#include <Adafruit_NeoPixel.h>
#define PIN A7 // Data pin connected to A7 #define NUM_PIXELS 24 // Number of LEDs in the strip #define BRIGHTNESS 255 // Set the brightness (0-255) #define BAND_SIZE 6 // Adjust this to control the size of the color bands (smaller is more gradual) #define SPEED 20 // Adjust this to control the speed of the rainbow movement (lower is faster) #define BUTTON_PIN 2 // Button connected to pin 2
Adafruit_NeoPixel strip = Adafruit_NeoPixel(NUM_PIXELS, PIN, NEO_GRB + NEO_KHZ800);
// Mode variables const int TOTAL_MODES = 10; // Total number of modes (0-9) int currentMode = 0;
// Button debounce variables bool buttonPressed = false; // Tracks whether the button is pressed unsigned long lastDebounceTime = 0; const unsigned long debounceDelay = 50; // 50ms debounce delay
// Timing variables for non-blocking animations unsigned long lastUpdateTime = 0; const unsigned long animationInterval = 50; // Interval for animations (in ms)
// State variables for animations int theaterChaseStep = 0; int theaterChaseCycle = 0; int colorWipePixel = 0; unsigned long rainbowOffset = 0; int WheelPos = 0; // Tracks the color position in the wheel
void setup() { strip.begin(); // Initialize the strip Serial.begin(9600); strip.setBrightness(BRIGHTNESS); // Set the brightness level strip.show(); // Initialize all pixels to 'off' pinMode(BUTTON_PIN, INPUT_PULLUP); // Set button pin with internal pull-up }
void loop() { handleButtonPress();
Serial.print("Current mode: "); Serial.println(currentMode); // Display current mode
switch (currentMode) { case 0: rainbowCycle(); break; case 1: alternatingRedWhite(); break; case 2: alternatingGreenWhiteGreen(); break; case 3: alternatingBlueWhiteBlue(); break; case 4: theaterChase(strip.Color(127, 127, 127)); // White theater chase break; case 5: theaterChase(strip.Color(0, 255, 0)); // Green theater chase break; case 6: theaterChase(strip.Color(0, 0, 255)); // Blue theater chase break; case 7: colorWipe(strip.Color(255, 165, 0)); // Orange color wipe break; case 8: rainLightFlash(); // F1-inspired rain light with 4 flashes break; case 9: insaneLightShow(); // Crazy light show break; default: rainbowCycle(); break; } }
// Function to handle button press with debounce void handleButtonPress() { int reading = digitalRead(BUTTON_PIN);
if (reading == LOW && !buttonPressed) { buttonPressed = true; lastDebounceTime = millis(); currentMode = (currentMode + 1) % TOTAL_MODES; // Cycle through modes Serial.print("Button pressed! Switching to mode: "); Serial.println(currentMode);
// Reset animation states when switching modes theaterChaseStep = 0; theaterChaseCycle = 0; colorWipePixel = 0; rainbowOffset = 0; }
if (reading == HIGH && buttonPressed && (millis() - lastDebounceTime) > debounceDelay) { buttonPressed = false; } }
// Non-blocking Rainbow Cycle void rainbowCycle() { if (millis() - lastUpdateTime >= SPEED) { lastUpdateTime = millis(); for (int i = 0; i < NUM_PIXELS; i++) { int colorPos = (i * BAND_SIZE + rainbowOffset) % 256; strip.setPixelColor(i, Wheel(colorPos)); } strip.show(); rainbowOffset = (rainbowOffset + 1) % 256; } }
// Non-blocking Theater Chase void theaterChase(uint32_t color) { if (millis() - lastUpdateTime >= animationInterval) { lastUpdateTime = millis(); strip.clear(); for (int i = theaterChaseStep; i < NUM_PIXELS; i += 3) { strip.setPixelColor(i, color); } strip.show();
theaterChaseStep = (theaterChaseStep + 1) % 3; if (theaterChaseStep == 0) { theaterChaseCycle++; } } }
// Non-blocking Sequential Color Wipe void colorWipe(uint32_t color) { static uint32_t currentColor = color; // Current color of the wipe
if (millis() - lastUpdateTime >= animationInterval) { lastUpdateTime = millis();
strip.setPixelColor(colorWipePixel, currentColor); strip.show();
colorWipePixel++;
// Check if we've reached the end of the strip if (colorWipePixel >= NUM_PIXELS) { colorWipePixel = 0; // Reset position currentColor = Wheel((WheelPos + 25) % 256); // Move to the next color WheelPos += 25; // Increment color } } }
// Solid Color Function void solidColor(uint32_t color) { for (int i = 0; i < NUM_PIXELS; i++) { strip.setPixelColor(i, color); } strip.show(); }
// Generate a color from the wheel of 256 colors uint32_t Wheel(byte WheelPos) { if (WheelPos < 85) { return strip.Color(WheelPos * 3, 255 - WheelPos * 3, 0); // Red to green } else if (WheelPos < 170) { WheelPos -= 85; return strip.Color(255 - WheelPos * 3, 0, WheelPos * 3); // Green to blue } else { WheelPos -= 170; return strip.Color(0, WheelPos * 3, 255 - WheelPos * 3); // Blue to red } }
void rainLightFlash() { static int flashCount = 0; // Tracks the number of flashes static bool isOn = false; // Tracks whether the light is on or off static unsigned long flashDelay = 100; // Delay between flashes (in ms)
if (millis() - lastUpdateTime >= flashDelay) { lastUpdateTime = millis();
// Toggle the light state isOn = !isOn;
// Set all pixels to red when 'on', or turn off when 'off' uint32_t color = isOn ? strip.Color(100, 0, 0) : strip.Color(0, 0, 0); for (int i = 0; i < NUM_PIXELS; i++) { strip.setPixelColor(i, color); } strip.show();




Names are used only to indicate the source of a result. Polyzon is not affiliated with the listed sites.
Comments 0
Loading comments…