
Free 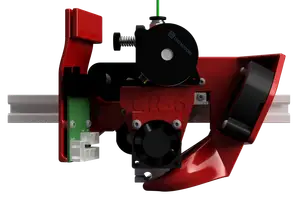
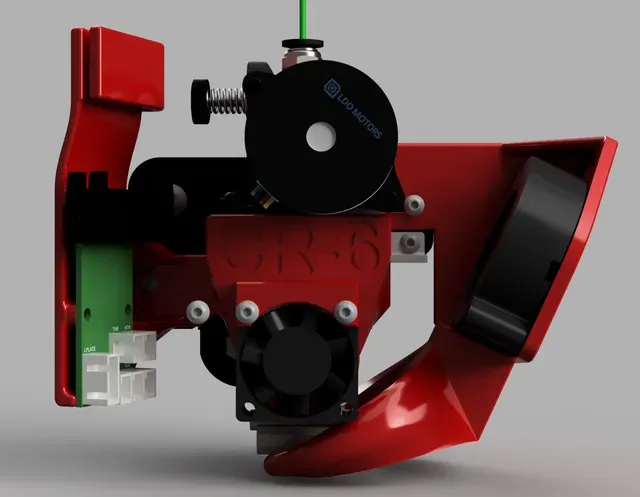
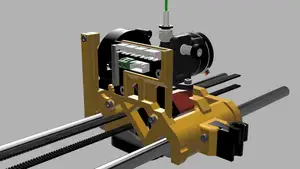
CR-6 Dragon (HF & SF) and Orbiter V1.5 direct drive mount to the CR6 strain gauge.
Printables

Overview:
This mount is part of a growing series of mounts for different hotends and extruders to the CR-6 strain gauge. I will be porting the designs from the GitHub (https://github.com/KoenVanduffel/CR-6_Strain_Gauge_Mounts) where they currently live to here.
Also on PrusaPrinters.org: https://www.prusaprinters.org/print/126838/edit Dragon and Orbiter mount to the CR-6 strain gauge. Most of the instructions are from this mount (as this is the one I run myself) but the principle is identical.
The series includes the Dragon, Mosquito and MicroSwiss hotends and the Orbiter V1.5, LGX Lite, Mjolnir and Bowden setup extrusion systems.
To be upfront: the LGX, Orbiter V2.0 and Superfly (and derivatives) cannot be supported as all are too bulky and collide with the X-carriage.
Introduction
This mount will strap the Mosquito hotend (both standard and Magnum compatible) in combination with the Orbiter V1.5 extruder to the strain gauge of the Creality CR-6 SE and CR-6 Max (CR-10 Smart most probably works as well, please report if you are successful). The Orbiter V2.0 will NOT work, it is too bulky and collides with the carriage.
Needed accessories
5015 blower fan
The mount uses a 5015 blower fan. Please use the one posted here on Printables.com as part of the series:
https://www.printables.com/model/157511-cr6-5015-part-fan-shroud-dual-fang
The standard case and thus fan mount does not fit any longer. Since the 4010 blower is largely insufficient to properly cool and achieve good overhangs and bridging at reasonable print speed the fan is upgraded to a 5015 blower and a dual outlet fan shroud.
A 24V between 4000 and 6000 rpm 5015 blower fan is ideal. Higher rpm will be noisy. Also ball bearings are typically less noisy. The fan will typically be used at 60 to 80% of its maximum speed making operation nearly silent and keeping some headroom for improved cooling of overhangs and bridges.
Daughterboard mount
The daughterboard also interferes with the extruder and needs adaptation. Also for the daughterboard there is a special mount on Printables.org:
https://www.printables.com/model/162434-creality-cr-6-daughterboard-mount
Hot melt inserts
6 M3 x 7mm hot melt inserts. (4 x 7 mm, the 2 others (fan) can be between 3 and 7 mm as they don't bear significant load). The hotmelts have to be of the type as in the picture above. The ones with 3 rings of knurls at the ends and in the middle are no good. These are for injection molded parts.
bolts
4 M3 x 10 mm bolts (extruder and strain gauge mount, max 12 mm otherwise the strain gauge will get damaged or the screw bottoms out on the hotend) 2 M3 x 16 mm bolts (hotend fan) 2 M3 x 24 mm bolts (part fan) 2 M3 x 5 to 8 mm bolts (daughterboard, not critical these can stick out) 2 M3 x 8 mm bolts (daughterboard mount) 1 M3 x 8 mm bolt (part fan shroud, not critical minimum 6 mm)
PTFE tube
33 mm PTFE tube
Print instructions
Print in PETG, ABS, ASA or other high temperature filament. The mount cannot be printed in PLA (especially the part fan shroud) as it will melt.
Your printer has to be properly calibrated to get proper dimensional accuracy. Especially filament flow should be calibrated too high flow and the small holes will not be the correct size, too little flow jeopardizes strength and stiffness. I advise to use the Cura “part for calibration” plugin and print the “multi-flow” test. SuperSlicer has the same test built in. For PrusaSlicer the test can be downloaded from GitHub: https://github.com/5axes/Calibration-Shapes
Print settings:
- 5 top and bottom layers - 5 walls + alternative wall with infill - 25% gyroid infill - line width 0.45 mm (outer line can be 0.4 for print quality) - no support needed The part fan shroud and daughterboard holder can be printed with 3 or 4 walls if wanted.
The parts should not need any post processing other than the filament path might need a quick pass with a 4 mm drill in order to be able to push the PTFE tube in later on.
All models are oriented correctly and print without supports except for the daughterboard mount which needs supports under the arm carrying the ribbon cable.
Hot melt inserts
The mount needs 8 (or 10 if you fix the hotend with 4 screws) M3 hotmelt inserts. 4 M3 x 6 to 8mm for the Orbiter and mount to the strain gauge. M3 x 5 mm is acceptable but be careful not to overtighten the bolts also the model will fatigue more quickly. The hotend fan and daughterboard can be M3 x 3 mm hotmelts. The hotend fan has holes that support 7 mm long inserts, on the daughterboard mount 7 mm will stick out but doesn't cause a problem.
Mount instructions
Mosquito to the mount block
The Mosquito is mounted to the M3 hotmelt inserts. from the bottom and front (contrary to the Dragon in the picture
Mount block to the strain gauge
Slide the mount over the strain gauge, it should slide over without any resistance. Be careful not to damage the white cover of the stain gauge sensor element.
2 M3 x 10 mm screws put the mount in place on the strain gauge.
Orbiter mount
Cut a piece of PTFE tube 33 mm long and slide it into the filament path. You can make 2 small chamfers on either end to facilitate the tube seating in the recess of the dragon (outside chamfer) and the filament to slide into the tube (inside chamfer).
The Orbiter than mounts on top of the mount bloc with 2 M3 x 10 mm screws.



Names are used only to indicate the source of a result. Polyzon is not affiliated with the listed sites.