
Free 
Secondary Mirror Spider for Skywatcher Newton 200 mm (8"), 3 spider vanes, 3D-Printed
Printables


Design
The tube end ring is combined with the secondary mirror spider. In my opinion, it makes no sense to screw on the tube end ring and also the spider for a 3D-printed part. The mirror holder is centered by design, it is not possible to adjust the center position of the mirror holder and therefore the mirror.
The standard secondary mirror spider with 4 vanes leads to 4 diffraction spikes at bright stars, with 3 spider vanes you will get 6 spikes which are a little bit smaller. See https://www.telescope-optics.net/spider.htm
At first I tried to run 3 vanes straight down the center, similar to the original spider. Printed in PETG - and it was far too flexible, especialy with rotational forces.
The design was therefore modified so that the spider vanes run tangentially to the mirror holder in the center. Also, the print material was changed to carbon fiber reinforced PLA - and I was pleased. It is quite stiff, I would say even stiffer than the 4 thin sheets in the original spider.
The holder was recessed to provide more rigidity around the focuser (to reduce focuser tilt) but support is needed.
The vanes are only 1.5 mm thick.
Star test / spikes
See the picture of the "first light". 6 spikes instead of 4 as expected. I like it.
The spikes do not run directly to each other in the center, I don't see this on the bright star. On less bright star it can be seen better (see pic). Decide for yourself whether this is acceptable for you.
Attention
Be sure that the focuser is not intruding the light path. As the spider vanes do not match the direction of the focuser tube, there will not be an overlapping with spikes from the spider vanes but additional spikes instead. This will lead to two additional spikes - see picture of a star test and the corresponding picture of the intruding focuser tube.
In case you decide to move the primary mirror closer to the secondary mirror, you can find a spacer ring here: https://www.printables.com/model/1305532-spacer-ring-to-move-the-primary-mirror-closer-to-s
If it is not possible to get the focuser not intruding the light path, it's maybe better to keep the existing spider vanes or search for another model with straight vanes and orient one of the vanes to the focuser.
Part List
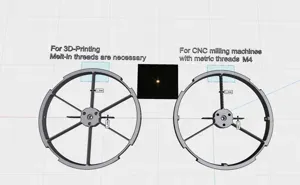
- Printed part Secondary mirror Spider - 4 Hexagon Nuts M4 ISO 4032 (DIN 934) (steel or stainless steel) - 3x M4 Insert Brass Nut - There are different sizes, used here: ∅6.3 mm, L = 8.1 mm (longer is possible with the existing model) - 3x Screw M4x25, ISO 4762 (DIN 912) Socket head screw or ISO 7380 Hexagon socket button head screw - 1x Screw, either use the original Philips Screw or (recommended) M5x ISO 4762 (DIN 912) Socket head screw or ISO 7380 Hexagon socket button head screw - 1x Spring (Original part) - black velour velvet fabric and/or black anti-reflective paint
Printing
Weight ~200 grams.
PLA-CF ( carbon fiber reinforced PLA ) recommended for printing. Stiffness is very important, don't use PETG or similar “soft” materials. PLA should also be fine, but it is less stiff.
Nozzle 0.6 mm, layer height 0.3 mm, (Bambulab) PLA-CF, 2 wall lines, 5 top and bottom layers, infill 20%, infill pattern honeycomb. Brim recommended if bed adhesion isn't very very strong. I decided to print with brim instead of throwing failed prints to the trash.
Support needed (only on print plate). It's not mandatory to get a nice face (it's no contact surface), so simple support is possible. Or use a different support material for the interface. Support of the countersink in the center is not needed. Therefore it is recommended to manually paint the surface for support - as shown in the picture.
If you print with a Nozzle 0.4 mm and layer height 0.2 mm inrease wall lines to at least 3 and top and bottom layers to 7-8 (stiffness reason).
Be aware of selecting “Inner/Outer” for “Walls printing order”, otherwise the overhang line is “printed in the air” (see slicer-pictures).
Assembly
- Remove the support - Pressing in the 3 Insert Nuts - Insert the nuts and tighten lightly with a screwdriver and a short screw M4 (e.g. M4x16) - Line the inside with adhesive foil made of black velour velvet fabric, similar to the picture. I prefer to paint the vanes with black anti-reflective paint to keep the vane thickness as low as possible. Of course you can line the vanes with black velour velvet fabric too. Leave the 20 mm from the top to the groove if you want to use the original cover and/or a Bahtinov-Mask which fits to the original tube end cap. - Assemble the secondary mirror onto the Mirror Spider - Assemble the mirror spider onto the tube
Other sizes
A secondary Mirror spider for 200 mm (8") Skywatcher is available here: https://www.printables.com/model/1347494-secondary-mirror-spider-for-skywatcher-newton-200
Edit
- 20.11.2025: model file (STEP) added with recess for cable routing for secondary mirror dew heater - see pictures ------------------------------- The only reward for a hobbyist is likes.
Support / Donation for my work



Names are used only to indicate the source of a result. Polyzon is not affiliated with the listed sites.
Comments 0
Loading comments…