
Free 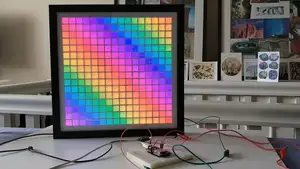
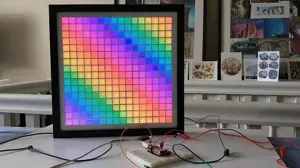
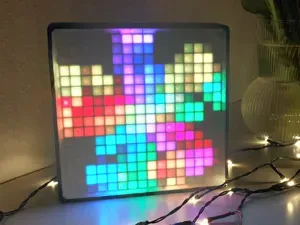
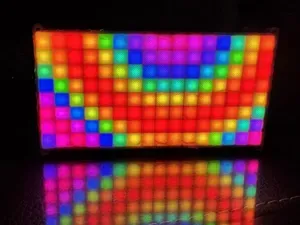
LED Matrix WS2812B ESP32 16x16 grid screen picture frame
Printables


Showcase your custom pixel art, scrolling text, and dynamic animations with this sleek and versatile enclosure, designed specifically for a flexible 8x32 WS2812 RGB LED Matrix. This case provides a sleek and professional look and durable housing for your display and its control electronics, turning your DIY project into a polished final product.
The enclosure's final outer dimensions are 340mm x 100mm x 22mm (approximately 13.39" x 3.94" x 0.87"), offering a compact frame for the 320mm x 80mm flexible LED panel. A USB-C port is integrated into the design for convenient power delivery. The main body is printed in two interlocking halves. These pieces connect with dovetail joint, ensuring perfect alignment and a nearly seamless finish with just a touch of CA glue for a permanent bond.
Bill of Materials:
3D Printed Parts: Front Frame (prints in two halves) LED Grid (prints in two halves) Back Case (prints in two halves)
Electronics: 1x 8x32 WS2812 RGB Flex LED Matrix Your microcontroller of choice (e.g., ESP32, STM32, Arduino, Teensy etc.) 1x USB-C Power Delivery (PD) module Wires, zip ties, and hot glue Optional: High-current buck regulator (if needed)
Hardware & Materials: CA (Super) Glue Diffuser sheet (from a broken LCD TV or photography store) 8x 2.5mm x 12-15mm screws
3D Printing Instructions Front Frame & Back Case: Print these parts in your desired color. Align the bottom of back case to you printer bed while slicing. No print support is required for printing the parts.
LED Grid: For the best visual results, print the LED Grid in black . This will significantly enhance the contrast of the LEDs, making the colors appear more vibrant. You'll need to print this part twice.
Diffuser: I experimented with several 3D-printed diffusers, typically thin sheets (1 or 2 layer heights) of white or translucent PLA. However, two key issues led me to prefer a diffusion sheet instead. First, the 3D-printed diffuser exhibits fine printed lines on one side, which act as diffraction artifacts, separating light into colors that appear impure. Second, due to the size limitations of my print bed, I was unable to produce a large enough diffuser, and a segmented diffuser would create a noticeable seam on the display surface.
To achieve better results, I opted for a diffuser sheet repurposed from a broken LCD TV. Alternatively, white diffusion sheets designed for photography—available online or in stores—can also be used. These sheets provide purer and more vivid colors, enhancing the overall visual quality. Cut the diffuser sheet to 84 mm × 324 mm for optimal fit.
Joining Split Parts: The Front Frame, Back Case and LED Grid are split to fit on smaller printers. To join them, apply a small amount of CA glue to the edges and press them together firmly on a flat surface to ensure proper alignment. A tolerance of 0.2mm is designed for a snug fit, but you may need to lightly sand the joints for a perfect seam, depending on your printer's accuracy.
Assembly Guide:
Step 1: Prepare the Front Frame
With the two halves of the front frame securely glued together, cut your diffuser sheet to 84mm x 324mm.
Slide the diffuser sheet into the frame. It should sit flat without any warping.
Next, insert the assembled LED Grid, making sure the wider side goes in first. This will sandwich the diffuser between the frame and the grid.
Carefully place the RGB LED Matrix PCB into the assembly. The clips built into the frame will hold everything in place.
Tip: The frame is slightly flexible. You can gently bend it to help slide the grid and LED matrix into position.
Step 2: Electronics & Wiring
Power: This case is designed for a USB-C PD module, allowing you to use a standard USB-C charger. Most 5V USB-C chargers can supply up to 3A. For my clock, the maximum current draw was 1.7A, well within this limit.
For higher power needs: If your project requires more than 3A, you can configure the USB-C PD module to output 12V, 15V, or 20V and use a high-current buck regulator to step the voltage down to the required 5V for the LED matrix.
Controller: You can use any microcontroller and framework that supports the WS2812 protocol, such as those compatible with the Adafruit NeoMatrix or FastLED libraries on Arduino framework.
Installation: The back case has ample room for your electronics, but ensure the total height of your components does not exceed 12mm.
Use the internal partitions to route your wires cleanly. Secure the modules and wires with zip ties and hot glue.
Important: Do not run wires over the top of the internal partitions. This will prevent the back case from closing properly and may cause it to bulge.
Step 3: Final Assembly Carefully align the back case with the assembled front frame and snap them together. Secure the two halves using eight 2.5mm x 12-15mm screws.
Enjoy your new RGB Matrix Display! If you have any suggestions for improving this design, feel free to comment and let me know.






Names are used only to indicate the source of a result. Polyzon is not affiliated with the listed sites.
Comments 0
Loading comments…