
Free 
Brompton Bottle Cage Carrier Block Mount
Printables


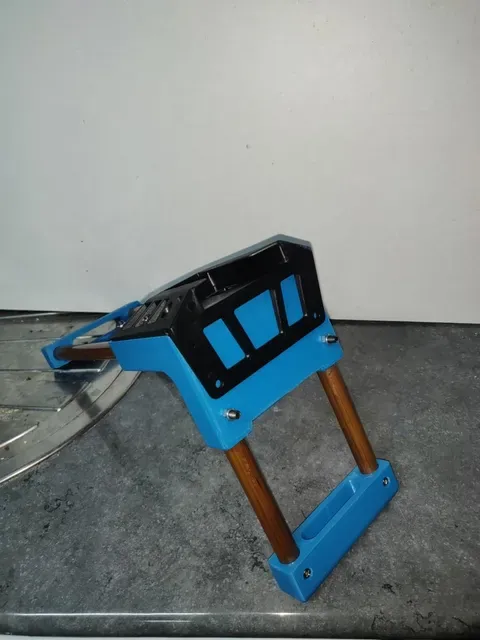

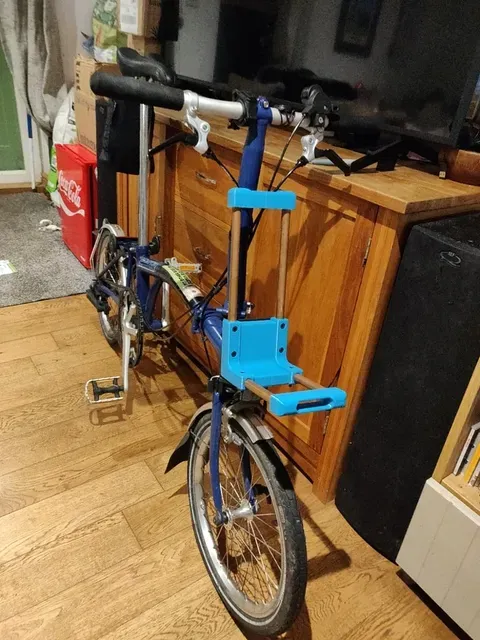
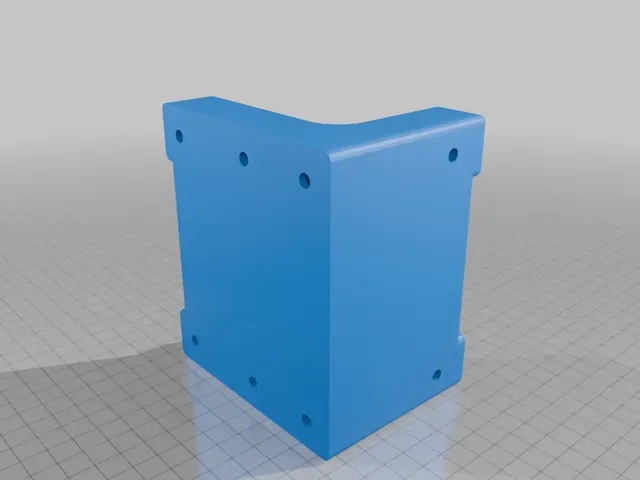


This is a heavy duty front rack for a Brompton.
I wanted a front rack for my brompton because wearing a bag on my back means I arrive to the train with a sweaty back. However I didn't want to remove the brompton clip mount like Magdi did as I still wanted to be able to mount a basket like this .
Initially I had printed gear engineers front rack (Make available here ) but after loading about 5kg onto it the clip part snapped which seems to be a common problem with 3D printed brompton front racks .
Unfortunately I didnt want to fork out £100 for a steel rack , and I dont trust these aluminium ones from Aliexpress to not bend under heavy weights.
I therefore modified GearEngineers rack to use this bag Adapter as Ive had great success with it in the past when making a front basket for the Brompton. It shoud be capable of holding up to 10kg of weight and removes the weak point in the design. This makes the design a bit more expensive but it should be able to handle more weight (hopefully).
Parts You'll Need:
- Bag Adapter
- 15mm Copper Pipe
- 6 m5x30mm machine screws
- 2 m4x30mm machine screws
- 8 m4 self taping screws
- 6 m5 locking nuts
- 2 m4 nuts
Tools You'll Need:
- Pipe cutter/ hacksaw
- Drill with drill bits
- Screwdriver
Instructions
- Print the parts. You'll need 1 mount, 2 caps, and 2 rod inserts.
- Pause the prints at layer 87 when printing the rod inserts to insert the 2 m4 nuts.
- Cut the copper pipe into 4 pieces. I went with 2 lengths of 30cm and 2 of 20cm.
- Drill out the holes for the m5 screws in the copper pipes using a 5.5mm drill bit.
- Drill out another hole in the back of the bag adapter.
- Attach the copper pipes to the caps using the m4 self taping screws.
- Insert the rod inserts into 2 of the copper pieces with the drilled holes.
- Insert the copper pipes with rod inserts into the base holes of the mount.
- Tighten the bag adapter to the mount using the lower 2 holes, the rod inserts, 2 m5 bolts, 2 locking m5 locking nuts, 2 m4 bolts, and 2 m4 nuts.
- Insert the other copper pipe lengths into the upright holes on the mount.
- Tighten the upright poles and bag adapter using 4 m5 bolts and 4 m5 locking nuts.
- Done!
After having made this, I loaded 9kg of stuff into a bag and rode around with it on the front rack of the Brompton for ~2.5km. The rack didn't crack or break! The only downside seems to be that a tall bag loaded on the front rack interferes slightly with the steering; this is only really an issue when taking sharp corners though.
7/9/2025 V1: Adapted gear engineers front luggage rack to work with a nylon bag adapter and 15mm copper pipes instead of tarp poles. Added a rod insert so the weight of any luggage should primarily go through only metal parts which should be able to stand a lot of strain compared to purely printed plastic. Uses this bag adapter
24/10/2025 V2 : Adapted mount and rod insert to work with the new bag Adapter . Increased mount height from 52mm to 77mm. Increased rod insert height from 40mm to 77mm. Added another mounting screw on the bottom of mount. Added another mounting screw on the front side of mount. Changed nut holes on front side of mount to boltholes.
27/10/2025 V2.1 : Removed the holes from the bottom of mount apart from one as the bag adapter would get in the way of these anyway. Changed all bolt dimensions from m4 to m5 screws that felt a bit stronger. Changed rod adapter so it only works for one bolt hole. Changed direction of last bolthole on mount, so the bolt goes in from the top rather than the bottom.
28/10/2025 V2.2: Cut away some of mount to reduce filament usage. Reduced rod insert height from 65mm to 60mm.
30/10/2025 V2.3: Increased width of rod insert from 11.75 to 12.6mm. Changed m5 nut insert in rod insert to an m4 nut.
Print Settings
Printer Brand:
Creality
Printer:




Names are used only to indicate the source of a result. Polyzon is not affiliated with the listed sites.