
Free 
Anycubic Mega Series, VORON afterburner mods, Stealthburner update
Thingiverse






update 11/06/22
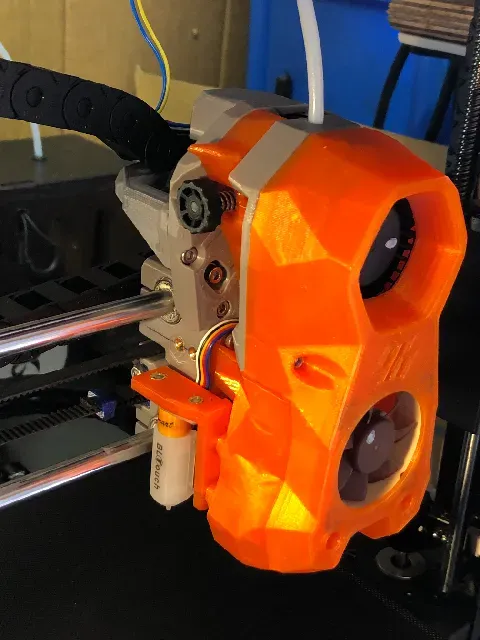
Since I realised that the solution I had to make new parts of the clockwork extruder, namely changing the bolting direction to the x-carriage, was now the same as the clockwork 2 method chosen by Voron Design, it now means that the only parts needed to install the stealthburner are the actual x-carriage itself and the plate on the end of the x-rail to fix the other end of the cable chain, with the relocated breakout pcb.
All other parts can be downloaded and used as is from Voron.
The BL touch bracket will still be useful, the x-stop paddle too.
I also made a 3mm shim to push the SB cable chain bracket further over the x-rails.
I’ll upload that as well.
I’m going to leave all the other files up, in case someone wants or needs afterburner on their AI3M
maybe later I’ll spilt it into separate projects.
21-05-22
Another bit of updating.
I received a REVO Voron hotend recently and decided to build that into this rig.
First I used a V6 compatible heatsink for revo, then printed the actual revo voron toolhead. This meant I found a trial for the BL-touch mounted on the thread-points on that toolhead (originally intended for the acceleration sensor) needed adjusting and the x-stop paddle needed redesigning.
30-04-22 Just added a coupe of things, I wasn't happy that the x-axis carriage had the right dimensions on the new BLT holes I added, while fixing that, I decided to look at the cable routing for the BLT. I realised I could sneak it under the extruder motor, so I added a cable-recess to the x-carriage at the same time. Then I realised that the stealthburner parts have an extra set of holes for the acceleration sensor for tuning features in klipper, which we don't use on the AC-Megas. This is now an optional bracket mounting point for the BLT. bracket uploaded.
April-22 Update 2; uploaded a new version of the x-stop paddle, to avoid a collision with the BLTouch sensor. Also a quick summary of my findings working with BLTouch and current FW from knutwurst.
BLTouch in this location on this printer really requires that you check the X-rails are parallel and square relative to the print-bed. I kept getting thick and thin first layers from left to right side of the bed. In the end, the best solution for me was to put a square on the bed and check from left to right sides that it touched both rails on the x-carriage rails. On mine, the upper rail was gapped from the square on the RH side of the bed. The fix is to slacken off the bolts that secure the upper frame of the printer, apply some pressure by hand to the frame to bring the rails square, then re-tighten and re-test. (AND check all the nozzle heights again!)
Firmware - I think it's intended as a feature for BLTouch. the printer can drive through the end-stops to achieve a position lower than 0 on the z-axis. WARNING! this means you can accidentally drive your nozzle lower than the bed in the axis menus or in pronterface. I did it a few times and broke a z-axis sensor. (used the spare I still had from the kit provided in the original box of my printer) If you also moved X/Y on the printer, you could destroy the bed. Be Careful!
April-22 Update; I added a BL-touch! new little bracket to fit on the side of the x-carriage, I've actually drilled the holes in mine with a 4.2mm drillbit, and then added heat-sets m3 threads. I have updated the x-carrriage stl to have the holes pre-made in it so that future makers can just print and ignore if they don't have BLtouch, or if they do, just add 2more m3 heat-sets and they're off, also can be retro-fitted easier that way too.
Using Knustwurst firmware from here; https://www.thingiverse.com/thing:4431052 for my configuration it's the variant of firmware "MEGA_S_TMC_BLT_10_v1.4.3.hex" based on having TMC2209s in a Mega-S machine with the 0.0.2 trigorilla board and a genuine creality BL-touch.
08-Feb-22 Update:
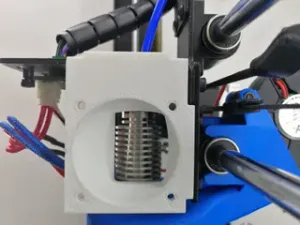
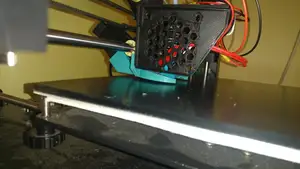
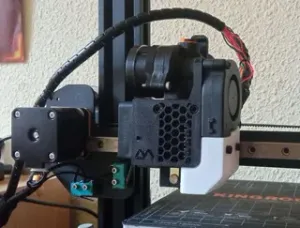
I was asked if Stealthburner would work with this mod, so I printed out just the fanducts and hotend carrier parts as I saw they were Clockwork1 compatible as-is.
Pictures to show what that looks like and comparison to Afterburner parts sat on the bed next to it.
For this to be fitted, it lowers the hotend by about 2mm, so I had to adjust the z-stop screws again and re-level.
In order to use Clockwork2, I will need to rework the new x-rail parts that VORON provided with Stealthburner and try it from there. For now, I probably won't do that very soon, unless I can find a 12v motor that is compatible with the Stealthburner build.
15-Nov-21 Update:
I decided I didn't like the x-stop threaded part I added to the part cooler duct. So I created a flappy-paddle thing to be bonded to the x-carriage frame, that then gives an adjustable thread to set the zero position by making contact with the standard Voron part.
I also decided to upload some new photos of parts printed with this mod, to show the quality difference of part made with the old Hotend and the parts re-manufactured with it.
Original Project Notes:
In order to get a working Voron Afterburner on my Anycubic Mega S, I was able to modify the X-Carriage from the Mk4 ML3DPrinting project and cut and shut a solution to hold the Voron printhead so that the hotend is in the same position in X/Y as the original.
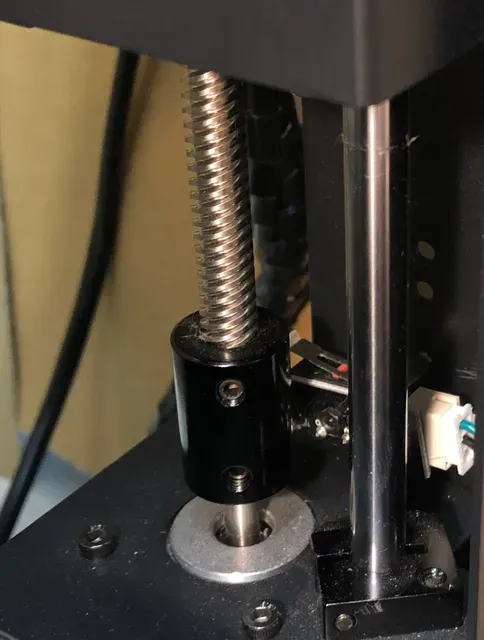
It requires lowering the X-Rail by moving the z-stops due to the position of the extruder motor in the Voron clockwork extruder.
It also is swappable with the bowden extruder version of the Afterburner printhead by using the original extruder on the X-rail.
UPDATE 25.10.21: Slimmed down the combined A+B parts of the x-carriage so that its the same width as the bearings and suits the size of the VORON mounting plate better.
Improved the cable cover/cowl for slip on fitment like later Afterburner covers, but with the same narrow fitting as the V1.8 to avoid clash with the x-rails.
Print Settings
Printer Brand:
Anycubic
Printer:
All-metal Mega
Rafts:
No
Supports:






Names are used only to indicate the source of a result. Polyzon is not affiliated with the listed sites.
Comments 0
Loading comments…