
Free 
WiFi Sync Clock
Printables

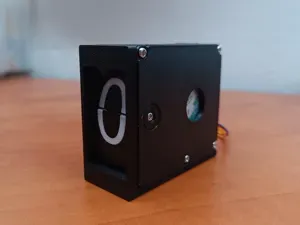
Playing card flap display / clock
One of the main difficulty to make a split flap display with 3D printers is the fabrication of flaps. Therefore I used off-the-shelf playing cards as flaps, and made a funny and crazy clock with minimum number of parts.
- Simple design : each display unit consists of only 3 types of parts - Funny motion : by arranging cards randomly, you can enjoy busy motion of flap display - WiFi time acquisition : current time is acquired via WiFi using ntp Detailed assembly manual will be added soon.
How to make
Necessary parts
- A deck of French-suited playing card (bridge size : around 57 x 89mm) - Three 28BYJ-48 stepper motor with driver board comes with - Micro computer with 12 or more IO ports. I used M5stamp C3, https://shop.m5stack.com/products/m5stamp-c3-mate-with-pin-headers - Double sided adhesive tape - Some tapping screws - zip ties Assembly
Please take a look at the video above.
- Print parts as supplied posture. No support needed. - Card holder (hinge) has orientation. Please be careful not to attach the hinge flipped. - If the engagement of motor axis and rotor is loose, use super glue from the outer hole. - You should edit the source code to specify the order of randomly arranged card.
You can print all parts for a single unit at once with 20cm x 20cm printer.
Card holder (hinge) has orientation. Please make sure the front or back of the parts as picture above.
Connection
* I used M5stamp-C3 for this clock. * Connect four pins of first (1minute) motor to G4, G5, G6, G7. * Connect four pins of second (10minute) motor to G0, G1, G8, G10. * Connect four pins of third (hour) motor to G9, G18, G19, G21. * Connect 5V and GND to the microcontroller. (M5stamp-C3 has three 5V and GND pairs)
Test
- Use Single-unit-test.ino for testing individual unit. - Use triple-test.ino for testing all units simultaneously. Please confirm that the order of the card is properly set to the source code (because clock code is so slow and hard to confirm) Use as clock
Use clock.ino.
You can set SSID and password of your WiFi using smartphone app.
This function is named SmartConfig. The apps for setting are at
Android: https://play.google.com/store/apps/details?id=com.khoazero123.iot_esptouch_demo&hl=ja≷=US
iOS: https://apps.apple.com/jp/app/espressif-esptouch/id1071176700
Please not that your smartphone should be connected to 2.4GHz WiFi.
Category: Gadgets






Names are used only to indicate the source of a result. Polyzon is not affiliated with the listed sites.
Comments 0
Loading comments…