Free 
SV08 Beacon/Cartographer Install Guide
Printables
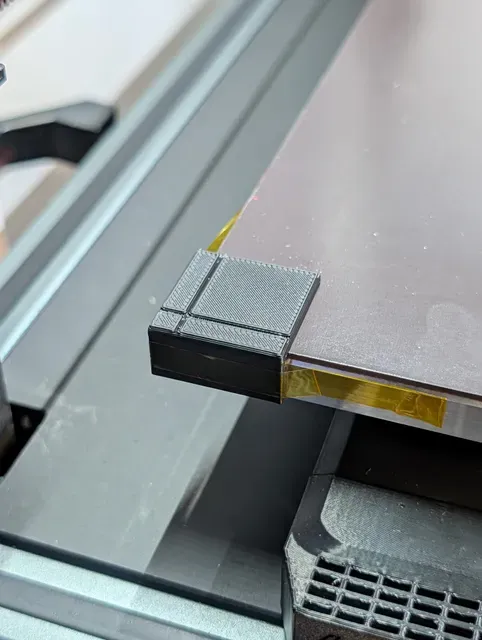
This corner target lets you easily define a good (0,0) on your bed, and if you put one on each corner, you can triple check your other three corners and make sure that they are where you expect them to be.
Very often, you'll get a bed a few millimeters larger in each direction than advertised, and this is a good thing. But it can mean that if you try to free-eye you (0,0) position, it is possible that you tool head might get close to one or two of the opposite edges of your build plate - and this can prove troublesome for inductive probes like Beacon, Cartographer, or Eddy.
The 3MF and gcode provided here is for a 350mm configured Voron that has a 355x355mm bed in reality, requiring a 2.5mm offset in both X and Y to center the configuration over the hardware. If you have any other sized configuration, or any other size bed hardware, you MUST download the CAD models and adjust the parameters yourself.
To adjust the Fusion F3D model, go to "Solid>Modify>Change Parameters:
Then adjust the parameters to suit your configuration and actual hardware:
designed_x and designed_y are what you are going to your Klipper configuration about your bed size. If you have a 350mm Voron, you tell it designed_x=350 and designed_y=350 . If you have a 250 Voron, you tell it designed_x=250 and designed_y=250 . Etc.
real_x and real_y are what you measured your physical bed as, in mm. In the case of the bed that came with my LDO Voron 2.4 R2 (Rev D) 3D Printer Kit, the bed that it came with measured in at 355mm x 355mm (your bed may vary), so you tell it that real_x=355 and real_y=355 . If I bought a 250mm kit and the bed measured 255x255, I would tell it that real_x=255 and real_y=255 .
From here, you should be able to run as-is. But if you so choose, you can also adjust the depth and side angle of the groove in the top of the model. I strongly recommend leaving the 1.5 value in (1.5/4)*1mm equation for groove depth alone, and instead only adjusting its denominator (4 in this case). I also suggest not going below 2 in the denominator. 1.5mm is the total thickness of the part here. If you divide by less than 2, you'll "cut" a groove deeper than half the thickness of the part and possibly compromise it.
Once you have your model, throw in your slicer of choice, print it upside-down, and tape it snugly into the corner of your bed. At this point, follow these instructions for adjusting the (0,0) position: https://docs.vorondesign.com/build/startup/startup.html?model=v2&step=9&interface=mainsail&probe=tap
Other instructions may work, so long as they walk you through where your tool head places its nozzle to get it to (0,0). These are just the instructions I used.
It is position_endstop and position_max , in both the [stepper_x] and [stepper_y] sections that you are trying to adjust in your Klipper configurations. RepRap or other 3D printer firmwares may have something similar, but I am not familiar with their setup process.
Once your (0,0) is set, go ahead and raise your tool head a few mm in Z so that it won't crash (if you have gone through QGL or z tilt adjustments), and go ahead and run it around the extreme corners of your bed to make sure everything looks good. Then run a bed mesh to see the improvements.
In my case, when using a Beacon probe on build that had about a 3mm offset to (0,0) in both X and Y, I went from this:
To this:
All by just getting the (0,0) in the correct location.
Note: you may still need to play with your QGL/Z-Tilt settings, too to eliminate all tilt when using an inductive probe. This model only helps you to center your build volume over your bed, which keeps your eddy current probe from getting too close to the edge of bed when doing a bed mesh calibration.
Names are used only to indicate the source of a result. Polyzon is not affiliated with the listed sites.