
Free 
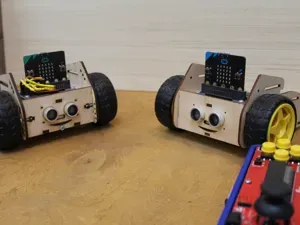
BBC Micro:bit - Robot Car
MakerWorld
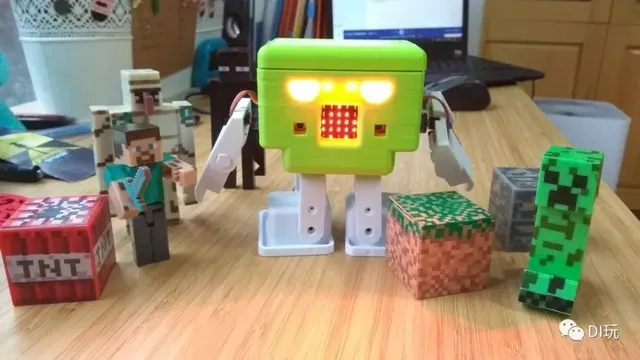
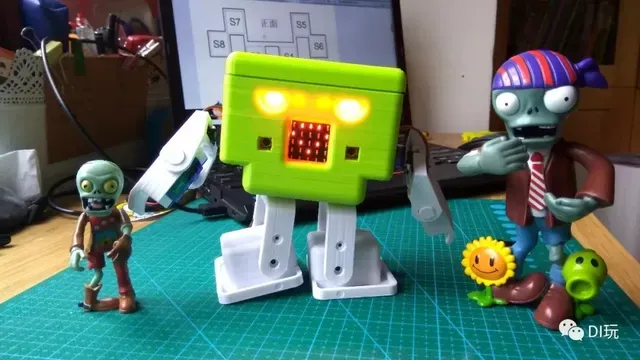
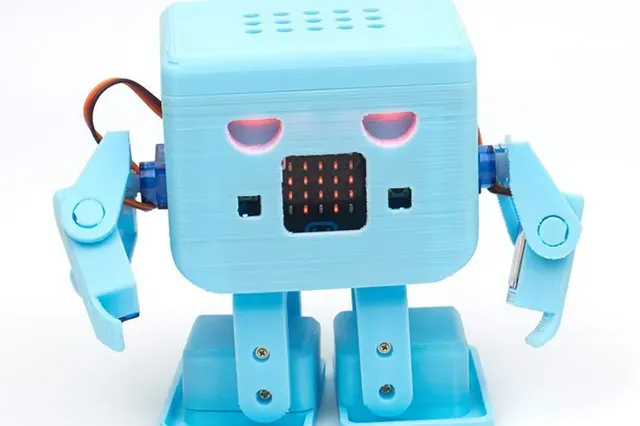
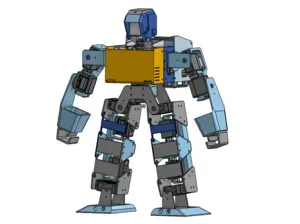
How about using the popular micro:bit to make a Otto robot? this is how this robot came to life combining to great platforms and adding more articulations to create a new member of the Otto family.
This a remix of the original Otto robot with the idea of using a micro:bit board instead of Arduino, it has 8 servos to control each joint including arms, LED mouth and Neopixel eyes.
Graphical programming with MakeCode makes it easy to control the robot's features
The control of the servo motors it is more difficult in this robot because the Python code language use in micro:bit is not compatible with the original Otto robot code, which was developed for Arduino, using C++ Libraries, instead you will have to create those movements from a series of blocks in MakeCode intending to move the servos angle by angle in combination to walk and dance or use Python.
Suitable for fans who have a certain programming foundation and hands-on ability., it may be too hard, specially if you have not use micro:bit before.
Features
- Graphical programming robot projects with Microsoft MakeCode - On board battery source (with 3.7v battery source to VM) - Drive 8 x servos and 4 x DC motors and the same time - Drive 2x Micro Stepper Motors - On board buzzer - On board, 4x RGB Neo Pixels - Length x width x height: 135mm x 70mm x 111mm - Net weight: 245g - Gross weight: determined by the final size of the package - Voltage: 5V - Current: 1A - Onboard full color RGB light - 8 steering gear simultaneous movement - Programmable buzzer - 18650-3.7V rechargeable lithium battery More details about the robotbit board here
Part List
- 3D Printed set of parts - Microbit (one more for remote control) - Robotbit shield - 18650 lithium battery - 8 x SG90s servos - 9 servo package screw M2x3 (the steering gear package itself) x 4 - 9 servo package screw M2.3x8 (the steering gear package itself) x 12 - belt mat M1.3 screw 12 - cross round head self tapping screw flat tail M2x6 x 8 - Phillips screwdriver 3D Printing
- Recommended to use a FDM 3D printer with PLA material. - Some parts need supports or rafts - Resolution: 0.28mm - Fill density: 20%
For slicing and generating the g code for the machine FREE slicer software like PrusaSlicer or any of your preference (If you are outsourcing the printing no need to worry about it).
After printing you will need to clean a little bit the legs and feet areas that fix the motors (generally) depends of the cleanness of your print.
it should take around 12 hours to print a full set of parts for one Otto micro:bit
MakeCode by Microsoft
https://makecode.microbit.org/
Examples to start:
- Robot code - Gamepad code For more you can copy or import the .hex files into MakeCode micro:bit then you can modify the blocks parameters in the examples
RobotBit board
Capable of controlling DC motors, step motors or servos.
On the board is an electric bell, multi-color RGB LEDs and handy 3Pin-conclusions for all ports of entry/output of the micro:bit board. These connectors allow you to connect to micro:bit most of all known additional devices for Arduino and other popular boards.
The board is powered by a 18650 battery and has a built-in charging module to charge from any USB port. It is possible to connect the external power of the battery with a voltage of no more than 5B.
The circuit board has standard Lego holes for attaching the board to the Lego-designer's details. Versatility makes this board an indispensable driver for micro:bit board and create your own DIY projects.
MakeCode Expansion
In an online editor, Makecode , add a Robotbit extension through keyword search (1). In the PC version of Makecode you can find the Robotbit extension in the same way. Click on the extension window to install it (2), after which the extension will appear on the Block Panel in the editor.
Once you've unpacked the RobotBit board in the first place install the 18650 battery, pay attention to the polarity (there is protection against incorrect installation). You need to activate the battery power control system by pressing a small button next to the battery compartment (batteryAct). Every time you change your battery or board goes into protective mode, when the battery is discharged or hangs with the blue LIGHTS on, you need to press this button to get it back to normal.
RobotBit Fast Start
Place the battery on the RobotBit board, paying attention to the battery polarity pattern and the pattern in the plastic compartment, do not confuse.
Install micro:bit in the connector on the RobotBit board, keeping the right side of the setup
Click on the small "battery act" button to activate the battery. You can also use this button if the RobotBit board is stuck.
Switch the tumbler to turn on the built-in battery 18650
Open MakeCode Online Editor (1) and select Extensions (2)
Enter in search of the word robotbit
Click on the extension that appears and it will automatically be added to the workspace.
A special section with blocks for the RobotBit board appeared in the editor's window
Add blocks to the workspace, put the right I/O ports in the block settings that connect servos, motors, etc.
Before you download your finished program, remember to connect the micro:bit board to your computer (it's a micro:bit board, not a RobotBit fee, because the usb connector on the RobotBit board is only for charging the battery). The micro:bit fee may remain snulged to the RobotBit board at this time.
After clicking on this button, you'll see a window that's going to say where to go, save the file to the MICROBIT store, which will appear as a removable disk when the board is connected to the computer.
Create the code as shown in the image below and click the Download button.
Once you download the program and copy .hex file on the micro:bit board, the heart will start beating on the board!
Assembly instructions




Names are used only to indicate the source of a result. Polyzon is not affiliated with the listed sites.
Comments