
Free 
Opto-endstop mounting for 8mm shafts
Printables


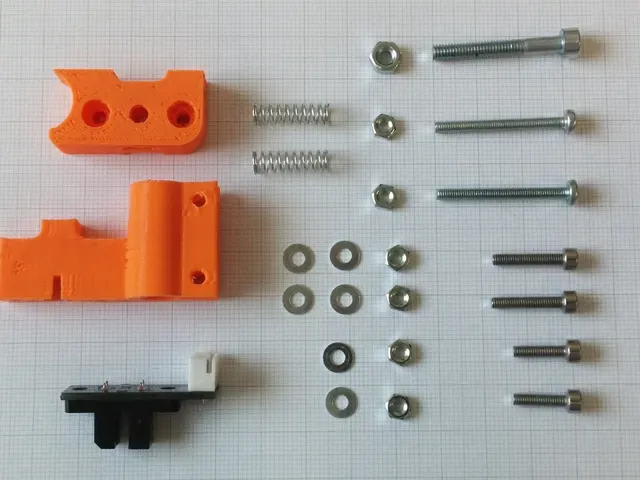


This is an adjustable holder for an opto endstop - not only for z-axis! No matter if you use it as an upgrad or for an new printer - you'll love it.
And - it can be build within 60 minutes.
Post-Printing
Parts list
Parts to be printed:
* 1x Opto Holder * 1x Opto Holder Body Additional parts (Vitamins):
- 1x Screw M4 x 30mm, Inbus-head
- 2 x Screw M3 x 30mm, Philips-head
- 2 x Screw M3 x 16mm
- 2x Screw M3 x 12mm
- 1x Nut M4
- 6x Nut M3
- 6x Washer M3
- 2x Spring 6x18mm
- 1x Opto-Endstop
Assembling instructions
First of all print the parts and remove the supporting material.
Insert two M3 nuts in the opto holder.
Put a washer on each of the two M3 x 12mm screws and attach the opto endstop to the opto holder.
Insert two M3 nuts in the adequate hexagonal holes of the opto holder.
Put in the two M3 x 30mm screws from the reverse side and slide the M4 nut into the slot of the narrow side of the opto holder.
Assembly of the opto holder body
Put the two M3 x 16mm screws (with a washer on each side) through the fixing holes of the opto holder body.
Put the M4 x 30mm screw through the central hole of the opto holder body.
Final assembly
Put the two springs onto the two m3 screws of the opto holder.
Join the opto holder an the opto endstop body.
Make sure you can move the opto holder by turning the M4 screw.
Finally put the whole thing onto your printer and connect the opto-endstop to your control-board.
Category: 3D Printer Parts


Names are used only to indicate the source of a result. Polyzon is not affiliated with the listed sites.
Comments