
Free 
SOVOL SV01 BLTouch Mount
Printables
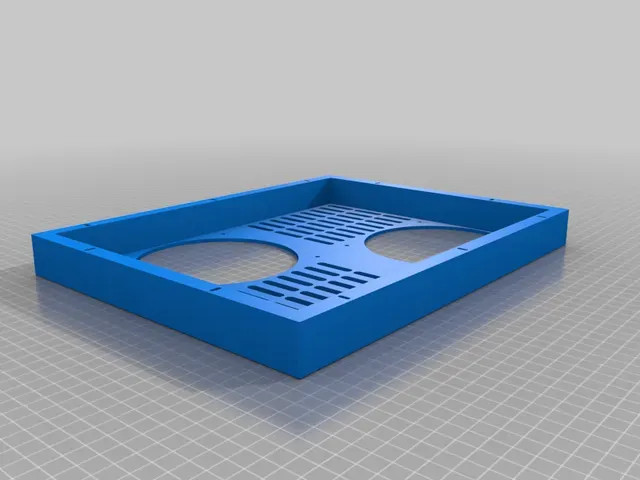


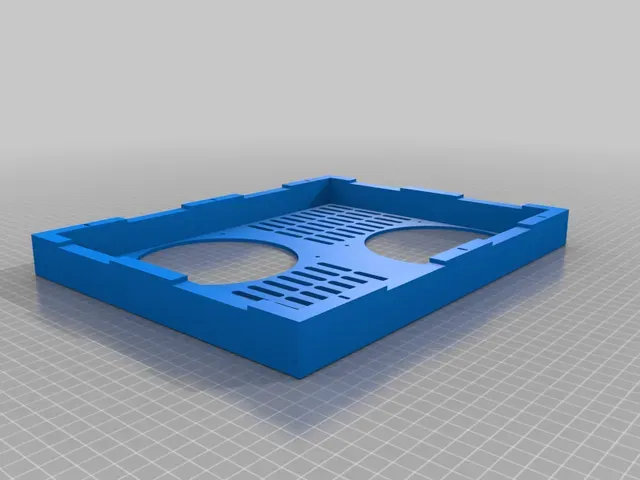
Edit5: Added a version with indentations to fit these magnets: https://www.amazon.fr/gp/product/B07VLFWB6X (Thickness measurement is without glue tape).
Edit4: Added the lid in one piece. Also fits the Sovol SV03.
Edit3: Changed the outer holes to slots for a better fit to all sides of the printer case.
Edit2: Increased the tolerance of the snap fit from 0.2 to 0.3mm since one person reported it's a very tight fit.
Edit1: Updated the files, added bigger and more ventilation slots to allow for better air circulation.
The SV01 is a great printer but for me its fans are way too loud. This is why I made a cover with 2 holes (+4 fan screw holes) and installed 2x 120mm NF-S12A ULN Noctua fans.
This is my very fist design, I made it with freecad, so don't expect it to be perfect. All I can say is, I printed it and it fits.
Ok, most important think first: If you plan on using this you'll have to exchange the stock rubber feet of the printer for higher ones! YOUR PRINTER WILL GET HIGHER, FOR AT LEAST 3CM!
I used 75mm high doorstops as new feet. You could get away with 60mm ones (the stock ones are roughly 30mm high) to maintain the same distance from cover/lid to the ground.
Here's the whole parts list:
4x 75mm rubber feet (I used doorstops): https://www.hornbach.at/shop/Tuerstopper-Deltafix-schwarz-40-x-H-75-mm/8450410/artikel.html
8x M4x35mm screws + M4 nuts for the fans
2x 120x30mm fans (I used Noctua ultra low noise fans): https://www.amazon.de/Noctua-NF-S12A-Geh%C3%A4usel%C3%BCfter-120mm-braun/dp/B00BG23S28/
1 step down/buck converter + XH2 or PH2 JST connectors and others of your coosing (dupont for example)
The parts snap together, concerning the fans for the new mainboard fan I used a "alway on" fan port on the motherboard, next to the hotend fan connector. Since the 12V fans don't like 24V you'll need to put a step down/buck converter in between.
I completely removed the cover of the PSU, the PSU fan and the stock mainboard blower fan (which blew against a big cable bundle thus was completely useless).
To get to the right lid screws of the PSU you'll have to remove the 4 screws under the heatbed that hold the whole PSU in place.
The second 120mm fan is plugged into the PSU fan port (where you removed the stock PSU fan).
And that's it! Assuming you also swapped the stock hotend fan and the mainboard to a silent board, you now have a nice and quiet SV01 :)
Print Settings
Printer:
Sovol SV01
Rafts: No
Supports:
No
Resolution: 0.2
Infill:
10%
Filament:
any PLA any
Notes:
Cover is split into 2 parts because of it's size, I went with dovetail like interlocking joints, no idea if this is the best way to do it, but it's sturdy and holds together.
Please use a brim to print this, especially if your bed isn't leveled correctly. Watch out not to knock your clamps off the bed, I switched to low profile frame clips that don't use up as much space as the standard foldback clamps.
You can print this with 0.6mm line width to save some time.
Category: 3D Printer Accessories




Names are used only to indicate the source of a result. Polyzon is not affiliated with the listed sites.