
Free 
Stern Pinball 5.25 Speaker Mount With LED Surround
Printables







Introduction
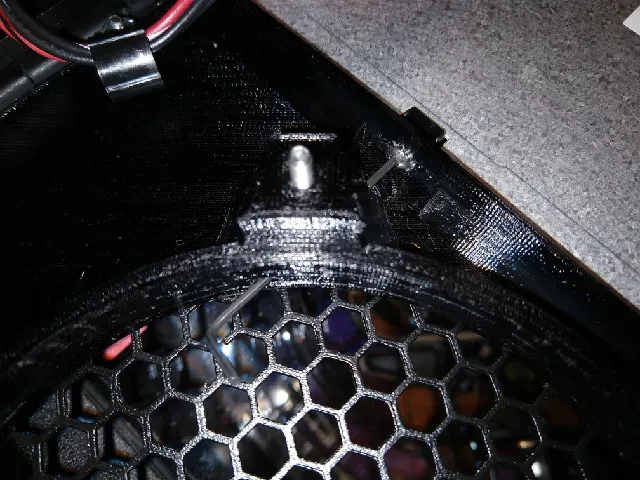
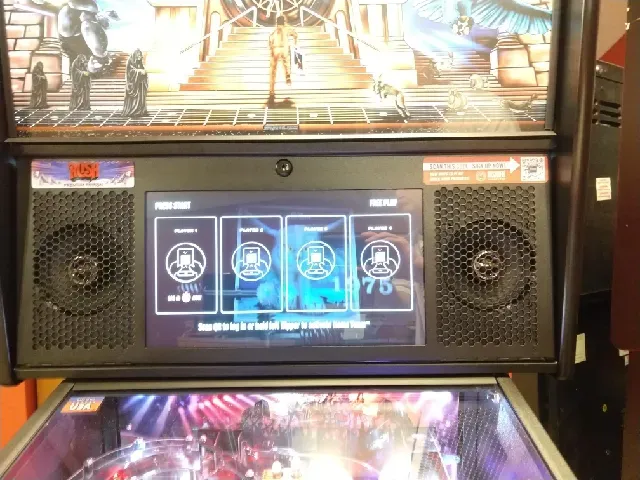
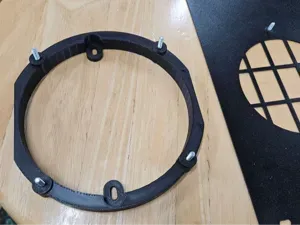
Rather than using an adapter insert, which will take up extra space and possibly create clearance problems behind the speaker, and which still leaves a 4" hole for the 5.25" speaker to play through, this mounting plate can replace the entire metal mounting plate that's in the machine and provide the necessary mounting bosses and studs for a 5.25" speaker to attach to.
Update:
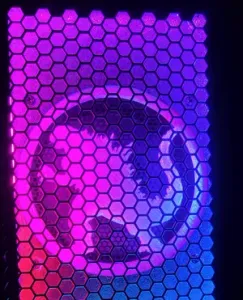
The original version of this model didn't correctly center the speaker behind the honeycomb grid in the speaker plate of the pin. That wasn't so bad if the speaker is left unlit – it's barely noticeable. But with LEDs around the speaker, the lack of centering becomes obvious. I've updated the model to be centered properly.
Which model should I use?
There are a few variations on this model:
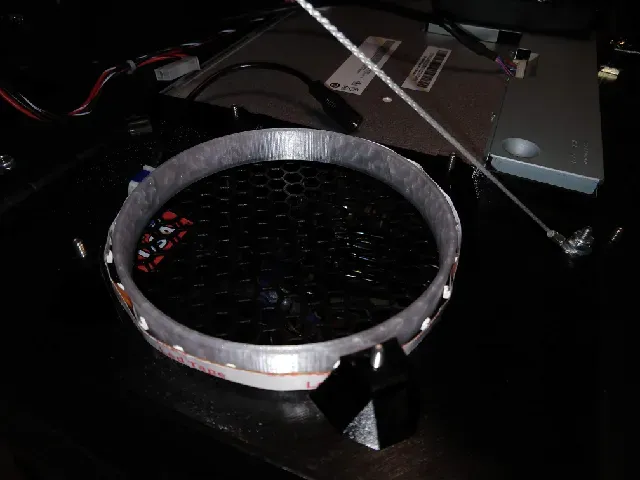
- LED-friendly. The main design accommodates those who might want to light the speaker with LEDs. It's printed as two separate parts, which allows you to print the speaker ring in a transparent filament, so that it acts as a diffuser for your LEDs.
Even without the use of LEDs, this version has a couple of other benefits. Printing two smaller pieces is less risky, in the event of a print failure. Also, getting even the small hex key in position to secure the side screws (see below) is easier without the ring in place.
This design can be downloaded either as a single STL with both pieces, or as two separate STLs. Most slicers should have no trouble letting you split a multi-object STL into its constituent objects. But if you have any doubts about doing that, go ahead and download the individual models separately.
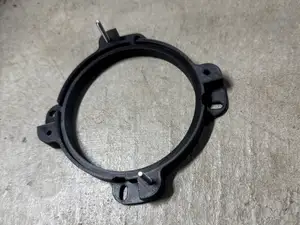
- One-piece print. This version combines the speaker ring and the mounting plate into a single, solid print. Importantly, it does not have gaps between the mounting bosses and the speaker ring that would allow for LEDs to be wrapped around the ring.
When I originally started this whole project, I was a little worried about the strength of the mounting bosses. After doing the “LED-friendly” version, I see that there's plenty of strength even with the bosses each standing on their own. But this version merges the speaker ring to the main plate, and the mounting bosses to both the plate and the speaker ring. This provides even more rigidity to the setup, even though strictly speaking it's not needed.
Only use this version if you're sure you're not going to install LEDs at any point (or you will just print the LED version later if you do decide to).
- Phillips #1 screwdriver. For the first two options, you will need to get different screws for the side holes, with a hex-drive head instead of the Phillips screws that come with the machine. This is because even without the speaker ring, there's just not enough clearance to get a regular sized screwdriver into the space to turn the screws. But the small 1/16" hex key wrench fits easily, even with the speaker ring in place.
But if you just happen to have a really short-shaft Phillips screwdriver, #1 or #0 (#1 fits the screws correctly, but you can get away with #0), then this option has holes through the mounting bosses large enough to accommodate the larger diameter of a screwdriver. In theory, this makes the two mounting bosses on that side a little weaker because of the larger hole, but again, there seems to be plenty of headroom with respect to the strength, and using this option means you don't have to find new screws. You do need that really short screwdriver though. I've also included smaller test print models. These are not for actual mounting, but they can be used to confirm your print settings as well as check the fit of the part that engages with the speakers, if you want to use this with a different speaker (see note in next paragraph). Each test model is just one mounting boss, which allows for: checking the fit with the speaker; verifying the through hole is large enough for the tool you want to use to secure the side screws; and letting you tune the print settings without printing the whole model (e.g., verifying that everything works okay even without supports enabled).
Other combinations would have been possible to include, such as a one-piece that still had gaps for LED lights for those with multi-filament printers, but that need can be filled by the model I did provide, and all those different combinations would lead to too many STL files to choose from.
NOTE: this was designed for and (so far) tested only using the Alpine S-S50 auto speaker. I don't know how will or even if this will work with other models of speakers. I'm guessing it will, since the mounting tabs themselves seem standardized, but I'd love to get feedback about whether that's actually the case or not.
The Alpine speaker is not a flush mount speaker, and the speaker's mounting tabs are behind the front plane of the cone and the tweeter assembly. The clearances on this design accommodate this particular speaker's dimensions, to allow the woofer cone and tweeter assembly to remain behind the plane of the back of the mounting plate. This allows this same design to be used as the starting point in case someone wants to fill in the hole with a decorative grill; that could be done without interfering with the tweeter assembly. (The tweeter assembly on the speaker is moveable to fine-tune its direction, and this clearance accommodates the assembly even at its most extreme angle of direction) .
Tools Needed
In addition to your 3D printer and whatever miscellaneous tools you'll use to clean up the print…
Socket driver with a 5/16" socket
1/16" hex wrench or #1 or #0 Phillips screwdriver no longer than 3" total length
Soldering iron or small-jawed pliers (e.g. needle-nose or electrical multi-function pliers) or Molex crimping tool #638190901 (this is a $300 tool…unless you just happen to already have one, you'll almost certainly go with one of the other options)
Additional Hardware Needed
In addition to printing two copies of this plate, you will need some extra hardware to complete the installation. Here's a list along with some sources for the hardware.
8x #6-32 ½" hex head machine screws
- https://www.digikey.com/en/products/detail/b-f-fastener-supply/HMSSS-632-0050/2618991 - https://www.mcmaster.com/92314A148/ 4x #6-32 nylon lock nuts
- https://www.mcmaster.com/91831A007/ - https://www.pinballlife.com/6-32-nylon-insert-lock-nut.html 4x #6 washers
- https://www.digikey.com/en/products/detail/b-f-fastener-supply/FWSS-006/274946 - https://www.mcmaster.com/92141A008/ - https://www.pinballlife.com/6-8-10-washers.html 4x #4-48 ¼" button head hex drive machine screws
- https://www.mcmaster.com/92949A327/ 4x #4 external tooth lock washers
- https://www.mcmaster.com/98438A210/ Optional hardware
2x Molex 39012025 connector housing
- https://www.digikey.com/en/products/detail/molex/0039012025/930271 4x Molex 39000073 connector socket (gold-plated)
- https://www.digikey.com/en/products/detail/molex/0039000073/3044236 Hardware notes:
The screw length given above is ½", but longer would be okay. One reason slightly longer screw might be preferred is it would make it a little easier to get the screw started when inserting it into the mounting plate. As it is now, with a ½" screw, the tip of the screw is just starting to engage the hole for the screw shaft when the head of the screw is starting to disappear into the larger hexagon hole. With a properly cleaned-up print, I didn't really have any trouble getting this all lined up, but I can see how for others it might be a little frustrating.
You should only need 4 additional nuts and washers, because even though there are 8 screws, you already have 4 nuts and washers holding your 4" speakers in. Just reuse those.
It's possible you already have enough washers. On my machine, for some reason a couple of the mounting studs for the plate itself had doubled-up washers, and on the other plate, it had extra washers under one of the clear plastic spacers that makes room for the foam screen. So, consider checking for these extra washers in your supply before you go shopping for hardware. :)
If you use the alternate version of this, with the larger through holes that allow your Phillips screwdriver to fit, and you actually have a short enough screwdriver (3" or less) to be able to access the hole, you can also skip the #4-48 machine screws, and just reuse the Phillips screws that are on the machine now.
The optional hardware is so that you can install the new speakers without modifying the old ones. If you don't mind desoldering the connector harnesses from the old speakers and reusing them for the new ones, you don't need the Molex stuff. Personally, I wanted to avoid making any invasive modifications to any of the stock hardware. Unplugging/plugging connectors, unscrewing/screwing fasteners, i.e stuff that was designed for easy removal or installation, is fine but I decided to draw the line at getting my soldering iron out when it came to any of the existing parts.
Printing the Part
Supports




Names are used only to indicate the source of a result. Polyzon is not affiliated with the listed sites.