
Free 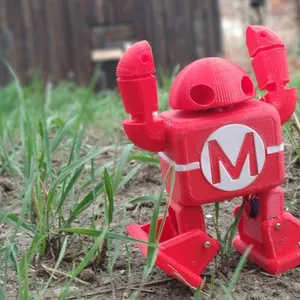
Makey dancing robot of the Maker Faire
MyMiniFactory

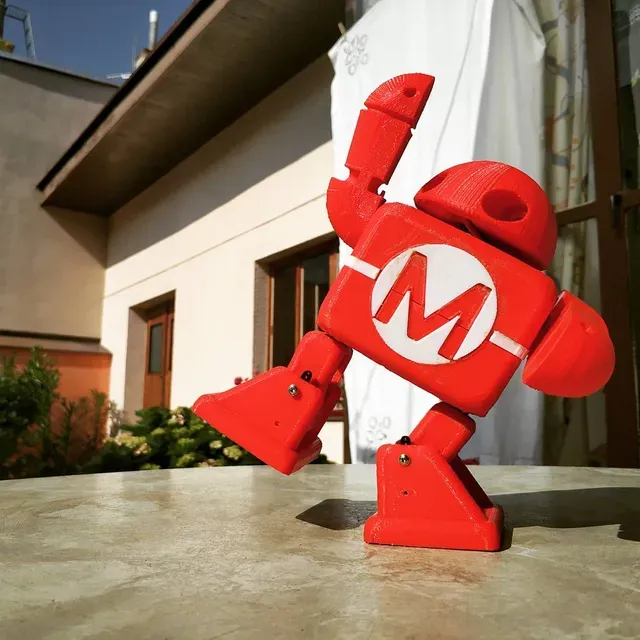
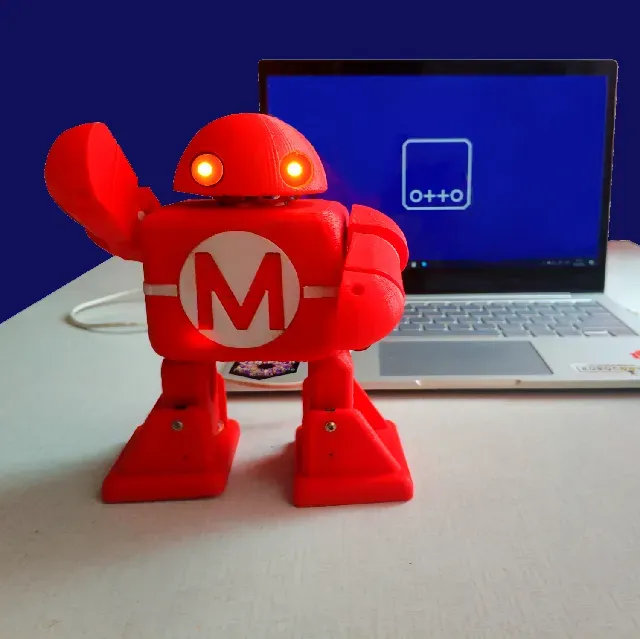
This is the very first interactive version of Makey the robot! (aka. Maker Faire robot) that can walk and dance, based on the same mechanic principle of Otto DIY robots.
Inspiration
From my experience making interactive robots, it is an interesting exercise to see how it would be to "Ottomize" basically almost any robot that could be bring to life by using the same mechanical principle of #ottodiy
For this the first one i chose was the remarkable "Makey" the robot the most well know character of the Maker Faires. I select it because for me it look pretty similar to the structure we use in Otto, although the articulations might vary i thought it will be fun to make it move in the way that i knew it could work.
I researched online and did not find so far someone that have take this challenge in small scale, i saw some amazing big and mega Makey but none so far made an automatic walking biped robot of it.
I took as reference the 3D-Printable Maker Faire Robot figurine, the 2D logo and whatever reference, i find online to make sure my design was as close as possible to the character.
I started 3D modeling "Makey" . After multiple revisions and one messed-up looking robot, I settled on its current version. The most challenging part of this project was designing a 3D model and make a functional robot from a 2D logo and the small 3D printable figurine.
Use the source Fusion 360 file or the .STEP neutral file attached in case you want to make your own modifications.
Maybe we should do one version like the one below?
Maker Faire it is the greatest show and tell on earth!
Ultimately this project is gratification tribute to Make Media now resurrected as Make Community. So that a lot people can replicate and share in their own cities Maker faire events.
Not only I was being careful to keep the aesthetic and overall look in the logo, i was trying to make it move in a consistent way to his natural shape and possible articulations. i try to guess how the arms and feet would move and that was an additional challenge.
I try to make the head rotate because it seems obvious that a head with a semi-sphere shape like that will rotate and added lights to the eyes. The problem there is that i cannot make the head rotate fully 360 otherwise the cables for the eyes will break so i decided there a 180 degrees servo will be fine as first try.
Features :
- We use same brain, libraries, code(with little modifications) and micro controller as Otto. - It has 4 servos for legs and feet same as Otto but 2 360 servos for the arms and one servo for the head. - It has 2 LEDs for the eyes to make it look like is alive, they will serve as feedback to know that the robot is on. Print instructions:
- I recommend to use a FDM 3D printer with PLA or better material for all parts. - 0.2mm resolution - 20% infill for main parts but the head and arms better less 10% since they don't need to be strong. - I use a RAFT to help stick to the bed of my printer, this is optional some printers have better beds and calibration. Part List
- 5 x SG90 or MG90s servos 180 degrees - 2 x SG90 or MG90s servos 360 degrees if you want the arms to spin like a crazy robot :D they could be also 180 for limited movements - 1 x Nano Atmega328 - 1 x Nano Shield Expansion Board Kit - 1× Bluetooth module BLE - 1 x Buzzer - 2 x LEDs - 2 x 1K resistors to limit current and protect LEDs - 10 x DuPont wire connectors Female to Female any length you prefer we use 10cm. - Micro Switch, Self lock On/Off button 8*8 mm 6Pin - 7.4V Rechargeable Lithium battery do NOT use Alkaline not enough power - 3D printed head - 3D printed leg x2 - 3D printed foot x2 - 3D printed body (Bottom part) x1 - 3D printed body (Top part) x1 - 3D printed M Logo x1 (white) - 3D printed band x1 (white) - 3D printed eye x2
Tools:
- Phillips screwdriver - 3D printer - Soldering iron and solder wire just for the LEDs and resistors - Hot Glue gun - Computer with Otto Blockly installed Electronics:
Before plugin in the battery
You should check your connections and test your robot with the USB cable connected to a computer.
As a good practice you should check your electronics and software in your computer, before assembling all the robot, this avoid having to disassemble the whole robot to fix something. You can do this by just connecting all the servos, in the place indicated in the wring and upload any code that makes Otto move with Otto Blockly or Arduino.
For App control you can use this Code for the Otto Makey robot to be controlled by the Otto Humanoid setting of the Otto bluetooth phone app made by @AlexJustAlex_476452
For rechargeable, sound sensor and Bluetooth option add the components here:
Assembly Instructions
Start from the bottom parts
Legs and feet the board goes in the bottom part of the body together with 2 servos on the side
Body with legs
Then you should put the motors for the arms in the top part of the body
then prepare the head with the LEDs and one servo inside.
If you see some misalignment in the movements, double check that you centered/aligned mechanically the arms respect to your servos before fixing with the short screw, but if you want more precise walk and movements, then you can do some electronic calibration as we explain in our YouTube channel.
We won Maker of Merit award in the Prague Maker Faire 2019 ! and this project appear in the Make: Magazine, Volume 70
We invested lots of time and resources to provide open source code, software and hardware, please support this project by just giving us a ❤ Like and share and you are welcome to be a part of this friendly community of robot builders, teachers and makers. Join today our Otto Builder community







Names are used only to indicate the source of a result. Polyzon is not affiliated with the listed sites.