
Free 
IKEA Utrusta for Korken 4oz for 42 jars (7x6)
MakerWorld




The model
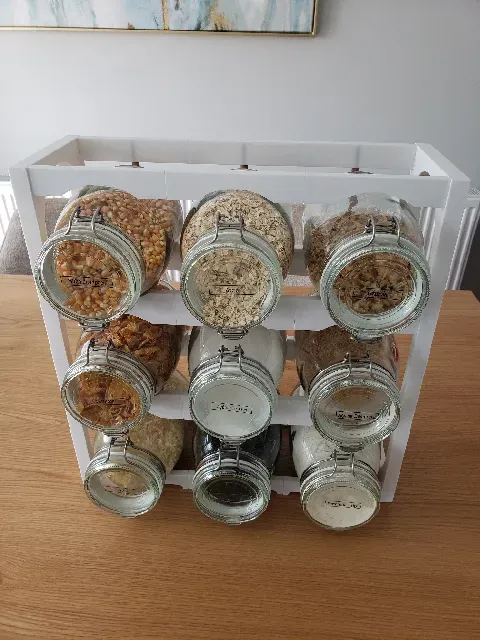
This is a vertical storage solution for organizing and displaying IKEA Korken jars. It has three levels of rows, and the number of columns is configurable, you can print any number of columns that you want.
This is made for the larger 1.8l / 1.9qt jars, but it can also fit the medium sized 1l / 34oz jars, they just won't have a perfect fit.
3D printed parts needed
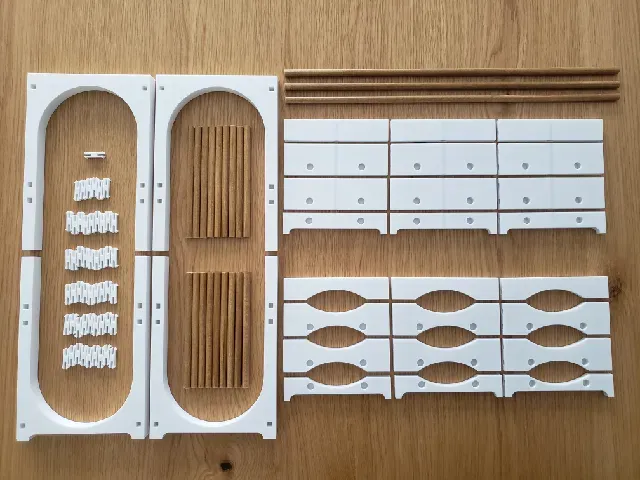
For this, you need to print the following number of parts (these are the numbers needed for a 3x3 grid like the one in the photos):
- 52 joining pins - 2 of each: lateral bottom and lateral top - 6 of each: front middle and back middle - 3 of each of the remaining parts (back/front top/bottom) If you want to print a different number of columns, you just need to print more or less front/back parts as needed, and calculate the number of pins. Also, you'll need to reorient the models when slicing. They shouldn't need any support, just print everything lying flat with the holes facing up.
Extra parts needed
This is designed to not need any screws, but it does need a number of wooden dowels as the “rails” that support the jars.
The dowels used were cut from two 2.4m lengths of 9mm diameter dowels. You can get any length you find locally and cut that to size, but it needs to be 9mm diameter.
The sizes and number of dowels required for the model in the photos are (divide by 3 to get the numbers for one single grid “column”):
- 3x 438mm (can be up to 15mm shorter, but it cannot be longer) - 18x 145mm (can be up to 4mm or so shorter, but it can't be longer than 146mm) In my model, I stained the dowels with a “dark oak” stain and coated it twice with satin varnish, but this step is only for looks and optional.
Assembly
With all parts printed, start by putting together the laterals with the pins, and then assemble each row. The pins should just click into place with some force applied (they're designed for a snug fit). Join all “front bottom”, “front middle”, “back bottom”, and “back middle” parts as needed, and join the front and back parts with the dowels. I would advise gluing the dowels in place as that'll give extra rigidity, but if you're using gorilla glue or any other quick drying glue, make sure that the dowels are exactly between 145-146mm in size, and push them all the way into their holes, otherwise the final model won't align properly. Alternatively, just use a slower setting glue that'll allow for adjustments later on.
Once all rows are assembled, use the longer dowels to join each row, and finally, attach each lateral. It's important that the long back dowels go before the laterals, otherwise it'll be very hard to put everything together as the laterals will be in the way and you'll need to flex everything a dangerous amount.
Make sure that each row is not upside down when putting it all together. The dowels should be on the top, not on the bottom of each row, so that the jars will easily slide in and out of them. Refer to the pictures for the orientation of the parts if needed.



Names are used only to indicate the source of a result. Polyzon is not affiliated with the listed sites.