
Free 
RatRig V-Core Filter 1.0
Printables


V1.0 now available here: https://www.printables.com/model/1374495-ratrig-v-core-filter-10
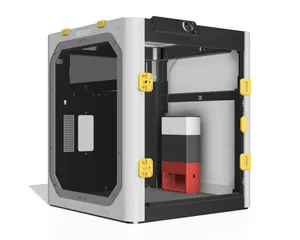
This is designed to fit a 400mm RatRig V-Core 3.1 to provide both fine particle filtration and VOC filtration. With some quick modification, you could easily move the bottom mounting holes in the exhaust section to fit a 500mm V-Core. It is too big to fit into the 200mm or 300mm as it is too long right now.
It is in Beta - I have printed this and have it working in my printer, but additional tweaks may be needed. Please be aware that this is a fairly involved print and assembly for a filter. If you have doubts about the wiring or how to do it safely with the fans and MCU you have chosen, please make sure you learn how to do that first - I can't provide wiring diagrams for every possible combination and doing the wiring wrong can result in melted wiring or burning out your MCU.
Let me know if anything looks wrong, is confusing, or issues with the files/printed parts. I tried hard to get everything right, but there may be a few issues that still need to be worked out.
Overview:
This is a modular, stackable filter for fine particles and VOCs inspired in part by the BentoBox, Nevermore, and many other 3D printer filters. The RatRig V-Core machines are powerful, fast 3D Printers, but also significantly larger with more interior volume (and this air) than many other printers. This means they need much more powerful filters to efficiently and quickly filter the interior air than current design.
Fans:
This filter is powered by four 80mm server grade fans that can move massive amounts of air through the filter, or be set to a low speed for quiet operation while still filtering much larger amounts of air compared to 4020 or 4028 fans. There is a TPU gasket both to help the fans seal against the hard plastic, as well as to reduce noise/vibration from the fans.
An exhaust section bolts into the frame of the V-Core to hold the entire filter firmly in place, and also directs exhausted air to the bottom of the printer, and not on your part - even when the build plate is at its lowest position - to prevent warping or rapid cooling of parts on the build plate. An optional exhaust cover plate also helps hide the fans and the wiring.
Filtration:
There are 3 different filter elements. First, there is a washable stainless steel mesh pre-filter to remove large particles and extend the life of subsequent filters. Next is an extra large carbon filtration container that allows for easy changing of carbon media as it wears out. Last is three HEPA filters taken out of Roomba robot vacuums for filtration of fine particles.
General Design Features:
Containers attach to each other using strong magnets and built in alignment grooves to ensure proper mating. Silicone gaskets between each layer also ensure a good seal within the filter and allow air to traverse the entire length of the filter without leaking out.
The pre-filter, carbon filter, and HEPA filter containers are interchangeable with each other, and can be stacked in any order. An extra container can be added in or a container can be left out if you don't want to use it.
I recommend the following order (as this is what most professionally designed HEPA filters use): Pre-Filter → Activated Carbon Container → HEPA Filter
BOM:
- 4x 80mm Fans - I recommend Arctic S8038-10K (10,000 RPM max speed) or S8038-7K (7,000 RPM max speed) as these come in a four pack and are some of the most powerful for the price 80mm server fans. - 7K Fans: https://www.amazon.com/ARCTIC-S8038-7K-Pieces-Regulated-Connector/dp/B09VGVQKJD/ - 10K Fans: https://www.amazon.com/dp/B09VH264BD?ref=emc_s_m_5_i_atc - 60-120 N52 3x4mm magnets (3mm diameter, 4mm depth) - These are used to attach each container section to each other. Each container is designed to house up to 14 magnets per side, but less can be used if desired/parts aren't warped. - I recommend the N52 magnets as these are fairly small and the extra holding power of the N52s is nice. - https://www.aliexpress.us/item/3256803871304509.html - 3mm round silicone foam sealing strips - 5 meters - For the seal between each container - https://www.amazon.com/gp/product/B0CBR7H2PG - 400 or 500 Stainless Steel Filter Mesh - 66mm x 351.1mm - This is for the Pre-filter, and needs to be large enough to be cut down to fit in the pre-filter container. Either 400 or 500 grade mesh is suitable (30 or 25 micron pre-filtration). - https://www.amazon.com/gp/product/B08XZ567SM - https://www.aliexpress.us/item/3256805462195970.html - 4 Port Fan Hub - I used this for PWM and the tachometer signal to the fans only, NOT POWER! These fans hubs are NOT designed to supply enough power to high amperage server fans like the above Arctic 80mms. Power/Ground will have to be run separately. - https://www.amazon.com/gp/product/B07M5P7VHG - Lower powered 80mm fans or a hub with a higher power delivery capability can be used, but this is up to the end user to determine what is appropriate. - 16x M3x8mm Cap Head Bolts - For attaching the fan container to the exhaust (4x), the exhaust cover to the exhaust (4x), and the HEPA Filter clip to the HEPA container (8x). - 16x M3x12mm Cap Head Bolts - For attaching the fans to the fan container. - 32x M3 x 4mm deep heatset inserts: - Use your favorite. Holes are sized for m3 x 4.2mm - https://www.amazon.com/gp/product/B0BBSLL6G7 - Appropriate Gauge wire in enough length to provide power/ground to the fans. - 2x 5 Port Wagos (221-415) - Used for distributing power and ground for the fans. One Wago can be for negative, and the other for positive. - https://www.amazon.com/WAGO-221-415-Lever-Nuts-5-Conductor-Connectors - Activated Carbon (roughly 1lb or 500 grams) - Make sure that the activated carbon is NOT ACID WASHED - ACID WASHED WILL RUIN YOUR PRINTER/CAUSE SEVERE RUST WITHIN A FEW HOURS!!!! - 3x HEPA Filters - Roomba 800 and 900s series filters - These pre-made filters are some of the largest filters I could find that fit, and are readily available around the world. - https://www.amazon.com/gp/product/B07H84D9R4 - SuperGlue/CA Glue - For gluing in the magnets if they don't friction fit into place well. - Hot Glue - For gluing in the pre-filter mesh - ABS/ASA Filament - As this will sit in an enclosed 3D Printer, the filament needs to be able to resist higher temperatures. ABS/ASA or other high temp filament is suitable. - TPU Filament - The TPU gasket is technically optional, but nice if you already have TPU. You want TPU that is as soft as possible for more dampening. - 4 Pin Fan extension - Depending on which fans you bought, you may need a short (50mm or ~2inches or so) fan extension to ensure the furthest away fan can be connected. - 2x M6x16 Cap Head Bolts and 2x M6 Washers - To bolt the exhaust container to the frame of the V-core. You may have some extra left over from the build for this. Don't forget the washers - the holes in the bottom of the exhaust container are oversized to ensure greater compatibility with often inaccurately cut bottom panels. Printing Instructions:
These are large pieces, and for the most part don't need to be particularly strong or have special settings. I would test that your printer correctly makes the holes for the magnets and heatset inserts. All printed parts should print in the orientation they are in the files. If anything looks off, let me know.
Some important printer settings/instructions:
HEPA Filter Clip - As this bolts down to compress the gaskets on the HEPA Filters, this part needs to be printed strong. I recommend 4-6 walls and 50%+ infill. The stiffer this part, the better compression and holding of the HEPA Filters.
Carbon Internal Container - make sure your retraction settings are set well before printing this otherwise it will be the stringy-est mess you have ever printed. If it comes out super stringy, a heat gun can be used but be careful because you may also warp/melt this using the heat gun.
The HEPA Filter Container, Pre-Filter Container, and the Intake Section are prone to warping after they are removed from the build plate. Allow them to fully cool to room temperature WHILE STILL ON THE BUILD PLATE. The Pre-Filter Container and Intake sections are flexible enough that if they do warp after being removed that you can use all 14 magnets between them to flex them to straight and properly sealed on the printer. The HEPA Filter container is too stiff to bend post-cooling and will need to be re-printed.
TPU Gasket - This part is optional, and you want it as soft as possible. I used 2 walls, 2 bottom layers, 5% gyroid infill, and 4 top layers. This made the gasket fairly compressible and soft.
Assembly:
- Magnets…. - Supplies: - 3mm diameter x 4mm deep magnets - Super Glue/CA Glue - Printed Parts: - Intake (6-14 magnets) - Pre-Filter Container (12-28 magnets) - External Carbon Container (12-28 magnets) - HEPA Filter Container (12-28 magnets) - 80mm Fan Container (6-14 magnets) - Instructions: - Ensure holes are properly sized to house the magnets. Holes may need a sharp knife to clean the hole out where it was touching the build plate (as this can cause residual plastic to make the entrance of the hole too small) - Place desired number of magnets in the holes using super glue - NOTE - Ensure magnets are facing the proper direction so that each section of the filter will be attracted to each other, not repelled! - Not every hole for the magnets needs to be filled if you do not want to. A minimum of 6 should be used (one in each corner, and one in the middle on each side). More magnets can be used if you want more holding power, better compression of the silicone gaskets, or if a part is slightly warped as discussed above. Even with 14 N52 magnets, all sections still separate easily. - Heatset Inserts: - Supplies: - 32x M3 x 4.2mm Heatset Inserts - HEPA Filter Container (8x inserts) - 80mm Fan Container (16x inserts) - Exhaust Container (8x inserts) - Instructions: - Insert heatset inserts to the proper holes. - NOTE: For the 80mm fan container, the inserts are inserted from the bottom of the container, as the fans will be bolted in to the bottom of this container. - Silicone Gasket: - Supplies: - Silicone Gaskets - Pre-Filter Container - Carbon External Container - HEPA Filter Container - 80mm Fan Container - Super Glue - Instructions: - Gaskets only need to be applied to the top groove of every container (as the gasket inserted into the top of a container will interface with the empty gasket groove on the bottom of the container above it). - Starting on one of the long straight sections, put a drop of superglue in the gasket groove and place the silicone gasket into the groove and allow the glue to dry. Every few centimeters (an inch or two), place more superglue into the groove and insert more of the gasket ensuring enough time passes for the glue to dry. Continue working around the entire perimeter like this. Corners can be tricky, and will need extra glue and pressure until the glue is dry. - Make sure to wipe away extra glue that can squeeze out when putting the gasket into its groove. - Use extra glue when you have worked around the entire perimeter to join the two ends of the silicone gasket. - Fan Installation: - Supplies: - 4x 80mm fans - 80mm Fan Container - 16x M3x12mm cap head bolts - TPU Gasket - Wiring for Power/Ground and PWM Signal/Tach Signal - Instructions: - Place TPU gasket on the bottom of the 80mm Fan Container. - Bolt Fans into place through the TPU gasket. Since we are using shorter screws, these only need to go through one of the fan flanges, not both. - Make note of where the wires for the fans come out as all wires will need to come out the same part of the exhaust containers. Place fans so the wires can reach. - A 4 pin fan extension may be needed depending on how long the wires are for the fans you bought. - Tighten the fans down snug but not overly tight - the fans should not move when you push on them, but shouldn't be tightened down so much that the TPU gasket is completely crushed. - Wire Fans in for power/ground and PWM/Tachometer signal. This will depend on what power supplies you have and what MCU you have on your printer. Remember to connect the grounds from the power and your MCU if you use a power source that is not your MCU. - The Wagos mentioned above are a great way to distribute power to the fans if you are using high powered fans. - Pre-Filter: - Supplies: - Stainless steel filter mesh cut to 66mm x 351.1mm - Hot Glue Gun - Printed Pre-Filter Container - Printed Pre-Filter Clip - Instructions: - Using a small amount of hot glue, tack down the corners of the stainless steel mesh to the pre-filter container, ensuring the mesh fits well and is taught across the opening. - Now for the difficult part as this requires you to work quickly and maybe have a friend. - Apply hot glue to the plastic Printed Pre-Filter Clip around the entire perimeter - GO FAST or the glue will dry by the time you make it around. - Immediately place the plastic clip into the Pre-Filter container and on top of the stainless steel mesh - Continue pressure until glue hardens. Ensure mesh is held in well. - Carbon Container: - Supplies: - Activated Carbon (NO ACID WASHED - I'm not joking that this will ruin your printer!) - Printed Carbon External Container - Printed Carbon Internal Container - Printed Carbon Door - Instructions: - Place the Carbon Internal Container on its side with the open side facing up. Fill each section about half way. Take the carbon door, slide it down the groove until it fully seats. Carefully place the internal carbon container into the external carbon container. - HEPA Filter Container - Supplies: - 3x Roomba 800/900 series filters (as linked above) - HEPA Filter Container - HEPA Filter Clip - 8x M3x8 Cap head bolts - Instructions: - Place filter into the designated slots of the HEPA Filter container. Filters should only fit one way - pay attention to the little plastic nub and the corresponding cut outs in the printed part. - Place Clip over the Filter - Bolt down the clip enough to compress the foam gasket on the filters - This clip, even when printed near solid, will flex. That is okay, just ensure you have the filters secured - Then bolt the exhaust container to your V-Core using m6x16 or longer bolts and a m6 washer. - The holes in the bottom of the exhaust container are fairly oversized to account for bottom panels where the holes are off by a few millimeters. Additional larger washers may be needed if your bolt and m6 washer slips through the hole. - Bolt the 80mm fan container to the exhaust container using 4x M3x8 bolts. Be careful not to pinch any wiring. - Bolt the optional exhaust cover to the front of the exhaust container using 4x m3x8 bolts. A piece of double sided sticky tape may be needed in the center of the cover to keep it flush with exhaust container. - Stack all pieces on each other. - CHECKING FOR CLEARANCE: - This filter is designed for a super small 2mm clearance between it and the build plate. If your exhaust container is warped or the bottom panel of your machine is tilted, the filter may interfere with the build plate. Slowly lower the build plate a few mm at a time and check that it does not hit the filter. If it does, shim the bottom of the filter until the build plate clears. - Power up and check that the filter works. I use my MCU to control fan speed, and may write up additional instructions on this in the future. Regardless, running this at full speed (Arctic 10K fans) is pretty loud, so some sort of speed control is necessary if you want to be in the same room. If you wire your MCU to control the fan speed, remember that most MCUs will not be able to power these powerful server fans, and a separate power supply will be needed. If a separate power supply is used, you must bridge the negative pin of the MCU fan port with the negative wires of the fans still. If this is done wrong/not done, you can sometimes burn out your MCU. Please make sure you know what you are doing before you attempt that.






Names are used only to indicate the source of a result. Polyzon is not affiliated with the listed sites.
Comments