
Free 
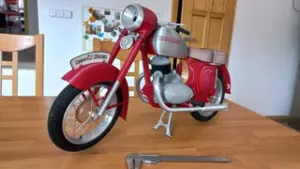
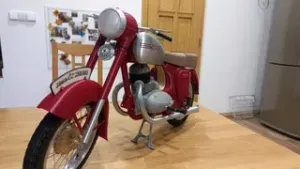
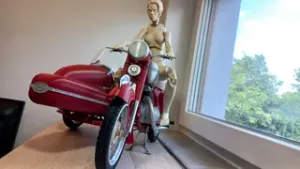
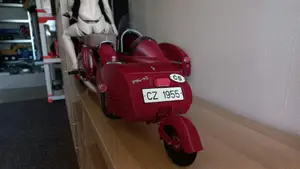
Project JAWA-ČZ KÝVAČKA 250/353.02 - PART No.10 - LAST ONE :)
Printables


Hope the 8th part was fun for you :)
Project JAWA-ČZ KÝVAČKA 250/353.02 - PART No.8 - Front mudguard + seat od autora jawarmaniak | Stáhněte si zdarma STL model | Printables.com
As usual the model part consist a big parts but the very small also so pay attention to the description and attached pictures. As usual be extremely careful during the assembly itself and work slowly and cautiously. If you manage to damage or break some part despite being extra careful you should "weld" it with a soldering gun rather than gluing it with super glue.
For today I prepared to you the front mudguard, seat, exhaust pipes and some small parts. Before each glue try to assembly all parts together and make sure that all parts fit.
If you will need more pictures for better understanding, you can see here:
https://www.rajce.idnes.cz/jawarmaniak/album/jawa-tisk
at first we started with the side boxes
Printing instruction:
- tool_box_body - 1 piece, red PLA, 100% infill, 0.15-0.2 layer. - tool_box_door - 1 piece, red PLA, 100% infill, 0.15-0.2 layer. - battery_box_body - 1 piece, red PLA, 100% infill, 0.15-0.2 layer. - battery_box_door - 1 piece, red PLA, 100% infill, 0.15-0.2 layer. - battery_holder - 1 piece, white PLA, 100% infill, 0.15-0.2 - battery_holder_2 - 1 piece, grey PLA, 100% infill, 0.15-0.2 layer. Assembly instruction:
- Complete both boxes using a wire with a diameter of 1 mm and a length of 37 mm. - Screw the M2-16 screw into the battery_box_body from the inside. - Insert a wire with a diameter of 1 mm and a length of 15 mm into the battery_holder . Then hook it into the hole in the battery_box_body . Slide the upper eye onto the M2 screw. - Slide in b attery_holder_2 and secure it with M2 nut - Each box install on place and screw 3x M1.6-3 screw - You can paint the logo on the battery_holder by red pen according picture at second we continue with the front footrests
Printing instruction:
- left_footrest_tube - 1 piece, red PLA, 30% infill, 0.15-0.2 layer. - right_footrest_tube - 1 piece, red PLA, 30% infill, 0.15-0.2 layer. - front_footrest_holder - 2 piece, grey PLA, 40% infill, 0.15-0.2 layer. - front_footrest_rubber - 2 piece, black PLA/TPU, 20% infill, 0.15-0.2 layer. - brake_pedal_holder - 1 piece, red PLA, 30% infill, 0.15-0.2 - brake_pedal - 1 piece, chrome PLA, 100% infill, 0.15-0.2 layer. - front_brake_rod_catch - 1 piece, grey PLA, 100% infill, 0.15-0.2 layer. - rear_brake_rod_catch - 1 piece, grey PLA, 100% infill, 0.15-0.2 layer. - brake_rod_nut - 1 piece, grey PLA, 100% infill, 0.15-0.2 layer. - lubricator - 1 piece, grey PLA, 100% infill, 0.15 layer. (see part No.7) Assembly instruction:
- Glue threeded rod M3-14 into left_footrest_tube and the right_footrest_tube . - Glue threeded rodes M3-33 into front_footrest_rubber . - Assembly front footrest rubber assemblies with front_footrest_holder s and with M3 nuts. - Assembly brake pedal with screw M2.5-5 according picture. You need print lubricator from 7th part. - Install left footrest tube assembly with front footrest assembly on the bike. You need M1.4-3 screw with nut and M3 nut with shim. See picture. The left footrest tube assembly you can fix by glue if you want. - Install right footrest tube assembly with front footrest assembly and with brake pedal on the bike. You weed M2-5 screw with nut, M1.4-3 screw with nut and M3 nut with shim. The right footrest tube assembly you can fix by glue if you want. - Install the rear_brake_rod_catch in the rear brake lever. - Make brake rod from wire diameter 2mm. You need 145mm long piece. Hook the rod into the front_brake_rod_catch eye and pull it through the rear_brake_rod_catch . - At last insert the brake_rod_nut on the rod. You can fix it by the glue if you want at fthird we can make the headlight
Printing instruction:
- mirror - 1 piece, chrome PLA, 100% infill, 0.15-0.2 layer. - headlight_ring - 1 piece, chrome PLA, 100% infill, 0.15-0.2 layer. - headlight_glass - 1 piece, crystal clear PLA, 100% infill, 0.15-0.2 layer. Assembly instruction:
- Glue the headlight_glass into the headlight_ring. See on the picture - make sure on the correct position. - Glue the mirror. - Install the headlight on the bike and fix it by M1.4-4 screw. AND… That's it for now.
Bill of material:
- 2x nut M1.4 - 2x nut M2 - 4x nut M3 - 1x screw M1.4-4 mm - 2x screw M1.4-5 mm - 6x screw M.6-3 mm - 1x screw M2-16 mm - 1x screw M2-5 mm - 1x screw M2-16 mm DIN 84 - 1x screw M2-30 mm DIN 84 - 1x screw M2.5-5 mm - 2x threaded rod M3-14 mm - 2x threaded rod M3-33 mm - 2x shim M3 - superglue - 1x wire of the diameter 1mm, length 15 - 2x wire of the diameter 1mm, length 37 - 1x wire of the diameter 2mm, length 145 I hope you had fun during building and everything went smoothly.
You can look forward to the next part. The 10th part is under progress right now ;)
10th part is available here: https://www.printables.com/cs/model/855577-project-jawa-cz-kyvacka-25035302-part-no10-last-on




Names are used only to indicate the source of a result. Polyzon is not affiliated with the listed sites.
Comments