
Free 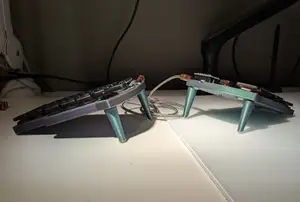
Lily58 Magnetic tenting for Gabbajoe's cases
Printables


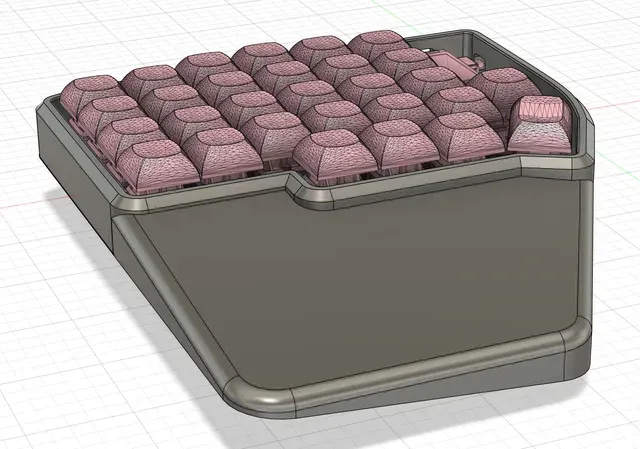


This is a case for the lily58 keyboard found on typeractive.xyz . It should probably work with other lily58 keyboards as well, but the USB port might need to be adjusted. It is based on another case that I use for my corne, but I don't remember where I got it. If it looks familiar and you want credit, I would be glad to do so. There is a flat version and a 5 degree tented version. Included is an Autodesk Fusion file that is parameterized for easy customization. There are a couple of parameters that didn't work as I wanted, but most should work fine. This includes wall thickness, tenting angle, and palm rest angle.
It can be used with threaded inserts (the STL would use M2 inserts) or wood screws to attach the keyboard to the case.
I ended up slicing it in half and added a pocket to put sand to give it some weight. I also added some indentions for these bumpers (https://www.amazon.com/gp/product/B07XXJZQMS/).
Update:
After receiving my components and building the keyboard, I went with 4mm high m2 threaded inserts. These worked great, sticking out from the standoffs and the pcb fitting right over the top and were just a hair below the top of the pcb as you can see from the picture. The heads of the screws I used are pretty narrow and fit through the holes of the pcb so I printed out some small washers. Of course the hole ended up being a little small so I drilled out the hole with a 2mm drill bit. The washers were also a tad thick but still worked really well.
After trying different layouts, just the base, with tenting, with and without palm rests; I found a larger tenting angle to be most comfortable. These will also just be on my desk so portability isn't necessary. The great thing is that I could put the keyboard in the top part of the case and then print different bottoms (or no bottom if not wanting tenting) then glue the top and bottom together and glue the palm rest to the case (or leave it unglued and just use it when wanted). There are many different options with this case and makes it easy to find out what you like.



Names are used only to indicate the source of a result. Polyzon is not affiliated with the listed sites.