
Free 
Ender 3 V3 KE and SE automatic nozzle cleaning brush.
Printables


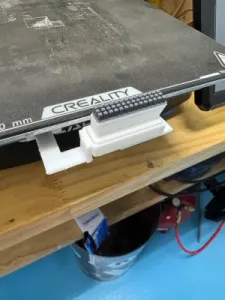
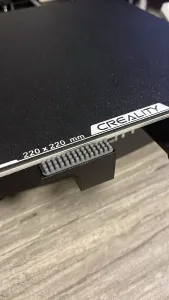
I took the original model and just made it beefier for a better more secure mount as the original fell off often. I recommend using PETG or at least PLA+.
This design also allows use for the cheap Harbor Freight brash brushes pictured. They are 99 cents as of the time of this posting. Just cut the handle off. No need for glue or anything, fits nice and snug and is easy to swap or remove and clean.
Here is the original description from the original model;
ASSEMBLING THE PARTS
- Turn off the printer and make sure the bed is cool; you could burn yourself if you've just finished a print. - Place the holder along with the brush right in front, on the X-axis.
Tolerances are adjusted for a perfect fit. If this is not the case, make sure to configure them correctly in your slicing software.
MODIFICATION OF THE INITIAL GCODE
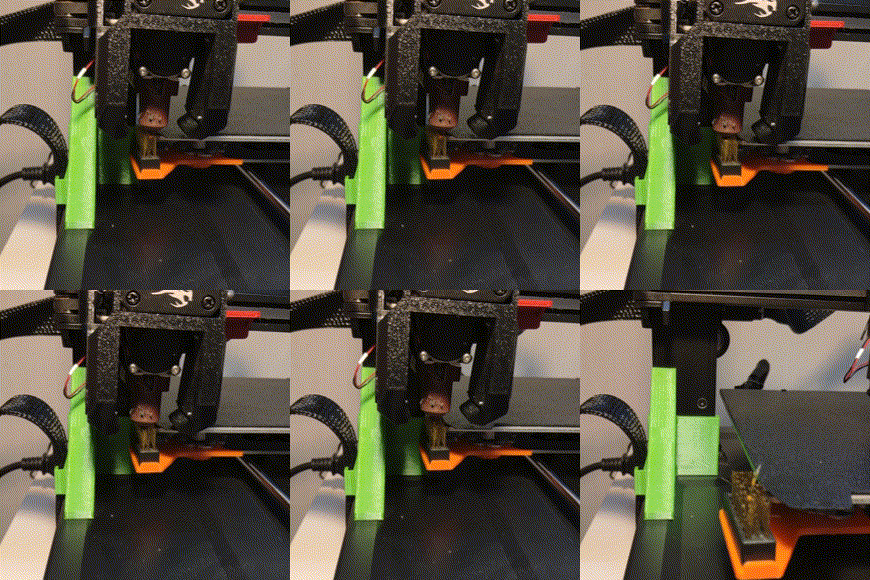
It is important to modify the Z value to prevent the fans from touching the metal bristles; otherwise, it could damage the plastic.
It is important to modify the X value so that the travel is complete. Additionally, depending on the position of the mod, the extruder and nozzle may not reach or may overshoot.
The GCODE lines that have been included and optimized are marked in red, as shown in the attached image. Below, you can find the GCODE for you to copy and paste into your startup GCODE. However, remember to calculate the values for Z and X to ensure optimal cleaning. ***Notice, you can remove the lines Wipe 6, 6, 7, and 8. I have found that 2 wipes across from each direction is enough to clean things off.
M220 S100 ;Reset Feedrate M221 S100 ;Reset Flowrate
M140 S[bed_temperature_initial_layer_single] ;Set final bed temp G28 ;Home G92 E0 ;Reset Extruder G1 Z2.0 F3000 ;Move Z Axis up M104 S[nozzle_temperature_initial_layer] ;Set final nozzle temp
G1 X1 Y-18 Z3 F5000.0 ;Line up with brush
M190 S[bed_temperature_initial_layer_single] ;Wait for bed temp to stabilize M109 S[nozzle_temperature_initial_layer] ;Wait for nozzle temp to stabilize
G1 X90 Y-18 Z3 F5000.0 ;Wipe 1 G1 X30 Y-18 Z3 F5000.0 ;Wipe 2 G1 X90 Y-18 Z3 F5000.0 ;Wipe 3 G1 X30 Y-18 Z3 F5000.0 ;Wipe 4 G1 X90 Y-18 Z3 F5000.0 ;Wipe 5 G1 X30 Y-18 Z3 F5000.0 ;Wipe 6 G1 X90 Y-18 Z3 F5000.0 ;Wipe 7 G1 X30 Y-18 Z3 F5000.0 ;Wipe 8
G1 X40 Y-18 Z15 F5000.0 ;Raise to clear brush
G1 X-2.0 Y20 Z0.28 F5000.0 ;Move to start position
G1 X-2.0 Y145.0 Z0.28 F1500.0 E15 ;Draw the first line G1 X-1.7 Y145.0 Z0.28 F5000.0 ;Move to side a little G1 X-1.7 Y20 Z0.28 F1500.0 E30 ;Draw the second line G92 E0 ;Reset Extruder G1 E-1.0000 F1800 ;Retract a bit
G1 Z2.0 F3000 ;Move Z Axis up
G1 E0.0000 F1800 PRINT
Run a test with the new startup GCODE to see how it works. If you have Klipper with Fluidd or Mainsail, you can add the GCODE commands directly to the console to visualize the movements and check that they are well adjusted.






Names are used only to indicate the source of a result. Polyzon is not affiliated with the listed sites.
Comments 0
Loading comments…