
Free 
Disc Golf Snap Retriever — Direct-Mount (M5 screw)
Printables


This is based on the now-defunct 'Disc Gator' with a few design improvements, and a DDiscs/Prodigy telescopic rod mount.
Disc Croc(k) as copy of Disc Gator, get it? (I am a very funny and interesting person as you can see)
To assemble this, you will need: - 2.5mm diameter wire coat hanger - the spring from a dollar store chip-clip (or fancier, you do you) - 2 m4 bolts with 12mm or greater thread length (or just two zipties) - 1 m5 bolt with 10mm or greater thread length - pliers (Knipex pliers will make this assembly easy if you have 'em) - thickboi wire cutters
See this handy video for how it works
See this handy video for assembly
(download the video and slow it back down or pause with VLC if needed, had to speed it up for imgur sadly)
If you find the trap triggers too easily, use a file to rough up the cavity where the trip wire sits and you should be able to up the friction a bit.
The best place to mount the mousetrap bar is into the "simple" (non-pole) side since the bar will get in the way of the lower rim of the disc a bit. make the sure pole-side is aligned with the bottom of the disc when you try to grab it for best results, see the first two images for an example. (I left a hole for the trap bar in the pole side if you prefer to have it set up the other way though)
THAT SAID , you can avoid caring which side the pole and disc are on if you CURVE the mousetrap bar like a fancy artist person. See the image with the curved bar for an example.
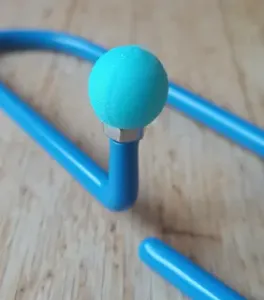
As you can see in the assembly video, there would normally be a flared m5 nut on the end of one of these Dynamic Discs / Prodigy telescopic rods, but mine broke off after the cheap metal twisted. I suggest gluing the final two telescopic sections together ahead of time to create a stronger tip segment for this unit to avoid having to mend things later like I did. If the nut were present, it would be secured using the m5 bolt at the end of the dome (I faked it in the vid!)
Even with the cheap thin metal, and the insanely useless hook they ship those retrievers with , I think it is still the absolute best length vs. collapse ratio of any retriever I have seen, and easily fits along the side of a backpack. With one of these printed, it really becomes actually useful, and I have used my earlier prototype MANY times over the past couple years, especially for tree and water retrievals (and even from the top of a neighbour's shed one time).
I included a standard broom thread version for each, but I have yet to find a window-cleaner rod that is even close to the same level of compactness. That said , if you are running an event or something, and want to have a really strong rod nearby, or even leave one on your course next to the water hazard if you live in a crime-free area, the broom version and a bigboi window-cleaning rod might be the right idea. Consider using a touch of thread-locker or pop a wrap of tape around the point where the printed part and the broomstick to make sure it doesn't unscrew slowly with use.
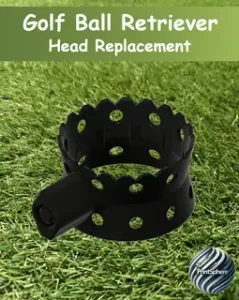
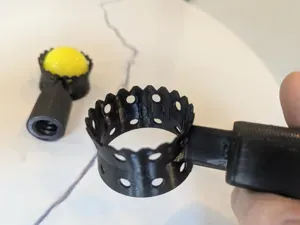
I also included a smooth version in case you live in a place with a lot of branches etc. that you are worried will get snared in the teeth, but I think it will probably have a worse hold strength (but still work fine).
Also: Knipex pliers will make this assembly easy if you have 'em (black ones in the assembly vid).
You will need support for the hinge plates when printing.




Names are used only to indicate the source of a result. Polyzon is not affiliated with the listed sites.