
Free 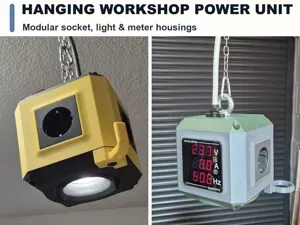
Workshop Hanging Power Supply Unit Power Outlet
MakerWorld


INSTRUCTIONS:
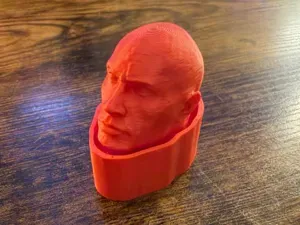
First off, the photo shown is a real Rock Monster, with the Small and Medium versions behind it. I will update when I have finished my large print, but keep in mind that the Large is not shown in photos.
Second, I will not be able to provide full instructions due to some of the methods I used for painting and such, but I will do as much as possible.
RED FILAMENT FOR BODY:
https://www.amazon.com/dp/B07YCNCZ5J?ref=ppx_yo2ov_dt_b_fed_asin_title&th=1
GREY FILAMENT FOR HEAD AND ARMS:
https://www.amazon.com/dp/B0CF1YWR7P?ref=ppx_yo2ov_dt_b_fed_asin_title
HINGES FOR THE MODEL:
https://www.amazon.com/dp/B09TFK9D9F?ref=ppx_yo2ov_dt_b_fed_asin_title&th=1
The hinges are 100% necessary as the model head is specifically designed around them.
BODY:
Follow this tutorial as closely as possible: https://www.printables.com/model/15310-how-to-print-glass
This will get you the best result for the body with your filament. It is hard and time consuming, but worth it.
I then sanded 60-80-120-220 for the body before painting.
HEAD and ARMS:
Just print using your best parameters then sand the same as the body. The SmallHead has way oversized teeth to make printing them more reliable, I just sanded them down and trimmed them with filament cutters.
PAINTING:
Do your best to color match. I had a hard time getting a paint match to the color of the actual rock monster. I ended up realizing that the grey of the filament I got was way too light. I used clear nail polish as my clear coat, and to darken it to match better I added a few drops of black nail polish, one at a time, and tested it on a test plastic until I was satisfied with the match. Make sure the paint you use for the body matches when the clear coat is on both. As for the eyes, you are on your own, I used a black paint marker to do it. They smear easily with the clear coat so be careful.
ATTATCHING ARMS:
I had to trim and sand down the connecting bulb on the end of the arms, it is a very snug fit and you will likely have trouble on the medium and large body. Just carefully sand and trim down until it pops into place.
ATTATCHING HINGES:
Measure twice, cut once. The small body uses the smaller hinge, and the medium and large use the longer ones. For the small body, you can only screw in one side. The side that attatches to the head MUST be glued into place or it will not shut properly. I used b7000 it is a strong glue.
ALSO use needlenose pliers on the hinge joints. They come super loose in the box, and if you just clamp the center down so that they are more snug the hinge will be much less loose and prone to moving.
I glued the hinges in place before I screwed any holes. I was able to make sure the hinges were aligned well. Then I marked the holes for the body on the smaller one, and the body and head for the larger ones. After removing the hinge I then used a small drill bit to tap the holes about halfway, then screwed in flush for the rest. Afterwards, I loosened the hinge a bit and added more glue beneath it to make an even more secure fit.
FINAL REMARKS:
And that's pretty much it. I used a paintbrush for the clear coat, and found that acetone helped to clean it off after so that was useful. It takes a fair bit of clean nail polish, so if you can find a better clear coat I highly recommend it. I also used acrylic paint for the body and eyes. I was pretty happy with the result, it took a lot of work to get it to all come together, I spent so much time in TINKERCAD to get the models right. So so many prototypes.
ORIGINAL MODEL BEFORE MY EDITING:
https://sketchfab.com/3d-models/rock-monster-power-miners-lego-6fb2e5a55b954b899b9b8d71fe720f0e




Names are used only to indicate the source of a result. Polyzon is not affiliated with the listed sites.