
Бесплатно 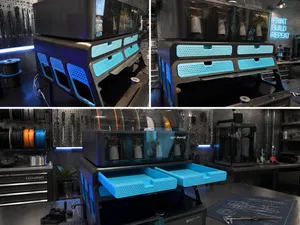
P1S / X1C / P2S / X2D - BLV Riser - Drawer Upgrade
MakerWorld
Boost Me Toss Me a Boost (I’m Running on Coffee and Dreams) ☕🚀 I’m over here, pouring my heart (and a lot of caffeine) into creating designs for this amazing community! If you’ve got a boost to spare, you’d be a total hero - it really does help! But if not, no worries at all, you’re still amazing, and I hope my designs make you smile anyway! 😊💛 Updates
- 18/04/26: NEW HUGE UPDATE v4.0 has been published (updating this page with new guides)
Full support to X2D , P2S Extra build plate support, Support for 3rd party attachments , Mounting holes for additional accessories, Magnetic attachments , Improved print time and more..
Introduction
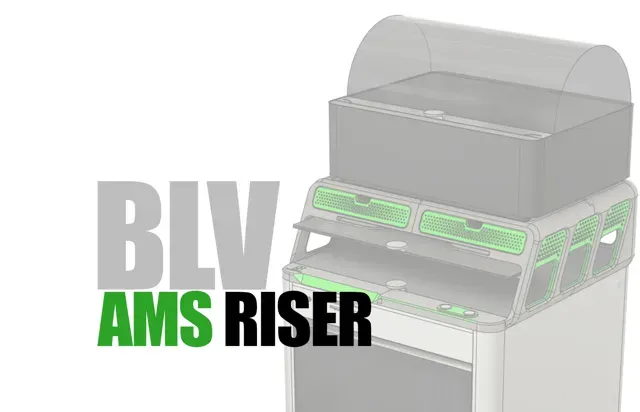
Hi, I’m Ben Levi, and I’d like to introduce you to the BLV AMS / AMS 2 Pro Riser I designed.
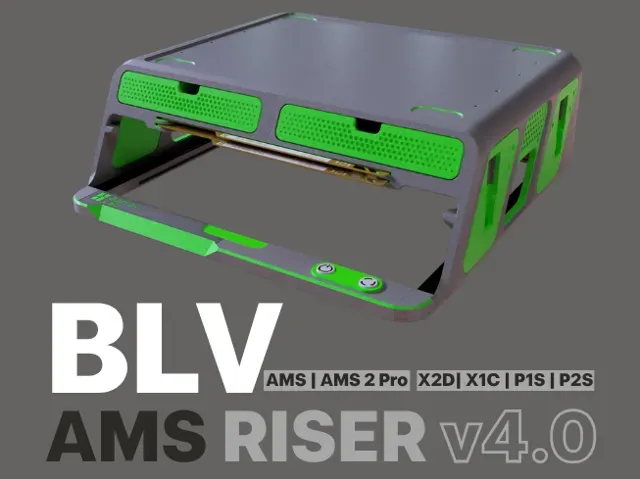
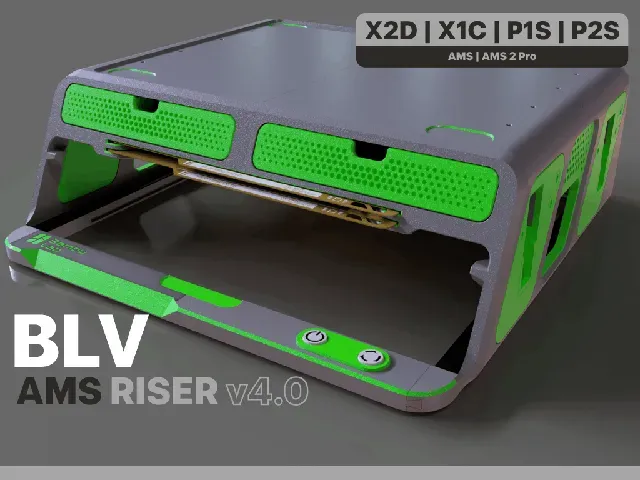
When the AMS sits directly on top of the printer, it blocks your view of the print and makes it impossible to open the top glass lid -something that's important when printing high-temperature materials and needing better airflow. I realized there needed to be a better solution - something that lifts the AMS while keeping the top cover free and accessible. I’ve seen a few AMS risers out there, but honestly, none of them really impressed me… so I decided to create my own. The result is this sleek and functional BLV AMS Riser:
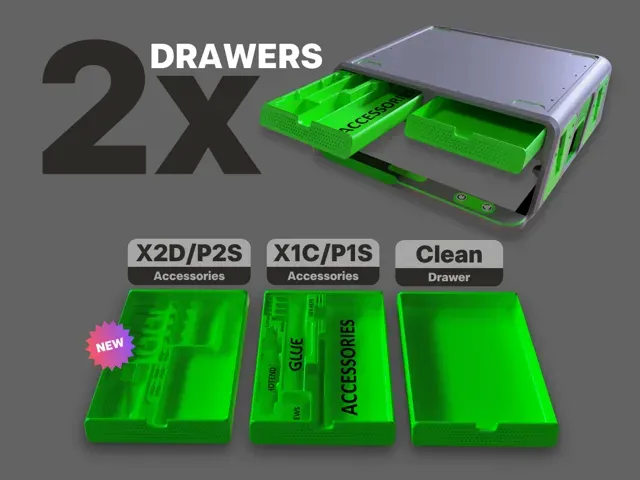
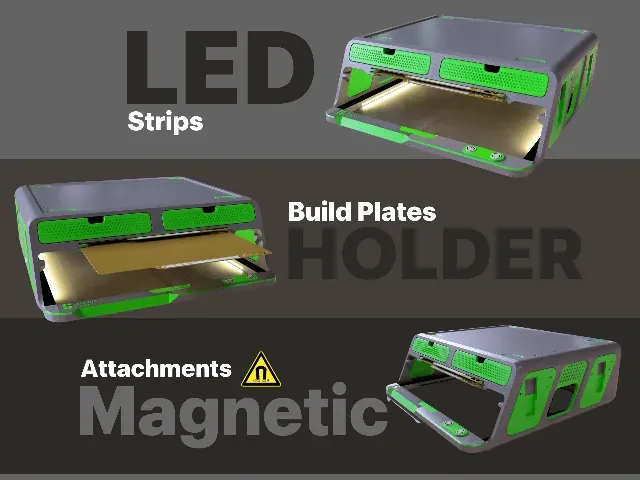
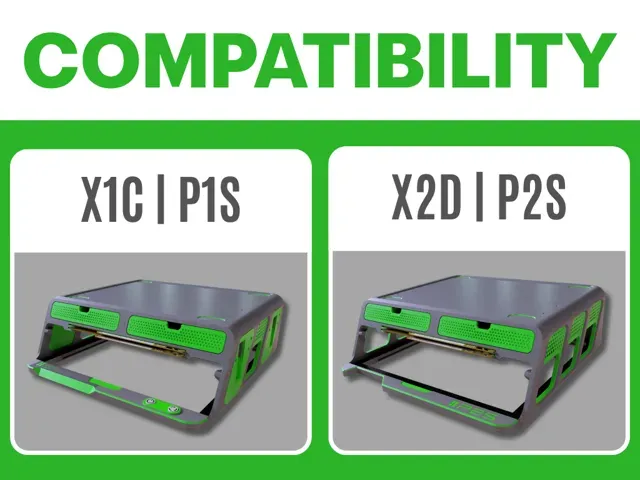
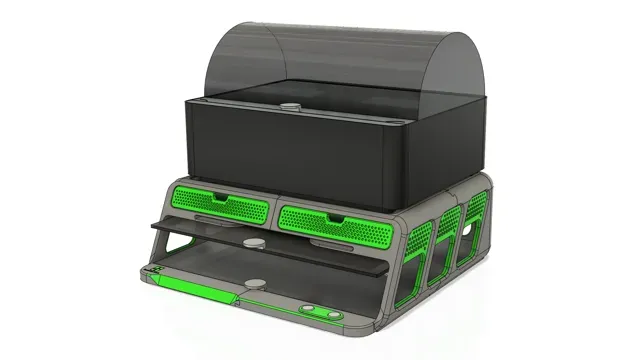
- Simple to assemble - Easy to use - Sturdy and reliable - Includes two practical drawers for your tools and accessories - Special storage for your build plates - Magnetic attachments - Support 3rd Party accessories with special adapter - Integrated dual LED strips for a clean, modern touch - Compatible with both the standard AMS and the AMS 2 Pro - Compatible with printers: X2D, P2S, X1C, P1S. It took time, effort, and iteration - but I’m proud of the outcome. As many of you know, I’m passionate about giving back to this amazing community. That’s why I’m sharing this project completely free of charge, including the original CAD files (F3D, STEP) so you can modify, enhance, or adapt the design to your needs. Please refrain from using the design for commercial purposes without my explicit permission.
Enjoy, and happy printing!
Thanks, Ben Levi
If you want, buy me a beer :)
Membership Love my designs? Follow me to stay updated on new releases! If you'd like to support my work or even sell physical prints of my models, check out my membership tiers. Your support helps me cover filament and equipment costs so I can keep creating for you! Main Features
These are just a few of the design features I’ve planned so far. If you have additional ideas or suggestions, I’d love to hear them - your input could help make this project even better. The original CAD files are available for download to make self customization easy.
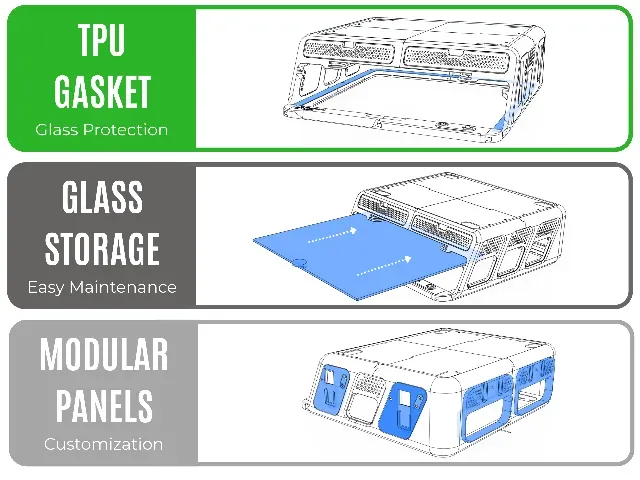
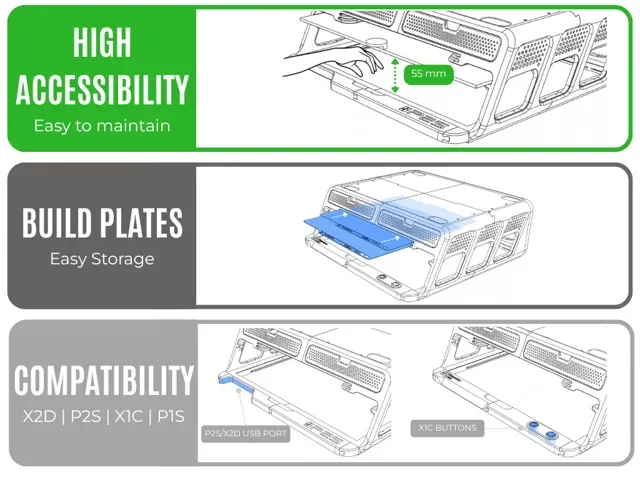
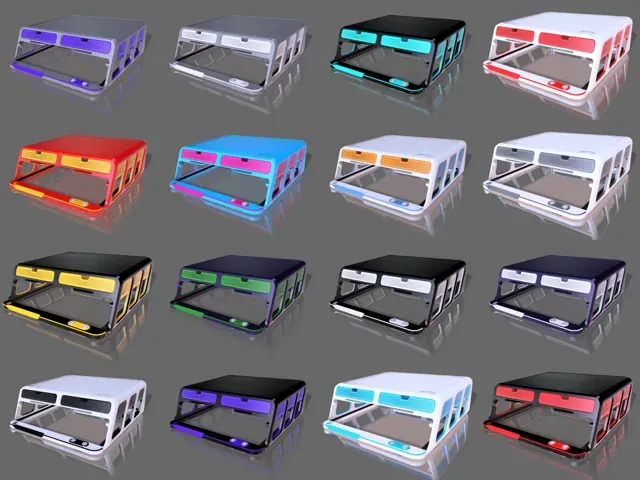
- Easy, Screw Free Installatio n - Assembles effortlessly with no tools or screws required. - Dual LED Strip - Integrated lighting positioned at an optimal angle for LiDAR functionality. - X2D / X1C / P2S / P1S - Fully compatible with all the latest X and P series printers. - AMS / AMS 2 Pro Riser - Elevates the AMS to improve visibility and functionality. - Top Glass Holder - Frees up the top cover for airflow during high-temperature prints. - Two Storage Drawers - Includes a version tailored specifically for tool organization. - Magnetic attachment - integral magnets allowing to attach scraper and other tools. - Build Plate Storage - Dedicated build plates holder. - Rubber Gasket for Glass – Provides a snug, protective fit for the top cover. - 3rd party accessories - Fully supports community created 3rd party accessories - Custom Side Panels - Sleek, modular design with a clean finish. - Full Access to Original Printer Buttons / Micro-SD (P2S) – No compromise on usability. - CAD Files Included - Downloadable in F3D and STEP formats for easy customization and remixing.
How to print and where to begin?
The easiest and most reliable way to get perfect results right from the start is to use the dedicated print profiles I’ve prepared especially for you. Everything is already dialed in perfectly: supports, infill, strength settings, layer heights – you name it. All you have to do is open Bambu Studio, select your printer model, choose the colors you want for your BLV Riser, and hit print. That’s it – zero hassle, maximum quality!
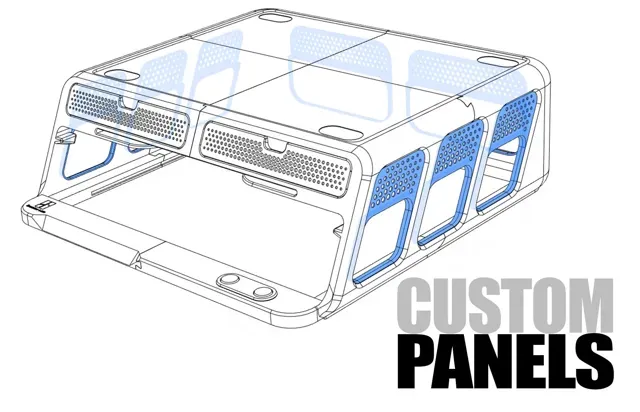
Panel Options Each profile includes two complete sets of side panels. You’ll see the name above each plate: OPTION1 or OPTION2 . Feel free to print both sets and swap them whenever you want, or just print the one you prefer.
- OPTION1 – Standard Panels : the classic clean look, purely aesthetic. - OPTION2 – Modular Panels : designed for mounting all kinds of community 3rd party accessories. Choose your style – or keep both! 😎
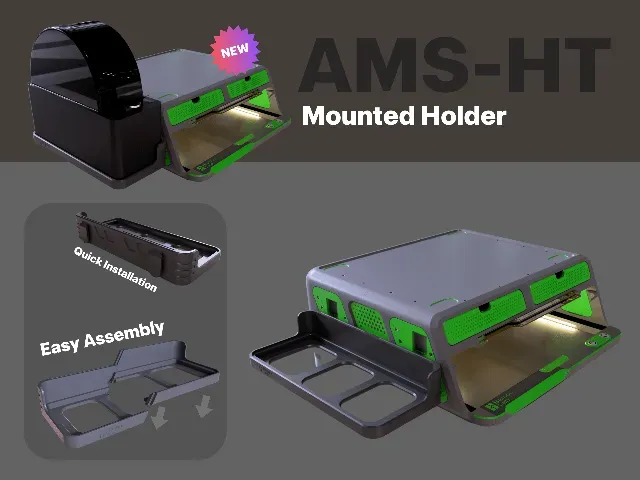
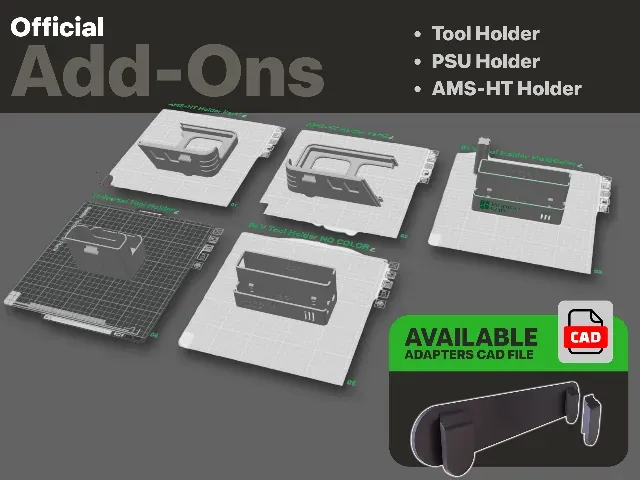
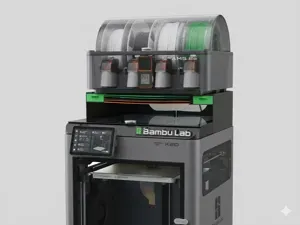
Example for an attachment that suitable to the v4.0 modular panels. The AMS-HT mounted holder can be easily installed on the left or the right side of the BLV AMS Riser.
you can download it from the Print profile, labeled: “BLV Official Attachments AMS-HT | PSU | Tool Holders”
To be completely honest, If you’re looking for a quick 2 hour print and done project, this isn’t it. This is a serious, high end upgrade that demands real commitment in both filament and print time. Finishing a full BLV Riser means you’re in for the long haul - but the result is absolutely worth it. Here’s what you’re signing up for:
Printing Time
~ 96 print hours (including color switching)
Printer
Any Bambu Printer other then A1 Mini
Filament
- Grey PETG - main color ~ 2.7Kg - Green PETG - accent color ~0.7Kg - Black PETG - for drawers text ~15g - TPU - flexible filament for the gasket ~50g * Feel free to choose your own colors.
Important note: Print the drawers using the same filament type as the main structure (color can be different). If the main body is printed in PETG but the drawers in PLA, different material properties may affect tolerances and cause increased friction or poor fit.
Overall dimensions for your convince:
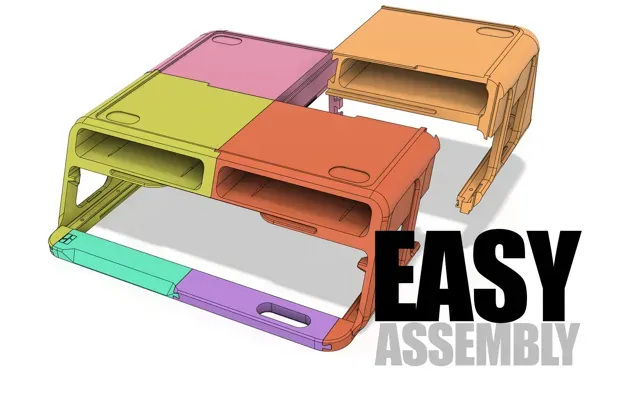
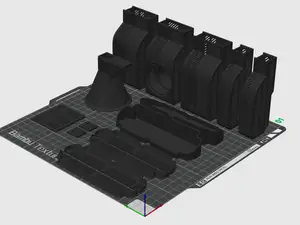
I designed this project with simplicity in mind - minimizing the number of parts and avoiding the need for screws or glue wherever possible. To make assembly even easier, I’ve included three reference images that display all the printed parts along with their corresponding file names. These visuals will help you quickly identify what needs to be printed and what can be skipped.. Click on the pictures to enlarge.
Assembly Instructions
I believe the best way to demonstrate the assembly process is through a visual guide. That’s why I’ve created a short animations that clearly illustrates how to assemble the project step by step, including the proper sequence of all components.
Main Body Assembly
- Gently insert Part 1 into Part 4, making sure that the tab on Part 4 slides smoothly into the corresponding groove on Part 1. Verify that all parts are perfectly aligned before proceeding.
- Gently insert Part 2 into Part 3, making sure that the tab on Part 3 slides smoothly into the corresponding slot on Part 2. Verify that all parts are perfectly aligned before proceeding.
- Gently insert the combined Part 1 + Part 4 assembly into Parts 3 and 2, following the animation below. slide them in carefully while keeping everything perfectly aligned, ensuring the tabs on one side lock smoothly into the corresponding slots on the other until both pairs are fully seated and flush.
- Now slide the front dashboard panels gently into the assembled units as shown in the animations below, until fully seated and flush.
X1C / P1S Dash Board assembly
P2S Dash Board assembly
- Before installation, make sure you have printed the correct version for your printer. The parts for the P1S/P1P are different from those for the X1C. The drawers are designed for storing screws, filament cutters, grease, lubricant oil, Allen keys, hotends, silicone socks, and more.
Drawers installation: Gently slide the drawers into place. Note the slot on the underside of each drawer, it aligns the drawer and prevents it from dropping when opened. A slight friction on the first insertion is normal and expected.
BLV - AMS Riser V4.0 for P2S - new official upgrade version! This is the latest and most updated version of the BLV Riser v4.0 for P2S !!!
FOR P2S
version v4.0 improvements:
- Allows storage of significantly more build plates. - Universal side panels for mounting a wide variety of existing 3rd party accessories already available on MakerWorld. - Universal rear panels for 3rd party accessories. - Integrated magnets for easy mounting of accessories such as the Scraper holder. - Significantly shorter print time without compromising strength. - Improved LED strip spacing for much easier insertion. - Added finger recess for comfortable removal of the top glass panel. - Numerous general model improvements and refinements. Note:
- Main parts : Plates 1, 2, 3, 4 - Drawers : Plates 6, 7 - TPU parts : Plate 8,9 - Panels - User Must choose what version to print: - Option 1: Regular panels: Plates 10, 11, 12 - Option 2: Universal panels: Plates 13, 14, 15 Recommendations:
- Filament: Print exclusively with PETG, ASA, or other strong/high-temperature materials . Printing with PLA is possible, but after a few months the PLA parts may slightly warp due to heat emitted by the printer . - Important: Do not mix filament types . If you print the main body parts (plates 1–4) with PETG, you must also print the drawers (plates 6 & 7) with also PETG. Mixing different filament types will almost certainly cause tolerance issues, and the drawers will not slide in smoothly. - Supports - everything is already perfectly configured in the files . Important Notice: This is the original and official print profile created by BLV – the author of the project and it has been successfully printed thousands of times. Recently, I’ve seen many complaints from users who experienced issues after downloading and printing other non original profiles or projects that illegally use the “BLV” name (my name) without permission. Please make sure you are using this official version to avoid any problems.
Enjoy the print! If you liked Please BOOST me
Thank you
Note:
- Note: Updated 10.12.25 the part 1 support - Updated 6.12.25 the PS2 drawer updated!
BLV - AMS Riser V4.0 X2D new official upgrade version! This is the latest and most updated version of the BLV Riser v4.0 !!!
version v4.0 improvements:
- Allows storage of significantly more build plates. - Universal side panels for mounting a wide variety of existing 3rd party accessories already available on MakerWorld. - Universal rear panels for 3rd party accessories. - Integrated magnets for easy mounting of accessories such as the Scraper holder. - Significantly shorter print time without compromising strength. - Improved LED strip spacing for much easier insertion. - Added finger recess for comfortable removal of the top glass panel. - Numerous general model improvements and refinements. Note:
- Main parts : Plates 1, 2, 3, 4 - Drawers : Plates 6, 7 - TPU parts : Plate 8 - Panels - User Must choose what version to print: - Option 1: Regular panels: Plates 9, 10, 11 - Option 2: Universal panels: Plates 12, 13, 14 Recommendations:
- Filament: Print exclusively with PETG, ASA, or other strong/high-temperature materials . Printing with PLA is possible, but after a few months the PLA parts may slightly warp due to heat emitted by the printer . - Important: Do not mix filament types . If you print the main body parts (plates 1–4) with PETG, you must also print the drawers (plates 6 & 7) with also PETG. Mixing different filament types will almost certainly cause tolerance issues, and the drawers will not slide in smoothly. - Supports - everything is already perfectly configured in the files . Important Notice: This is the original and official print profile created by BLV – the author of the project and it has been successfully printed thousands of times. Recently, I’ve seen many complaints from users who experienced issues after downloading and printing other non original profiles or projects that illegally use the “BLV” name (my name) without permission. Please make sure you are using this official version to avoid any problems.
update: Drawer fixed!
Enjoy the print! If you liked Please BOOST me
Thank you
BLV - AMS Riser V4.0 X1C P1S new official upgrade version! This is the latest and most updated version of the BLV Riser v4.0 !!!
version v4.0 improvements:
- Allows storage of significantly more build plates. - Universal side panels for mounting a wide variety of existing 3rd party accessories already available on MakerWorld. - Universal rear panels for 3rd party accessories. - Integrated magnets for easy mounting of accessories such as the Scraper holder. - Significantly shorter print time without compromising strength. - Improved LED strip spacing for much easier insertion. - Added finger recess for comfortable removal of the top glass panel. - Numerous general model improvements and refinements. Note:
- Main parts : Plates 1, 2, 3, 4 - Drawers : Plates 6, 7 - TPU parts : Plate 8 - Panels - User Must choose what version to print: - Option 1: Regular panels: Plates 9, 10, 11 - Option 2: Universal panels: Plates 12, 13, 14 Recommendations:
- Filament: Print exclusively with PETG, ASA, or other strong/high-temperature materials . Printing with PLA is possible, but after a few months the PLA parts may slightly warp due to heat emitted by the printer . - Important: Do not mix filament types . If you print the main body parts (plates 1–4) with PETG, you must also print the drawers (plates 6 & 7) with also PETG. Mixing different filament types will almost certainly cause tolerance issues, and the drawers will not slide in smoothly. - Supports - everything is already perfectly configured in the files . Important Notice: This is the original and official print profile created by BLV – the author of the project and it has been successfully printed thousands of times. Recently, I’ve seen many complaints from users who experienced issues after downloading and printing other non original profiles or projects that illegally use the “BLV” name (my name) without permission. Please make sure you are using this official version to avoid any problems.
Enjoy the print! If you liked Please BOOST me
Thank you
BLV - AMS Riser V3.2 X1C P1S v3.1 OLD VERSION Hi, this is the my own print profile that i keep update.
Last update: 18/10/24
Change log
- 18/10/24 - more optimized support - 02/08/24 - removed unnecessary brim - 22/02/24 - changed orientation, faster print. - 06/10/23 - added support - 04/10/23 - Faster print, Less material, GYROID infill, Better Support! - 02/10/23 - added buttons insert.stl - 29/9/23 - Optimized infill. - 26/7/23 - Drawer's support fixed. - 26/7/23 - optimized to the new Bambu Slicer settings.
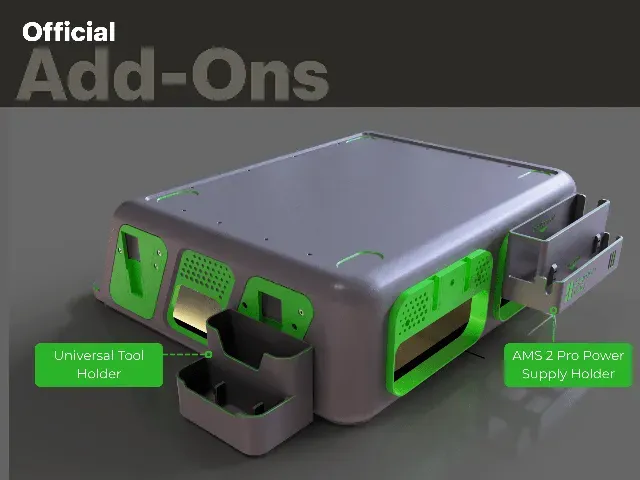
BLV Official Attachments AMS-HT | PSU | Tool Holders ! BLV Official Attachments AMS-HT | PSU | Tool Holders !
With this print profile, you can easily print and attach the add-ons designed specifically for the BLV Riser V4.0 to your modular panels. Included in the profile:
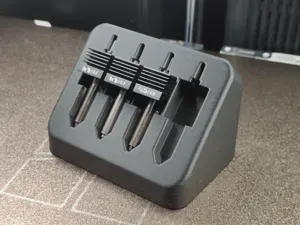
- AMS-HT Mounted Holder (for side modular panel) - AMS 2 Pro Power Supply Holder 2 versions: Multicolor and Single color | for rear modular panel - Universal Tool Holder (for side modular panel)
Updated support, Infill combination, 0.2mm layer, 3 walls, 15-20% infill, GYROID & Adaptive Cubic!
All settings balanced for optimal print (multi-colour with no AMS!!!) If you print from bambu studio you can add the below code into “Print settings” under “change filament G-code” and your printer will pause and unload filament when required, you just need to load the new one and press resume:
; change filament without AMS g-code {if toolchange_count > 1} M204 S9000 ; set starting acceleration G17 ; set CNC workspace plane G2 Z{max_layer_z + 0.4} I0.86 J0.86 P1 F10000 ; spiral lift G1 Z{max_layer_z + 3.0} F1200 ; vertical lift
; move to poop chute G1 X70 F21000 G1 Y245 G1 Y265 F3000 M400
; turn off fans P1 and P2 M106 P1 S0 M106 P2 S0
; wipe? G1 X90 F3000 G1 Y255 F4000 G1 X100 F5000 G1 X120 F15000
; move to position to prep for cutting filament G1 X20 Y50 F21000 G1 Y-3 ; always use highest temperature to flush M400 M109 S[nozzle_temperature_range_high]
; cut filament G1 X5 F300 G1 X20 F12000
Названия используются только для указания источника результата. Polyzon не аффилирован с перечисленными площадками.