
Бесплатно 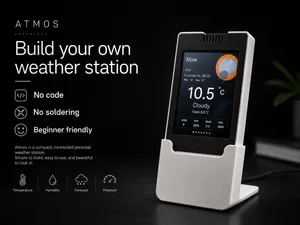
Build your own weather station - Atmos - CYD case
MakerWorld


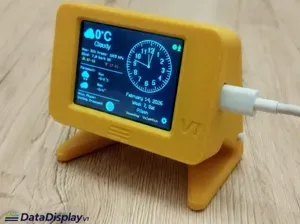
🕰️ Fused Shaped 3D Smart Clock (ESP32 IoT Display)
Transform your desk setup with the Fused Shaped 3D Smart Clock.
This is a fully customizable, web-controlled digital clock powered by an ESP32 and vibrant WS2812B LEDs.
Unlike standard digital clocks, this device runs on our custom V112 Firmware , giving you a powerful Web Interface to control everything—colors, alarms, time, and weather—right from your smartphone, without needing to install any apps. It connects to your WiFi, syncs time automatically via NTP, and pulls live weather data.
✨ Key Features
- 📱 Smart Web UI: Host a local control panel on the clock itself. Change settings, brightness, and modes from any browser. - 🌈 8+ Animation Modes: Choose from Rainbow, Cyberpunk, Matrix, Lava, Breathe, and more. - 📡 OTA Updates: Supports wireless firmware updates via the Web UI or automatic GitHub checks (includes safe-mode loop protection). - 🌦️ Live Weather: Displays real-time temperature and weather conditions for your city. - 🇮🇳 Built-in Database: Includes a pre-loaded selection of all Indian States and Districts for easy location setup. - 🧠 Auto-Brightness: An LDR sensor automatically dims the display at night to prevent glare. - 🛠️ Productivity Tools: Integrated Stopwatch and Timer modes. 📦 Bill of Materials (Hardware)
To build this clock, you will need the following electronic components:
- Microcontroller: ESP32 Dev Module (30-Pin version is standard). - LEDs: WS2812B Addressable LED Strip. - Density: 60 LEDs/meter recommended. - Quantity: Approx. 2 meters (depending on segment scale). - Display Segments: The 3D printed digits are designed for 3 LEDs per segment (Total 23 LEDs per digit including dot). - Light Sensor: LDR (Photoresistor) + 10kΩ Resistor. - Audio: 5V Active Buzzer (for Alarms/Timer). - Temp Sensor (Optional): DS18B20 (for indoor room temperature). - Power: 5V 2A Power Adapter (Micro-USB or External). - Wires: Jumper wires or silicone stranded wire. 🔌 Connection & Pinout Diagram
The firmware (V112) is pre-configured for the following pin connections.
Component ESP32 Pin Notes
WS2812B Data In GPIO 4 Connect via a 330Ω resistor (optional but recommended).
Buzzer (+) GPIO 18 Positive leg to Pin 18, Negative to GND.
LDR Sensor GPIO 34 Analog Input for brightness sensing.
DS18B20 Temp GPIO 17 Data pin (needs 4.7kΩ pull-up resistor).
Factory Reset GPIO 0 This is the "BOOT" button on the ESP32.
Power (+) VIN / 5V Do NOT use the 3.3V pin for LEDs.
Ground (-) GND Common Ground for all components.
Wiring Tip: Ensure your LDR is wired as a voltage divider (LDR goes to 3.3V, 10k Resistor goes to GND, center tap goes to GPIO 34).
🖨️ 3D Printing Instructions
These files are designed to be printed easily on standard FDM printers (Ender 3, Bambu Lab, Prusa).
- Material: PLA, PETG, or ABS. - Nozzle: 0.4mm standard. - Layer Height: 0.2mm. - Infill: 15% - 20% (Grid or Gyroid). - Walls/Perimeters: 2 or 3 walls. - Support: None required for the main grid if printed face down. - Diffusers: Print the Diffuser files in White PLA . Use 100% Infill or Solid Layers to ensure smooth light diffusion without grid patterns showing through. 💻 Firmware Installation Guide
The code requires specific partition settings due to the large Web Interface features.
- Download Code: Download the Fused_Clock_V112.ino from the file list. - Arduino IDE: Open the file. - Install Libraries: Go to Sketch > Include Library > Manage Libraries and install: - FastLED - WiFiManager - ArduinoJson - DallasTemperature - OneWire - Board Settings: - Board: ESP32 Dev Module - Partition Scheme: Select "Huge APP (3MB No OTA/1MB SPIFFS)" . (Critical Step!) - Upload: Connect ESP32 via USB and click Upload. - Setup: Once flashed, search for WiFi network FusedShaped3D Clock on your phone to configure your WiFi credentials.


Названия используются только для указания источника результата. Polyzon не аффилирован с перечисленными площадками.
Комментарии