
Бесплатно 
Bambu Lab 3D Printer Bed Scraper 2026 OEM Version
MakerWorld

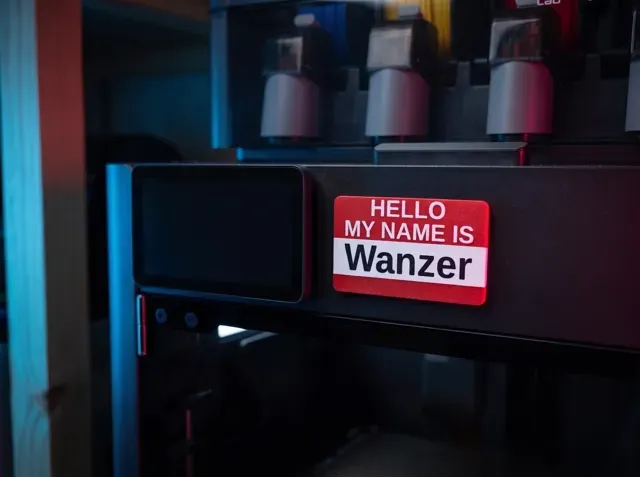
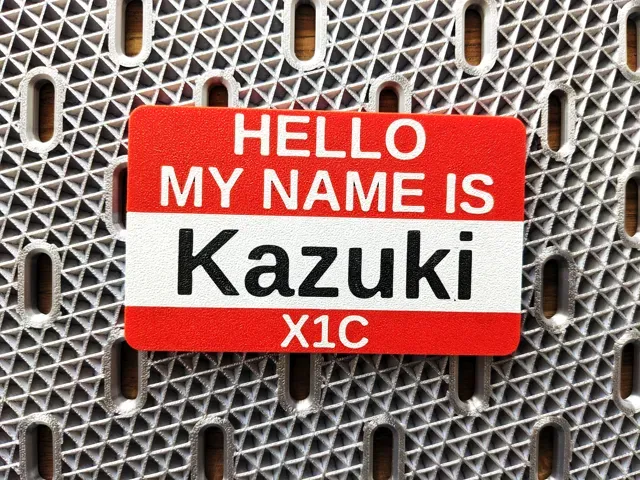
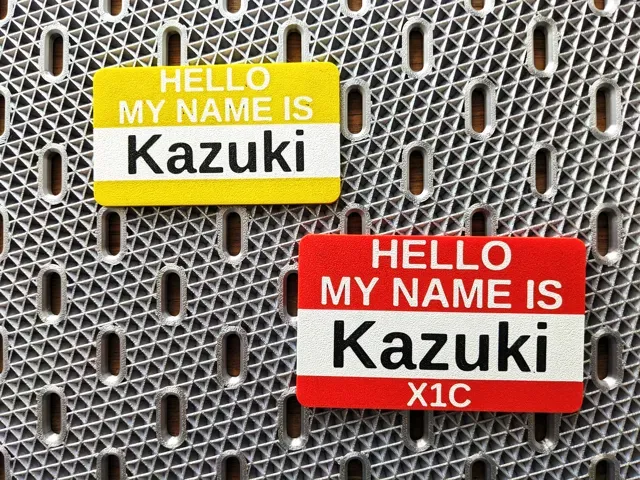
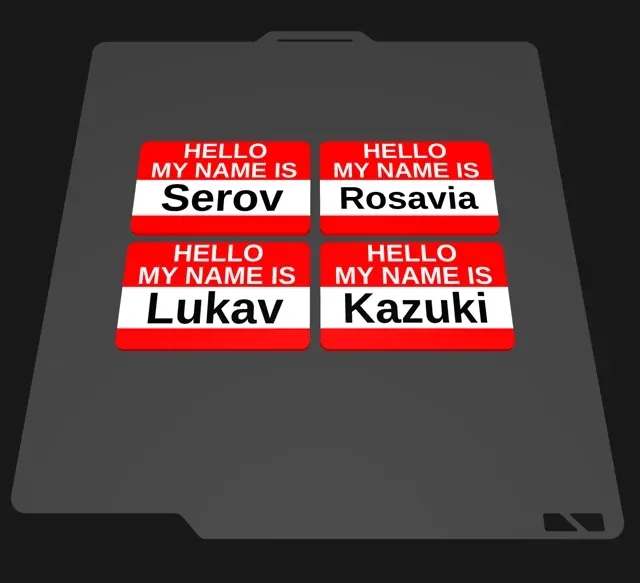
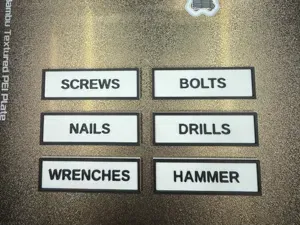
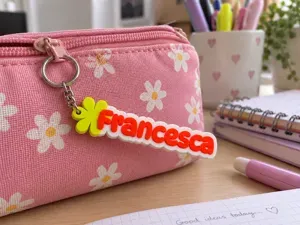
Type in your printer's name, pick your plate size, and print a name tag that mounts on your printer's front panel two ways: magnetic for easy removal and repositioning, or double sided tape for a permanent hold. No vinyl lettering either way, just a clean two tone plate with your printer's name flush inlaid in a second color.
This is a fully parametric generator built for Bambu Lab printers with AMS. Type your printer's name, pick a plate size preset to match your printer series, and the whole layout rescales itself automatically. Every field is optional and adjustable directly in the Customizer, no CAD software needed.
Key Features
- Generate up to 4 plates in one file, each with its own printer name and ID, laid out automatically in a 2x2 grid - Two mounting options in one design: magnetic pockets built in, or a flat back ready for tape - Type your printer's name, layout generates instantly - Optional third field for a custom ID or asset number - Three plate size presets or fully custom dimensions - Flush inlaid text, not raised, prints cleanly face up or face down with no supports or cantilever warnings - Color layout optimized to minimize AMS filament swaps - Font selectable directly in the Customizer
Customizer settings explained
- Printer name : the text shown in the middle field, for example "X1C" or "Serov" - ID label : optional text for the bottom field, for example an asset number or location tag. Leave it blank to show an empty field, or turn it off completely below - Show ID field : toggle the bottom field on or off. Independent from ID label, so you can show an empty field or hide it entirely - Plate size preset : H-series (90x55mm), A/P/S/X-series (80x45mm), or Custom. Pick the one that matches your printer, see sizing guide below. Click the generated plate in the preview to check its exact dimensions before printing - Custom plate width / height : only used when Plate size preset is set to Custom, ignored otherwise - font_name : pick any font installed in MakerWorld's Customizer, live preview included - Magnet diameter / Magnet height : match whatever magnets you have on hand. Plate thickness recalculates automatically to keep a safe wall around the magnet pocket. Setting Magnet height to 0 does not just remove the pockets, it also shrinks the whole plate to about 1mm thick, see Hints below before you do this - Color layer depth : how much of the top surface carries the second color and the text, default 1mm. This is the main lever for AMS filament swap count, lower it for faster prints with fewer color changes, details in Hints below - Plate gap : spacing between plates in the 2x2 grid, only matters if more than one plate is switched on - Printer name / ID label / Show ID field / Show Plate (repeated for plates 1 to 4): each plate has its own independent set of these four fields, grouped into separate collapsible sections in the Customizer
Which size to pick
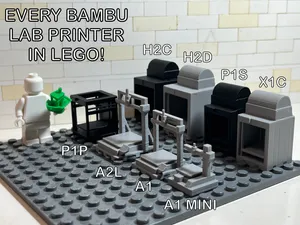
H-series printers have room for the larger 90x55mm plate. P1, X1, S1 and A-series printers need the smaller 80x45mm version to fit the front bar (A-series pending confirmation, let me know in the comments if it does not fit). If neither preset fits, switch Plate size preset to Custom and set your own width and height.
Printing multiple plates
This generator can output up to 4 plates at once, useful if you are labeling several printers in one go. Plate 1 is on by default, plates 2 to 4 are off until you switch them on. Each plate has its own Printer name, ID label and Show ID field, but they all share the same Size settings above, including Plate size preset, Magnet diameter and height, and Color layer depth, so make sure those fit every printer you are labeling in that batch. All active plates are arranged automatically in a 2x2 grid with Plate gap controlling the spacing between them. Color layer depth applies to every active plate at once, so this is where the AMS swap savings add up fastest when printing several plates in the same file. If you need different sizes for different printers, generate them in separate exports instead of mixing sizes in one batch.
Mounting: magnetic or tape
For the magnetic mount, print with the magnet pockets and press in 4x small round magnets matching your Magnet diameter and Magnet height settings (default 6x2mm). A drop of CA glue keeps them from working loose over time, optional but recommended if the plate gets handled often. For a permanent hold instead, skip the magnets entirely and stick the plate down with double sided tape, the back face is flat and ready for it either way. Magnetic works best if you want to move the tag between printers or take it off for cleaning, tape is the better call if it never needs to come off.
Hints
Export as 3MF , not STL. STL has no color information, so exporting as STL gives you a single-color plate with just the rounded outline, no text, no field colors, nothing usable. Always pick 3MF from the export options in the Customizer to keep the multi-color geometry intact.
Print face down (text side to the build plate) to avoid supports entirely, since the flush inlaid text sits level with the surface and there is nothing for a nozzle to bridge over. The Customizer preview always shows the plate face up by default so you can see what you generated, flip it in your slicer before printing.
Setting Magnet height to 0 does not just remove the magnet pockets, it also shrinks the entire plate thickness down to about 1mm, since plate thickness is calculated directly from the magnet depth plus a safety wall for the text inlay. You will also still get a faint 0.05mm dimple at whatever Magnet diameter is set to. If you want a clean flat back for tape only, set both Magnet diameter and Magnet height to 0 and expect a noticeably thinner, more flexible plate as a result. At this minimum thickness the plate has no hidden monolithic core left, the entire cross section becomes the color layer, so Color layer depth stops mattering for filament swaps here. The swap savings are strongest on the default, thicker magnetic setup, not on the thin tape-only version.
Color layer depth is the main lever for print speed and AMS wear if you tend to use magnets. Every layer below it prints in a single color with zero filament swaps, only the top layer range switches colors. Lowering it from the 1mm default cuts swap count further, useful if you are printing several plates in a row, just do not go below the text inlay depth or the second color will cut into the base layer.
Click directly on the generated plate in the Customizer or Bambu Studio preview to see its exact dimensions, handy for checking it fits your printer's front panel before you commit to a print.
If you print it, please leave a rating - it helps a lot.
Boost Me Hey! All my models are designed in the stolen hours between work, sleep, and pretending I'll go to bed early. Everything here is free - if something saved you a trip to the hardware store or just made your day a little easier, a boost is a great way to say thanks. Got questions, feedback, or a wild idea? Drop me a DM - I read everything, eventually. Thanks for stopping by!!
4 empty nameplates 90x55mm
4 empty nameplates 80x45mm



Названия используются только для указания источника результата. Polyzon не аффилирован с перечисленными площадками.