
Бесплатно 
AMS Purge Calibration V2
MakerWorld
One of the worst and most stressful things about using AMS is the amount of purged filament that gets wasted, without considering the additional time for each print.
So, I decided to create this simple file without having to make any modifications to the gcode or anything else.
The goal, therefore, is to minimize the amount of filament during each purge.
The only necessary tool is a caliper, but you can also use a simple ruler.
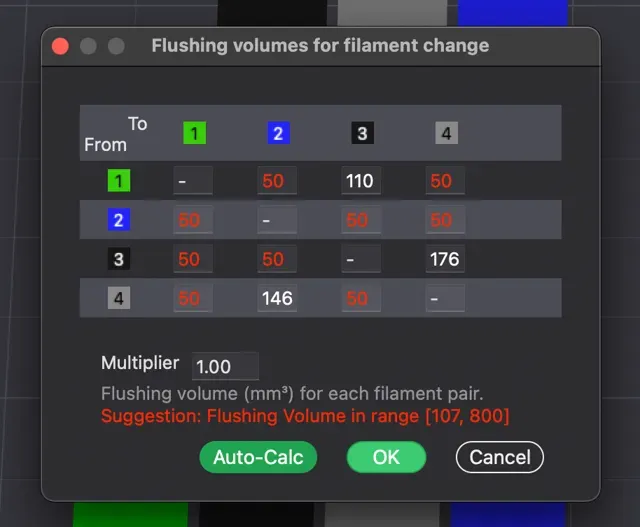
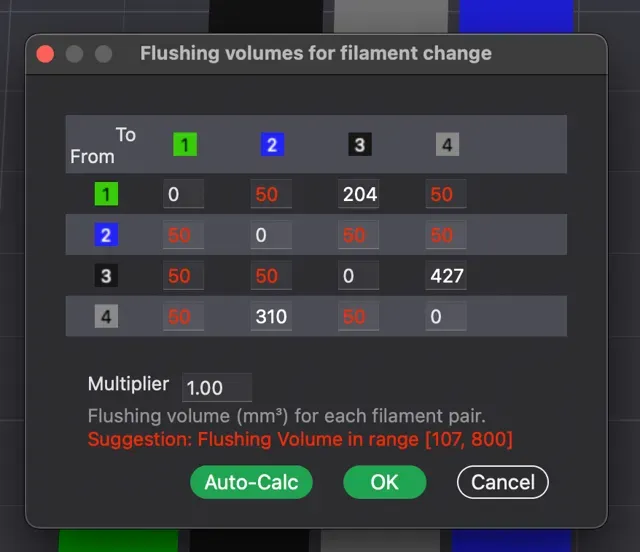
You start by setting all the purges to 50mm³
Once you've chosen which filament to calibrate, through the slicer, you set the correct sequence of chosen colors.
A simple example is the photo below.
All that's left to do is start the print and wait.
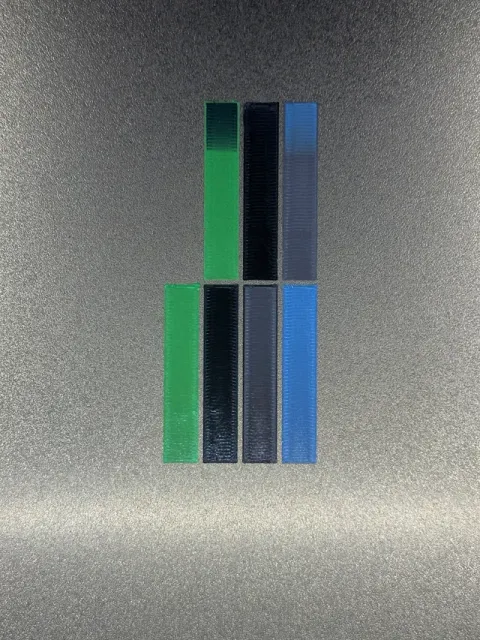
What you will see in front of you will be something like this.
At this point, our friend, the caliper or ruler (depending on how precise you want to be), comes into play.
What you need to measure is the moment when the color you've chosen stops blending with the previous color and finally takes on its clean color.
In this case, to transition from gray to blue, 48mm are needed.
Now, using a simple formula, you can calculate the final value to input into the slicer.
Each rectangle is exactly 100mm³.
So, you need to multiply the measured value by 2 and add it to the 50mm³ set previously.
Therefore:
Vdef = (Vmeasured x 2) + 50 = (48 x 2) + 50 = 146
Now, I will input 146mm³ to make the color change from gray to blue.
This process should be performed for all color changes and all possible combinations.
In case the first rectangle is not enough, the one below will complete the purge.
Just keep in mind that in the formula, in addition to the 50, the value of the first rectangle, which is 100, should also be included.
For example, as it happened to me for the change from black to gray, I measured the second rectangle, finding 13mm, and then I applied the formula again, adding the value of the first rectangle.
So, the calculation would be:
Vdef = (Vmeasured x 2) + 50 + 100 = (13 x 2) + 50 + 100 = 176
Therefore, I would input 176mm³ to facilitate the color change from black to gray.
Using this method allows you to significantly reduce the amount of purged filament without affecting the color you'll load afterward.
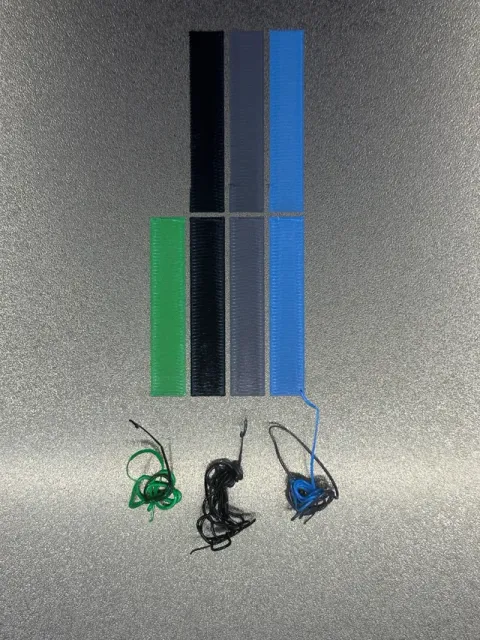
In the photo below, you can see the amount of filament that has been purged using this technique.
Comparing it with the slicer's automatic calculation, the difference is quite evident.
This technique allows you to reduce purging by 30% or even less, depending on how precise your measurements are.
BEFORE
AFTER
I hope this simple idea can help you, as it helped me, to reduce the amount of filament wasted during color changes.
Wishing everyone happy printing and lots of fun!
0.2mm layer, 2 walls, 15% infill
0.2mm layer, 2 walls, 15% infill
0.2mm layer, 2 walls, 15% infill
0.2mm layer, 2 walls, 15% infill
True 4 color calibration. Each color is calibrated against the other 3 Instructions for use
- Open the 3mf file in Bambu Studio - Assign your filaments - Color 1: Filament 1, 3, 5, 13 - Color 2: Filament 2, 7, 9 - Color 3: Filament 4, 8, 11 - Color 4: Filament 6, 10, 12 - Ensure flushing volumes are all set to 50 (I prefer to use 100) - Confirm the “first layer filament sequence” is customized and in order from 1 to 13 (refer to photo) - Slice and print. - Refer to the original description for measurements and calculations. - Be sure to adjust from 50 to 100 if you use my preference While the 3mf file is created for the X1C, you should be able to use this for any BL printer. Just change your printer and plates in the slicer, and then apply the following changes to your printers preset.
I use the “0.20mm Standard @BBL X1C” preset with the following changes
- Strength → Infill Direction to 0 - Others → Flush options both unchecked - Others → Prime Tower unchecked







Названия используются только для указания источника результата. Polyzon не аффилирован с перечисленными площадками.
Комментарии