
Бесплатно 
Vertical Hydroponic Tower (Revised & Optimized)
Creality Cloud
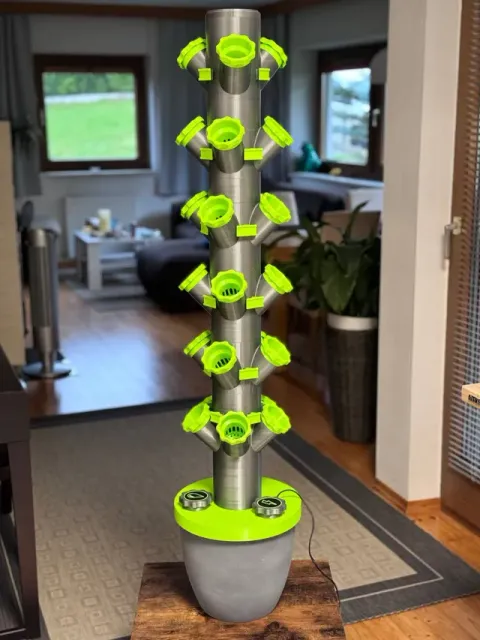
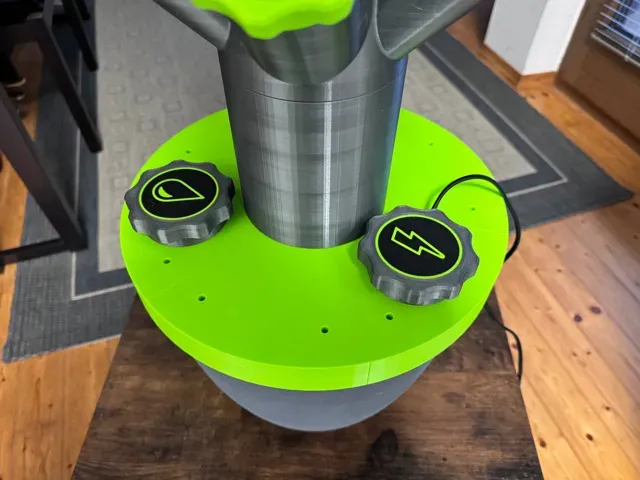
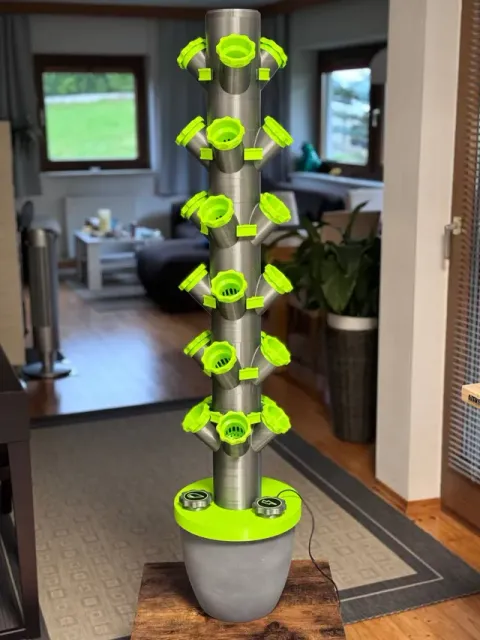
I downloaded the original from here, but some things were missing and the print settings were not quite to my taste.
Now that I have finished the tower, I would like to share my findings with you :)
In the original, all wall thicknesses were specified as 4 in the first print profile - but for most parts, 2 walls are easily sufficient. I would only recommend 4 wall thicknesses for the pot lid, as this is where the entire weight is borne.
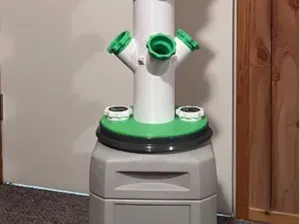
The file says that it fits a 24cm pot - but I bought one with a 28cm diameter at the DIY store. I simply went to the store with the printed lid and tried out where it would fit best. Snap fit :)
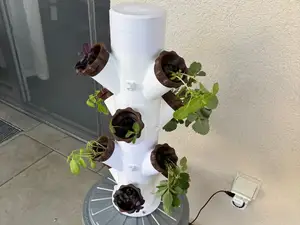
The original file contains the 4x-planter with ugly wrinkles (artifacts), I have added a nicer file here so that you don't have the same mistake as me :)
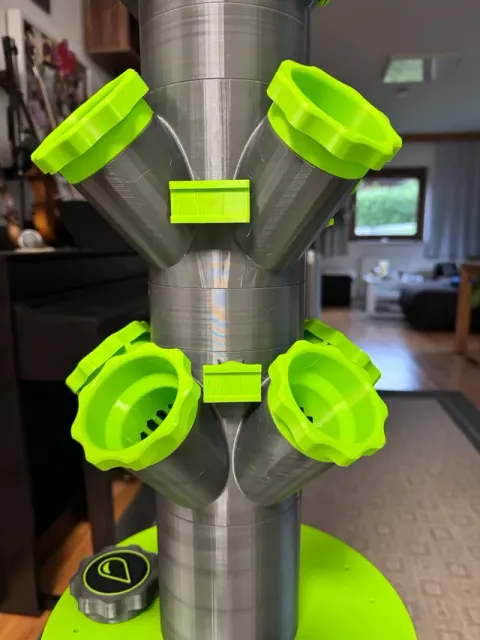
I also added more caps and made inlays for them. So you can print them in a different color and then just press them in, fits wonderfully. Otherwise a light tap with a small hammer.
If you print a 5x-planter, the name tags will no longer fit. They are simply too wide. That's why I drew new ones and added them to the file.
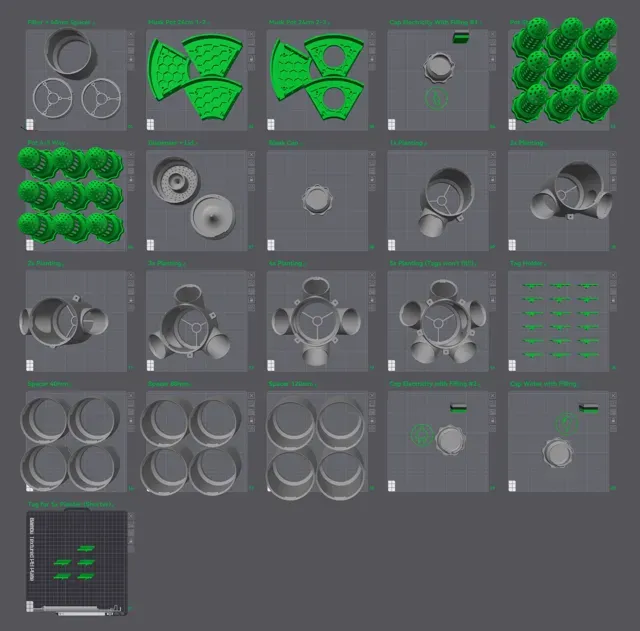
In addition, all the plates are filled up so that the printer is ideally occupied. If you need less, simply delete them.
My recommendation is (everything with 2 walls except the lid):
- 6x the 4x-planter - 1x 120 spacer at the bottom (filter inside) - 5x 40 spacers - 24x small pots (4-5 way, enough) - 1x Dispenser+Lid - Lid made of 6 parts (with 4 walls!) - 24x normal tag holders (if needed) - 1x Water Cap - 1x Energy Cap (your choice)
I am also happy to share my Amazon purchases with you here. I'm from Austria, so the links are from the German Amazon and not the American one, like most of the others :)
- Hydroponic fertilizer: https://amzn.eu/d/c3KQN7J - Hose with suitable connection: https://amzn.eu/d/9qxVJQI - Clay granules: https://amzn.eu/d/f0519D2 - Wire mesh (filter): https://amzn.eu/d/0PiNyBg - PH meter: https://amzn.eu/d/cB339wM - Cultivation rock wool: https://amzn.eu/d/fE1lfIV - Water pump (quiet): https://amzn.eu/d/jhNRJRJ You also need:
- 12 x cheese head screw (cylinder) M6 x 25mm (stainless steel) (pls drill out the printed holes!) - 12 x nut M6 (stainless steel) - 24 x washer M6 (stainless steel) - 6 x cheese head screw (cylinder) M3 x 16mm (stainless steel) - 6 x nut M3 (stainless steel) Edit 8.5.25: PLEASE be AWARE of potentially wrong translation!
I've created this site in english, if you are watching it in another language => SCREWS !
M6 x 25mm Cheese Head Screws are this! (German: Zylinderkopfschraube) NOT COUNTERSUNK!
I used just under 3.5 kg of filament in total. As you can see in the picture, I used 2kg of PETG Stainless Steel and 2kg of PETG Lime Green .
For example: If you print a 5x-planter with 4 walls instead of 2 walls, you'll need 320g instead of 219g of Filament. That makes a difference in terms of quantity :)
Happy Printing!
Edit 12.01.2025:
The User @user_3194745930 made a Lid for 30cm Pots (ACE Buckets) => File can be found here.
Would be nice if anyone could give some feedback :) Thanks
Edit 10.03.2025:
Because it is asked VERY FREQUENTLY :) FAQ
- The exact pot i‘ve bought: Scheurich Übertopf 920 Ø 28 cm x 25 cm Dark Stone But: Print the lid, assemble it and go to your local store and try it. There were 5 pots of this model, and it only fit on 3 of them. The other 2 pots were not exactly round :) - I recommend that you drill once through the M6 holes of the lid, because a printer usually never prints exactly round. Sometimes the screws are a little difficult to get through. So drill through the holes once with a 6 mm drill bit, then it can be screwed together very easily. Connect all 6 parts with two screws, 2 nuts and 4 washers each.
- The filter (with a mesh) is to be built and used as follows: The first print plate shows “Filter+Spacer”. Take these two rings, clamp the mesh between them and screw them together with the small M3 screws. Then punch a hole in the middle so that the hose can be fed through. This filter is inserted into the spacer, and this spacer forms the basis for the tower, so it goes right at the bottom, just above the lid. The filter is intended to protect the water - and therefore the pump - from any dirt that might fall from the plants above. I didn't take a picture of it myself, but some users ( Codybkid69 , BokuNoMaxi ) in the comments were kind enough to do so :) Pic#1 and Pic#2 Edit 29.07.2025:
I pinned a comment from @Baladauf , who found a few cheaper alternatives on Ali. To clarify: my shopping list is what I considered to be good and bought. That doesn't mean you have to buy exactly the same stuff :) Everyone is free to shop at the retailer of their choice.
Thanks @Baladauf !
Edit: 25.08.2020:
I pinned another comment from @dakater . He was kind enough to make a tower spacer for those whose tolerances are too large and whose tower is therefore a little unstable. Please let us know if you try it out :)
Edit: 31.05.2026
Added Assembly Instructions
0.2mm layer, 2 walls, 15% infill - Tags need support - Planter, Pots and Spacer needs a Brim - Pot Lid needs 4 Walls - Everything else needs 2 Walls
A1 Mini Version - 0.2mm layer, 2 walls, 15% infill
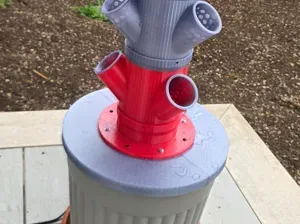
5 Gallon Bucket Compatible I created a 5 Gallon Bucket Petal since 5 Gallon buckets are easier to find.
It does not lock onto the 5 Gallon Bucket, the petals are expanded slightly to sit down on the bucket.
Enjoy
TPU Inlay, 0.2mm layer, 2 walls, 15% infill TPU Inlay for the Hydroponic Tower
Can be used for larger plants like tomatos or cucumber or others.
I have printed it in TPU 95A HF and it fits perfect.
Adaptor for any lid Adaptor to be used for lids. You can buy a bucket with lid / barrel and drill a hole and add this adaptor
The holes for screws are about 10mm. The entire diameter is about 150mm.
There is a step file, you can modify it if you need other values!
密封圈 内径102mm,外径115mm,厚度0.9mm
解决连接处松动,密封圈。
材料:TPU 95A
0.2mm layer, 2 walls, 15% infill
H2C PETG 0.2mm layer, 2 walls, 15% infill H2C Profile for PETG 0.2mm layer, 2 walls, 15% Gyroidinfill. Plates filled
Planting Pot with Hole: 0.2mm layer, 2 walls, 15% infill Standard Pot For 4-5-Way Planting Module with Hole: 0.2mm layer, 2 walls, 15% infill. Provides the roost easier access straight down into the reservoir. I saw some requests in the comments so thought to share. Hope it helps.
Vase diameter 24 cm CREATO:
Base dper vasi di 24cm
Anello per evitare di rompere il tubo con la rete metallica
NOTA BENE
su A1 mini va diviso l'oggetto e stampato pezzo per pezzo invece che intero
Fix 120 mm spacer - acqua che esce dal secchio Questo profilo di stampa permette di sostituire il primo distanziale della torre con questa versione con una lunghezza estesa che permette di fargli oltrepassare il coperchio del secchio evitando che l'acqua esca dalle fessure del coperchio. Inoltre è stata aggiunta anche una piccola scanalatura dove inserire il tubo di silicone quando si fa manutenzione poggiando l'intera torre per terra senza che il tubo si pieghi.
Il profilo era già stato caricato l'anno scorso ma poi cancellato dato che non aveva una foto della stampa effettiva. Lo ricarico sperando che possa servire a tutti.
Adapter Schlauch/Pumpe Bei meiner Tülle geht es um das Montieren von diesem Schlauch:
https://www.amazon.de/dp/B0CMTNZBQT?ref=ppx_yo2ov_dt_b_fed_asin_title&th=1
Auf die Tülle dieser Pumpe
https://www.amazon.de/dp/B014MB5RQ4?ref=ppx_yo2ov_dt_b_fed_asin_title&th=1
Es passt nicht.
Mit der von mir konstruierten Tülle ist das kein Problem mehr. Der schlauch passt auf die Tülle und die Tülle an die Pumpe. Es kann die mitgelieferte Überwurfmutter verwendet werden.
Keine Stützden erforderlich. Getestet auf einen A1 mini 0,4mm und Supertack Coolplate.
07.07.25 Verbesserte Version hochgeladen.
Hydrophonice tower to 6L bucket screw-on lid This gives the opportunity to screw a store bought 6L bucket to the bottem of the tower, filling this with water and adding the pump makes it sturdy to hold the tower upright. No need to print several parts and connect them together using bolts.
The bucket I bought: LINK
The bucket is called: CurTec 6L KPE bucket
0.12mm layer, 2 walls, 15% infill A lightweight cover for unused planting ports in a hydroponic tower. It helps prevent water splashes and can be easily removed using the two recessed finger openings and the central grip. Includes both happy and grumpy face versions.

Названия используются только для указания источника результата. Polyzon не аффилирован с перечисленными площадками.
Комментарии