
Бесплатно 
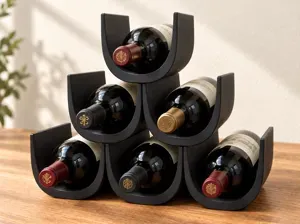
wine bottle gift box
MakerWorld
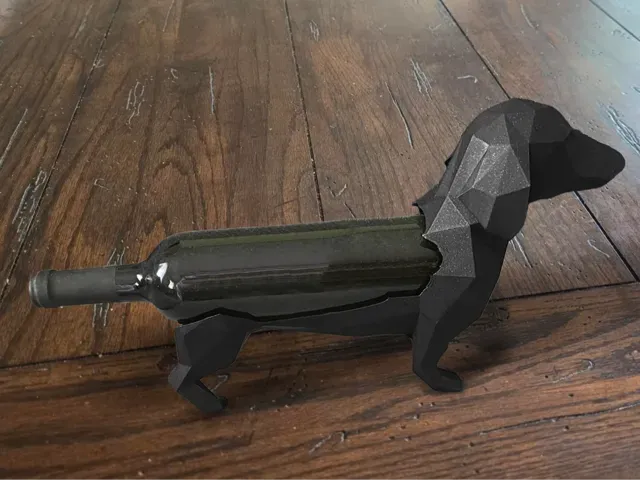
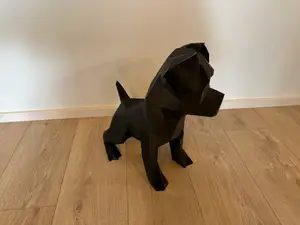
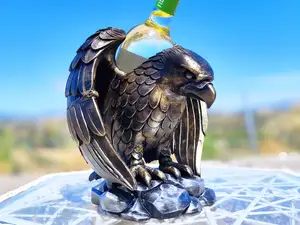
This unique dog-shaped wine bottle holder is not just a stylish décor piece, but also the result of extensive effort and detailed modifications to ensure it could be 3D printed effectively. Remixed off the original design, significant time was spent adjusting and refining both the model and the print profile to create a structurally sound and visually appealing product. The holder securely accommodates a standard wine bottle, making it a perfect addition to your bar or kitchen. Whether for dog lovers or wine enthusiasts, this piece blends art with practicality.
Important Notes for Success:
- A clean build plate is essential for a smooth print, so make sure to prepare your surface properly. - I recommend using either build plate glue , or the Bambu SuperTack plate . - A well-calibrated printer and filament are crucial to achieve the best results. - Using glue, such as Epoxy or CA Glue (super glue) , for assembly is strongly recommended to ensure added strength and long-term stability. If you are not as confident in your printer's reliability or are not having success with the default profile, try the “Easier Print” profile. In it, the most difficult to print parts, have been slightly flattened at the base, increasing surface area with the build plate.
Print Optimizations:
The angles of cuts and print orientation were thoughtfully designed to ensure optimal printability of the design. In addition, by leveraging variable layer height, print times were reduced by several hours while also improving resolution in key areas, striking the perfect balance between strength and speed.
Assembly Instructions:
The pieces should be assembled in the order they are printed:
- Part A (Head) slots into Part B (Front Legs). These are both included on the first plate. - Part C (Hind Legs) then connects to the combined A+B assembly.
Updates:
2024-10-16:
- Reinforced supporting structures for the hind legs. 2024-11-10:
- Removed supports from the front legs by slightly shrinking the layer height for the area in question. - Changed support type of the hind legs to make removal easier. - Switched to adaptive cubic infill shortening print time by about 4.5 hours. 2024-12-17:
- Slowed down print speeds dramatically to improve first layer adhesion, surface finish, and print success rate. This also reduces vibrations during the print. - Implemented upgraded custom supports throughout. - Updated variable layer heights. - Updated surface pattern to concentric further reducing vibrations on the upper-most layers, as well as improving surface finish. - Introduced a new “Easier Print” profile. In it, the most difficult to print parts, have been slightly flattened at the base, increasing surface area with the build plate.
0.16mm (variable) layer, 2 walls, 15% infill 2024-10-16:
- Reinforced supporting structures for the hind legs.
2024-11-10:
- Removed supports from the front legs by slightly shrinking the layer height for the area in question.
- Changed support type of the hind legs to make removal easier.
- Switched to adaptive cubic infill shortening print time by about 4.5 hours.
2024-12-17:
- Slowed down print speeds dramatically to improve first layer adhesion, surface finish, and print success rate. This also reduces vibrations during the print.
- Implemented upgraded custom supports throughout.
- Updated variable layer heights.
- Updated surface pattern to concentric further reducing vibrations on the upper-most layers, as well as improving surface finish.
Easier Print (see description) In this profile, the most difficult to print parts, have been slightly flattened at the base , increasing surface area with the build plate .
0.16mm (variable) layer, 2 walls, 15% infill
0.16mm layer, 4 walls, 10% infill I printed the original model, but the supports were too difficult to remove.
So, I made some adjustments, but during the second attempt, I accidentally broke one of the legs.
In my opinion, wall count adds more strength than infill. So, I made a second adjustment: I increased the number of walls and lowered the infill percentage.
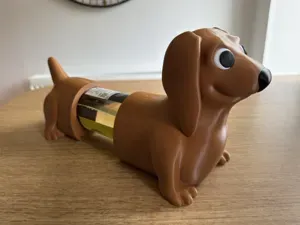
I read through the comments and realized that I wasn’t the only one who encountered these issues. Therefore, I decided to upload my print profile, which produced a successful result for me.


Названия используются только для указания источника результата. Polyzon не аффилирован с перечисленными площадками.