
Бесплатно 
Nextruder Hotend Max Flow Benchmark Test for Prusa XL, MK4, MK3.5, MK3.9, Mini
Printables
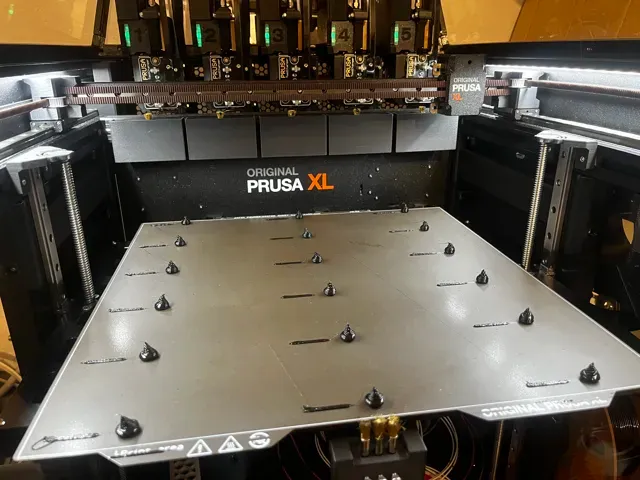
Use this to find out the maximum flow rate of your hotend to print faster.
The test was created with the help of this website: https://hotend-flow-tester.netlify.app
Thanks also to @CNCKitchen
Here you will find further information and EXCEL table examples to better illustrate the test results: https://github.com/CNCKitchen/ExtrusionSystemBenchmark
Provided Gcode for the Prusa XL:
I have provided a few different Gcodes for PLA & PETG. The gcodes were created in PrusaSlicer 2.8.1 with the Prusa XL 5TH and the website version 0.4.6. The text output on the display and the print time do not match. Simply ignore it. The test takes about 20 minutes. The desired print head can be selected at the beginning.
The Gcode can be modified using a text editor. I have identified and described the important parts. The temperature can then be easily adjusted. The flow rate can also be adjusted. To do this, multiply the desired flow rate by 1.247.
For example: 14mm3/s * 1.247 = 17.458 ≈ 17.46 (rounded to two decimal places) Then change this command for the desired block. "G1 Z10.5 E200 F17.46 ; Extrude"
You can also easily generate your gcode via the website for MK4, MK3.5, MK3.9, Mini. Example for the Prusa XL with PLA. Temperature of 220c, 210c, 200c and a flow rate of 14mm3/s - 24mm3/s with an offset of 2mm3/s each
If the gcode from the website doesn't work directly on the printer, it must be adjusted first. Open PrusaSlicer and create a box by right-clicking on the print plate and then selecting Add shape --> Box. Now change the size in the bottom right of the slicer. First click on the lock symbol to be able to define the size independently. Set the size of your print bed for X and Y. Example for Prusa XL: X=360 Y=360 Z=0.2mm. Deactivate the wipe tower if necessary. If it's too big, subtract 5mm from X and Y. Select a profile with 0.20mm. You need to enable expert mode in PrusaSlicer. Select the desired filament: The temperature should be set to the highest temperature used in the test. Cooling should be off. Under Advanced, the value "Max volumetric speed" must be set to at least the highest value in the test or you can deactivate it with the value “0”. Under the Printers tab, the entry for "G-code thumbnails" should be deleted. Also deactivate the 3 boxes below.
OR just use the 3mf file for your printer ;)
Now you can export the Gcode. Open it with a text editor.
Now search for the command "M107" using "control f". For Prusa Mini, MK3.5: Delete everything between the first M107 command and the second M107 command. Then paste the entire gcode from the website there. For Prusa XL, MK3.9, MK4: Delete everything between the second M107 command (after "M142 S36 ; set heatbreak target temp") and the third M107 command. Then paste the entire gcode from the website there.
Now simply save the GCODE and print. IMPORTANT: Do not let the printer out of your sight at the beginning and follow the first movements closely. If something does not happen as intended, reset the printer immediately.
Now you can weigh all the poops with a precision scale. Enter the values into the EXCEL table if you want. Everything is fine as long as the value does not fall below 0.55g. This means under-extrusion. You can also hear this when extruding from the clicking noises.
THATS IT :)
NEXTRUDER NOZZLE FLOW COMPARISON:
I compared 3 different nozzles to determine the maximum flow rate in mm3/s. I never thought the values would be so close. Of course, more can be achieved by increasing the temperature. It would also be interesting to compare this with the Nextruder CHT nozzles. But I'm not a fan of CHT. I think they clog up more easily and are harder to clean.
I will probably only be able to say how the SiC nozzle performs in a long-term damage test in one to two years. However, I already have a Pheatus nozzle made of tungsten carbide on my Prusa mk3, which I have used a lot for the last two years, and it is still good today. And with it I can print at 10 degrees less temperature than with the Nozzle X from E3D.
The Phaetus SiC Nextruder nozzle only costs around 20€. This means that it is not only better in terms of thermal conductivity and wear resistance but also significantly cheaper. You can buy the nozzle here (affiliate link): https://s.click.aliexpress.com/e/_DDh6ZFJ
The filament I used is from Sunlu and is called PLA Meta. It's for speed printing. Normally this is printed at 185-190c. With normal PLA you would need a higher temperature to achieve the same flow rate.






Названия используются только для указания источника результата. Polyzon не аффилирован с перечисленными площадками.
Комментарии 0
Загружаем комментарии…