
Бесплатно 
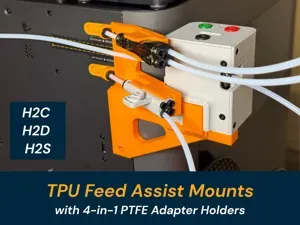
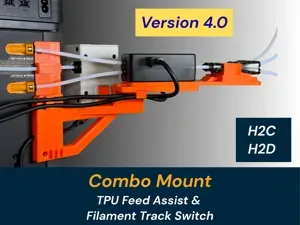
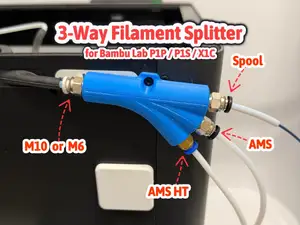
V3 Filament Track Switch & TPU Feed Assist Mounts
MakerWorld
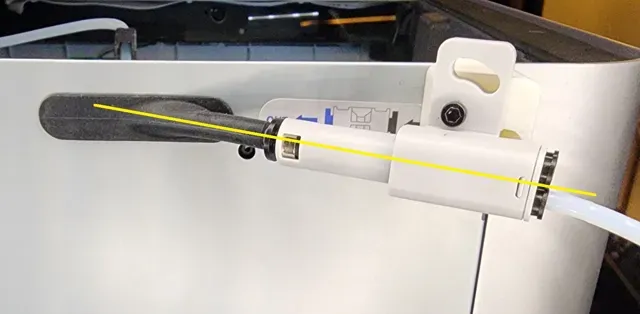
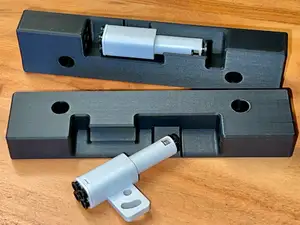
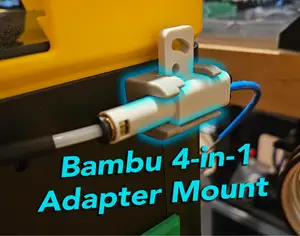
Mounting block for the Bambu 4-in-1 PTFE Adapter
This is a tighter fitment to the 4-in-1 PTFE Adapter of my previously released 4-in-1 PTFE Adapter mount . See below for a list of the changes.
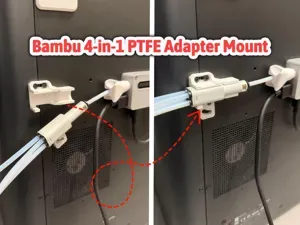
One of the best accessories for the Bambu X1C and P1 series printers is the Bambu 4-in-1 PTFE Adapter !
If you own an AMS, you want one of these! They are very inexpensive and better than the printable versions:
- This is the 4-in-1 PTFE Adapter from the US store: https://us.store.bambulab.com/products/bambu-4-in-1-ptfe-adapter - 4-in-1 PTFE Adapter from the Global store: https://store.bambulab.com/products/bambu-4-in-1-ptfe-adapter I find the 4-in-1 PTFE Adapter very useful!
If you have an AMS, and sometimes use an external filament spool, this adapter prevents you from forgetting to reconnect the AMS to your printer and having filament spill all over the floor and rear of your printer the next time you use your AMS!
Yes, I've done this several times!
Always leaving your AMS connected to your printer using this adapter solves this problem, while still allowing an external spool of filament to be easily used when needed, all without constantly disconnecting and re-connecting the PTFE tubes!
I really think Bambu should have included this part with each AMS!
However, there is a flaw in this part if mounted directly on your printer as designed by Bambu!
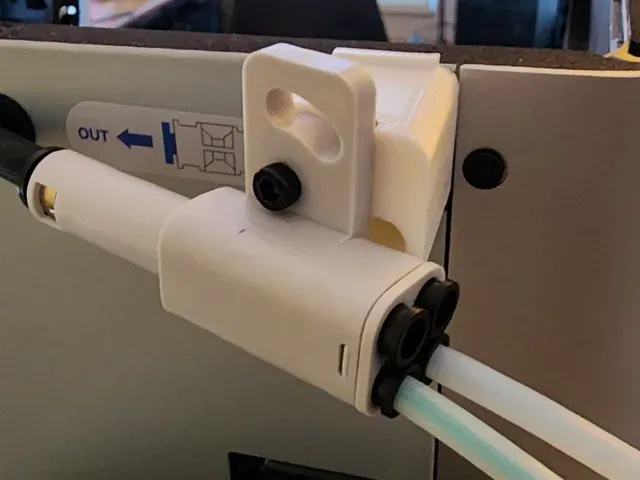
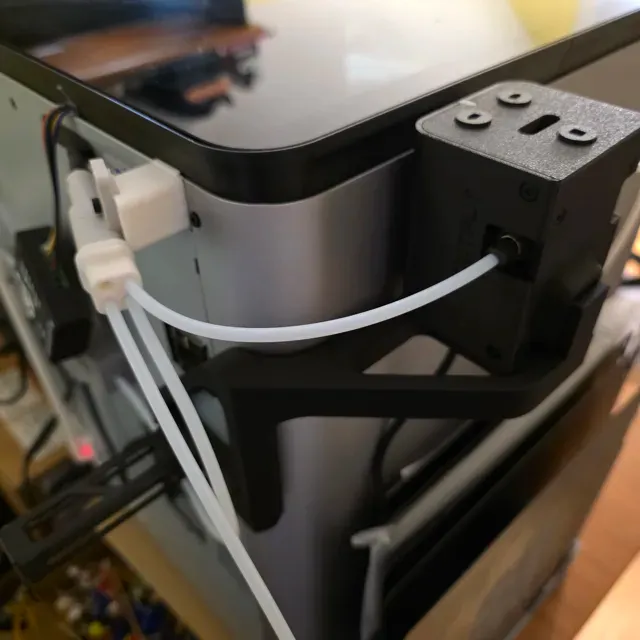
- Mounting it directly on the rear of the X1C (and the P1S) introduces more curves into the PTFE path. - Every extra curve in the PTFE tube adds friction and therefore the possibility of filament feed or retraction errors when using the AMS. - Letting the adapter dangle in free air almost solves some of the friction issues, but not entirely. It can also affect repeatability as the amount of friction can change from time to time as the part moves around. Here's a photo of the 4-in-1 PTFE Adapter with my improved mount fastened to the rear of an X1C printer.
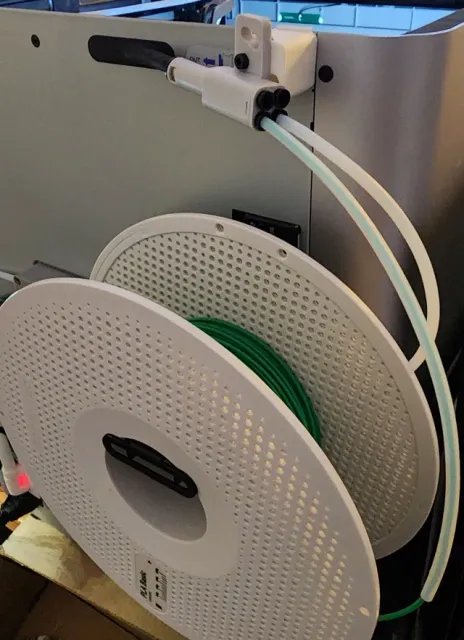
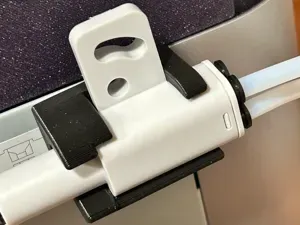
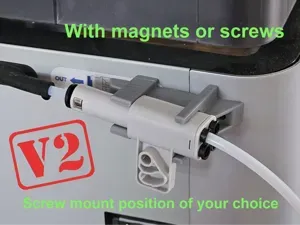
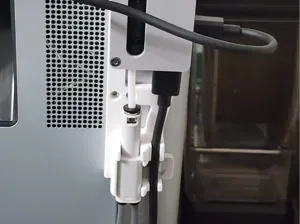
The Bambu 4-in-1 PTFE Adapter mounted to the rear of an X1C using this m mount. Also shown are two PTFE tubes, one going to the AMS buffer and the other can be left connected for use with an External Spool when needed. This mount solves two issues while being a simple design:
- This mount will stop the 4-in-1 PTFE Adapter from loosely flopping around. - This mount will hold the 4-in-1 PTFE Adapter at an optimum angle to minimize chances of internal friction of your filament caused by flexing the PTFE tube while entering the printer. Changes from the original version:
I read all the reviews and comments made on my original mount. Although it seems to be working well for almost everyone, there were a few suggestions and requests for some minor changes. I tried to incorporate every request:
- Adjusted all angles and dimensions to more perfectly minimize any possible friction to the filament path. - Added a cutout for the bottom of the 4-in-1 PTFE Adapter to allow it to sit flat on the mount, while minimizing the chance of it rotating out of position, without the need for a second screw. - Made the clearance hole for the Socket Head mounting screw a bit larger as some screws have a slightly larger head than others. - Enlarged the clearance hole to allow the mounting screw to easily drop into position. - Changed the preferred screws to be M3x12mm for mounting the Adapter to the Mounting block, instead of M3x8. Alternatively, you can use M3x8, or M3x10, if you use a shorter screw, don't over tighten it so as not to strip the Mounting block threads. - Lengthened the internal space for the Adapter mounting screw to allow the use of a longer screw. - Printed with finer layer lines to enhance the printed threads for the self-threading mount screw to allow for easier assembly. - Changed the order of the walls to allow the dimensions to be more accurate. - Increased the number of walls to make it stronger to allow self-tapping screws to be used instead of machine screws. - Added a print profile to allow use of a heat set brass insert nut for those that may prefer this. (note that I wouldn't bother doing this myself, but I offer it here for those that may prefer to use a threaded insert).
NOTE: If you have already printed and are using the original version, there is no need to print this new version, but this V2 mount does fit a bit cleaner, and very slightly improves the angles of the PTFE tubing as it enters into the printer, it should be better. I do recommend that this V2 version be used instead if you are trying to decide which one to print for the first time.
Printing Instructions:
You can print this out of any material. I used PLA. PETG also works. This part never sees any high temperatures, nor stress, so there is no need to worry about heat affecting this. There is no need to worry about the strength of the part. My print profiles are set to gyroid, so it should print safely on any Bambu printer. This V2 uses one easy to remove support.
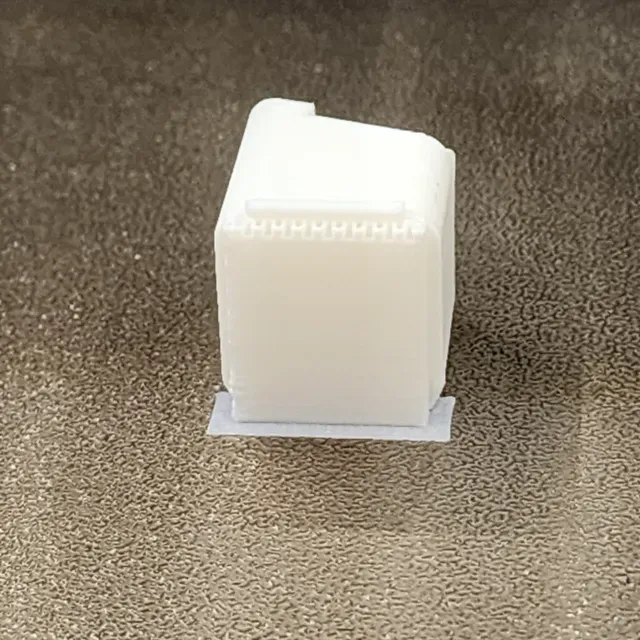
4-in-1 PTFE Adapter mount as printed on the gold Textured PEI build plate Print as shown on the build plate. You can use your favorite build plate. It doesn't really affect this mount. Remove the support after the print is completed.
Hardware needed:
In addition to printing this mount, you will need one M3 x 8 and one M3 x 12 machine screws . They can be Button head , or Cap head type of machine screws. Please do not try to use Flat Head screws , they will be the wrong length, and their head may not fit! Note: If you have M3x10 machines screws, they may work. but be careful not to use too much torque when tightening them.
If you decide to build the version with the heat set insert version, you will need a M3 heat set nut of almost any length. I used an M3x4mm head insert as that is what I had on hand.
You may alternately use one of the left-over shipping screws from your original Bambu shipment if you still have them. The left-over screw is ONLY to be used to mount the Bambu 4-in-1 PTFE adapter to this mount . Don't try to use one of these screws to connect this mount to your printer as this requires an M3 machine screw!
Assembly and installation:
Step one:
Note: If you are going to try to use a self-tapping screw here, please use this pre-threading procedure with the self-tapping screw.
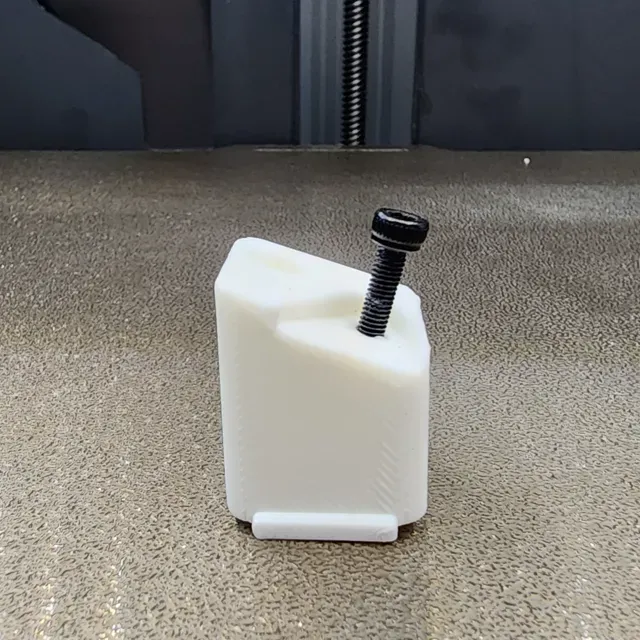
The first step is pre-thread one of your M3 x 12 machine screws into the mounting block as shown. Be sure to try to thread it in perpendicular to the sloped surface as shown. This is to pre-form the threads to allow for easy installation in a later step. The hole is only 12mm deep, so don't try too long of a screw. There are threads in this hole already to help you, but simply pre-threading in the machine screw at this step is easy to do. There may be some friction, and it may seem that the machine screw does not thread in easily. This is by design and does not affect the use of the mount but is to keep the screw secure and not too loose.
Pre-install important step: Pre-thread a M3x10 (or M3x10) machine screw perpendicular to the sloped surface. Thread it all the way in to pre-form the threads, but up to a maximum of 12mm deep.
The hole is purposely an angle to the sides of mount itself, but the screw must be perpendicular to the sloped surface . The hole is pre-threaded, but you may need to use a bit of pressure to pre-start the M3 screw due to variances of filament and printer calibration settings. This is designed so that the screw will hold tight. Once the head of the screw touches the surface of the mount, stop ! Don't over tighten the screw and strip the threads of the hole .
Alternate Step one for use with a heat-set insert nut:
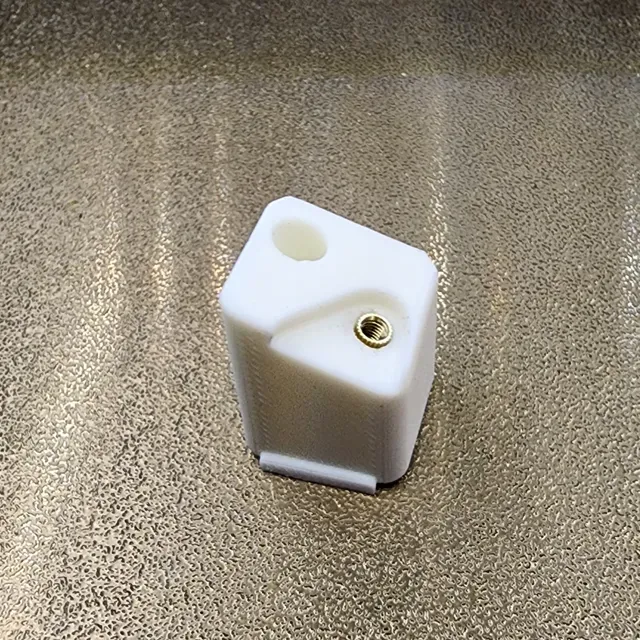
If you are using the heat-set insert nut, insert it now into the mount. I suggest that you thread a screw into it, and then using some heat from a soldering iron, heat it and press it flush into the mount, be careful to watch the angle of insertion so the screw is perpendicular to the sloped surface. It may also be installed by heating it with a flame, but I don't use this method. Don't burn your fingers!
Heat set threaded insert installed flush into the mount. Step two:
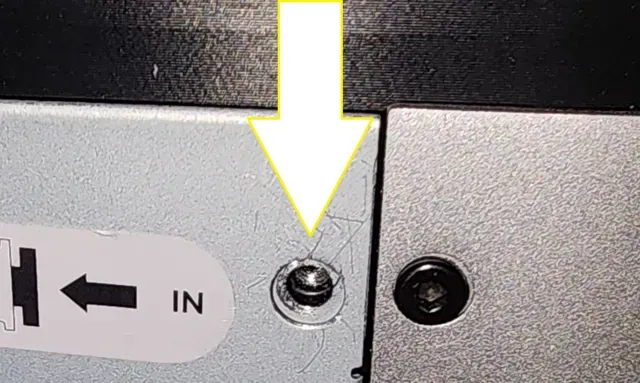
Remove one screw from the top right-hand corner of the rear panel from your printer. Save this screw for future use if you ever need to remove this mount.
Arrow points to the screw to remove from the top right hand rear corner of your printer.
Step three:
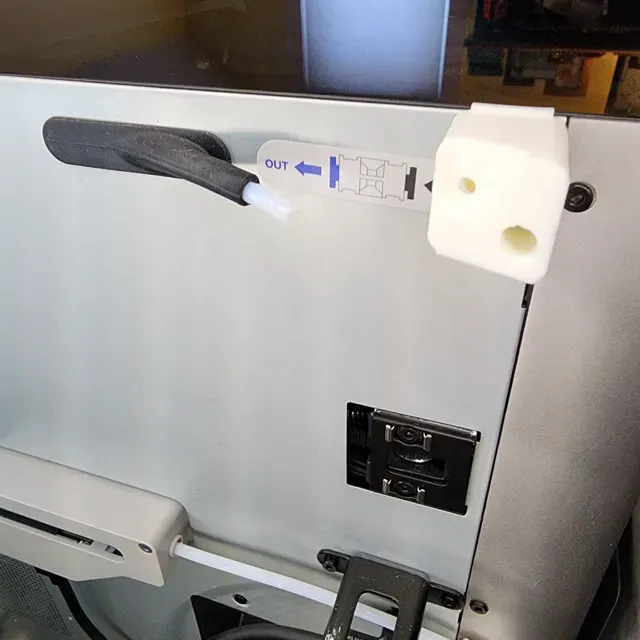
Using one M3x8 machine screw, mount this 4-in-1 PTFE Adapter Mount to your printer. There is a small lip on top of the mount which should slightly catch the top of the rear panel of your printer. It should not interfere with any riser that you may be using. Its only purpose is only to help keep the mount square and to not rotate. If you are using a riser that interferes with this lip, you can simply slice if off with a knife blade (or your metal bed scraper blade). Note that it's possible to use an M3x10 or even an M3x12 machine screw here.
4-in-1 PTFE Adapter Mount installed on the printer with one M3x12 machine screw. NOTE: Don't use a left-over shipping screw here, this must be a M3x12 machine screw! Step four:
The final step is to connect the 4-in-1 PTFE Adapter to this mounting block using one M3x12 machine screw (or a similar sized self-tapping M3 screw) into the hole which you pre-threaded in step one. Alternatively, this is where you can use one of the left-over shipping screws as it's not important to use a machine screw in this hole. You may also use M3x10 or M3x8 screws here but be very careful not to over tighten the screws so as not to strip the threads.
Please look at the mount and be sure it's square to the top of your printer. Then also look straight on from the back of the printer and be sure that the 4-in-1 PTFE Adapter is in line with the PTFE tube coming out of the rear of the printer. You want this to be straight and the mount has enough space to allow you to slightly pivot the adapter as needed.
Use one M3x12 machine screw to install the 4-in-1 PTFE Adapter to the mount into the pre-threaded hole on the mount. Don't over tighten it and strip the threads. Alternatively, one of your screws left over from the shipping container of your printer or self-tapping screw may be used here. Don't over tighten the screw. This is not a high stress area.
0.16mm layer, 4 walls, 15% infill, gyroid, wall order Fine tuned printing profile for accurate results! If you have scale or sizing issues, be sure to calibrate your filament.
Heat Set threaded insert 0.16mm layer, gyroid, wall order ONLY Print this if you want to use a Heat-set threaded insert! I don't think this is needed, but some users may prefer to use a threaded insert instead of tapping the mount screw into the plastic.
Otherwise, it's the same as the other main print profile.
Названия используются только для указания источника результата. Polyzon не аффилирован с перечисленными площадками.