
Бесплатно 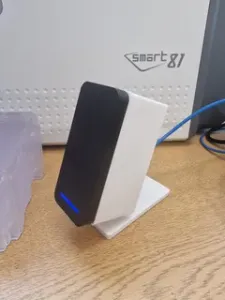
Ubiquiti UniFi UA-G2 / UA-G3 Reader Table Stand
Printables

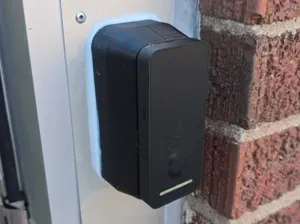
UK Faceplate mount for UniFi Access G2 and G3 Readers:
Ah, Ubiquiti… My favourite tech company. Almost perfect in every way, except for international compatibility with mounting options.
We've started using UniFi Access recently, and originally had to purchase the backboxes for the G2 and G3 readers .
These work fine, however, aren't standard UK backboxes.
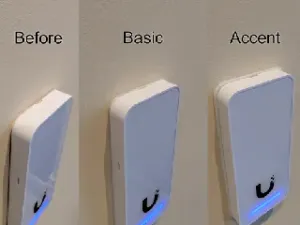
NB: The UA-G2/UA-G3 is slightly taller than a standard UK faceplate, and so will sit slightly proud at the top and bottom.
The idea:
Make a UK-compatible faceplate, with mounting holes for the included aluminium bracket.
The implementation:
Design
I took the base faceplate from @CFairhurst and imported into Tinkercad .
I filled in the original speaker plug mounting holes, and imported a scale scan ( attached in other files section ) of the backbox.
In hindsight, I could have used one of the included templates…
I then created mounting holes at the appropriate locations, and a cutout for the box to sit in when installed.
Printing
I printed the design in PETG, but PLA will probably work for most applications.
0.2mm layer height, 100% infill (otherwise you'll have just the one hollow layer - negligible change to print speed).
Face down; No supports.
Finishing
Use a deburring tool to remove the infill from the mount screw holes. They don't need to look perfect, as they'll mostly be covered by screws.
Installation:
Requirements:
- Printed Faceplate - 2x UK Electrical Screws (3.5x25mm). - If you have spares from an old faceplate or socket, use those! - UA-G2/UA-G3 Reader Aluminium mount (part “C” on product installation guide ). - 3x M2.5 x 5mm Machine Screws - 3x M2.5 Nuts Optionally, 3x M2.5 Washers, if you would like to use them.
Things to consider before installing:
- The aluminium plate is very easy to break if you apply too much force when mounting it. - Whilst the reader is IP55-Rated, the faceplate is not weather proof . - Proceed with caution if mounting outdoors, or in other areas where the reader may become exposed to water. Fitting the mount to the faceplate:
- Gently press the mount into position through the faceplate. - Pass M2.5 machine screws through the mount and faceplate. - Secure the screws in place using nuts on the rear side. Use washers if desired. Fitting the mount to the backbox
- Align the faceplate and backbox, passing the network cable through the faceplate and mount. - Install the screws, tightening until the box is secured.
Improvements for a 2nd Revision:
Threaded Inserts
I'd like to do a version with heat-set threaded inserts for the G2/G3 Reader plate, so that you can use the original mounting screws.
This should be fairly easy to achieve (thicken the faceplate around the screw holes, and increase diameter to match the depth of the inserts).
Height Match
As the G2/G3 Reader is slightly taller than a UK Backbox, it sits a little proud of the faceplate. A quick fix for this would be to extend the faceplate to match the height of the reader.
This would look a little strange when next to a typical faceplate, but no more so than when the reader is installed on one of these.
Rounded corners
I'd quite like to have the plate use rounded corners for the aluminium mount. This is purely cosmetic (and indeed, hidden by the reader) so is not a high priority.
If I get around to it, I'll update this post with any improvements I make.



Названия используются только для указания источника результата. Polyzon не аффилирован с перечисленными площадками.