
Бесплатно 
LED Light Bar Prusa i3 MK2/MK3
Printables
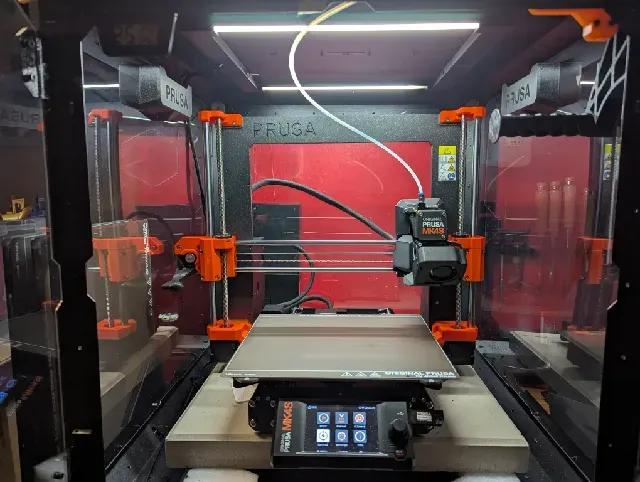


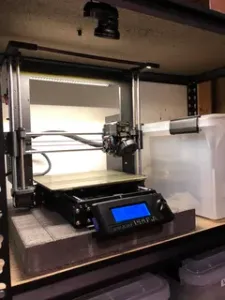
This LED light bar system is designed for my Prusa Enclosure and is compatible with any other 3D printer enclosure. The mount attaches to the ceiling of the enclosure using magnets, providing a stable and convenient lighting solution. The design accommodates a 9x17mm aluminium U-channel and features a hollow interior for routing wires down the back of the printer frame, ensuring a clean and organised appearance. Additionally, the mount includes an opening for integrating a power switch.
The LED strips can be powered directly from the printer’s power supply and are compatible with standard 24V LED strips .
Features
- Clean, minimalist design for a tidy enclosure setup. - Magnetic attachment for easy installation and removal. - Integrated wire management for an uncluttered look. - Option to include a power switch for added functionality. This design happens to use the same hardware as @In3DSpace LED Light Bar , who provided clear assembly instructions for the LED strips: https://www.printables.com/model/493459-led-light-bar-prusa-mk4 .
Print Instructions
Recommended Print Settings:
- Layer Height : 0.20mm - Infill : 15% (Gyroid recommended) - Supports : Snug, Z-top distance 0.23 on openings - Files : Open 3MF files in PrusaSlicer for preconfigured settings Required Hardware:
- Aluminium U-channel (9x17mm) - 24V LED strip (compatible with MK3 / MK4 / MK4S) - Wires - Magnets (8x3 mm) Optional:
- Switch (e.g., a 3-pin switch to toggle between warm and cool white) - Cable organisers Hardware Kit (Example):
- Hardware Kit on AliExpress ← No affiliation Tools:
- Soldering tools - Cyanolite glue (or other adhesive as needed)
Notes & Tips
- Ensure the aluminium U-channel and LED strip fit snugly into the mounts. - Test your wiring before final assembly to avoid rework. - For added functionality, consider using a switch to toggle between lighting modes. - Use cable organisers to further tidy the wiring for a professional finish.
Disclaimer
Working with electrical components can be hazardous. Ensure proper precautions are taken, such as disconnecting power sources while assembling or modifying the LED system. If you are unfamiliar with electrical wiring, consult a professional or refer to detailed guides before proceeding. The creator of this model assumes no responsibility for any damage or injury caused during assembly or use.







Названия используются только для указания источника результата. Polyzon не аффилирован с перечисленными площадками.
Комментарии