
Бесплатно 
1 Glass + 2 Spring Steel Sheet Buildplate Bed Plate Holder Stand 235mm for Creality K1 and Ender 3/Pro/Neo/v2/v3/S1/5 - Elegoo Neptune 2/2S/2D, 3/Pro, 4/Pro - Flashforge Adventurer 5M/Pro - with Built-in Feet
Printables


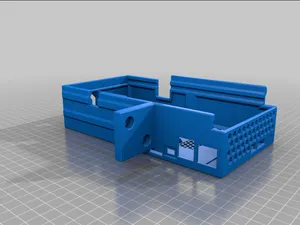
I've created an adapter for the BTT Manta E3EZ board, designed specifically for my Elegoo Neptune 2S printer. The adapter was made using OpenSCAD and is easily customizable for other printers or boards by modifying the constants defined in the file. This allows you to screw the new board into the stock board case, which is necessary due to the screws not being in the same position.
Please note that the code may need some cleaning up, but I didn't have the time to do it.
There are a few flaws with this adapter (for this specific board and printer only) in its current form:
• The bottom panel of the case cannot be put back on, leaving only about 1-2 mm of clearance between the top of the stepper drivers and the feet of the printer. • The USB ports, including the Micro-USB port used for serial and SD card slot, are inaccessible without dismounting the board from the adapter, or cutting holes in the original case. • The board almost fits in the original bottom case, but it's not possible to place it elsewhere without modifying the case. Rotating the board might resolve the port issue, but it would worsen the cable positioning.
I printed the version with holes in PLA and it has been working fine for a while. I even unscrewed and rescrewed the board once, but I wouldn't recommend doing it too often, as the 3D-printed screw threads may degrade over time.
The other versions of the adapter are untested but should work. They are expected to be less flexible than the ones with holes.
To use the adapter, you'll need:
• M3 screws to secure the Manta board to the adapter. The screws should be long enough to reach the threads, but not too long, as this may cause issues. If I remember correctly, i used M3*6. • The original screws from the old board, which will be reused.
Screw the adapter first to the case, then the board to the adapter. The SD card needs to be inserted in the board first. Be careful not to break the microsd.
The .scad file uses the threads.scad module, available on GitHub ( https://github.com/rcolyer/threads-scad/blob/master/threads.scad ). If you wish to edit this model, you will need to download this file first from there. The authors of threads.scad do not endorse this project or are related to it in any way.
Put the threads.scad file next to my .scad file.
If you need any help to remix this, feel free to send me a message, as the file in its current form could be confusing.





Названия используются только для указания источника результата. Polyzon не аффилирован с перечисленными площадками.
Комментарии 0
Загружаем комментарии…