
Бесплатно 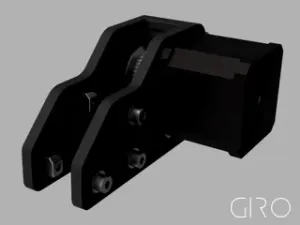
GIRO - TEVO Tarantula / Y-Axis Motor Mount
Printables


INFO
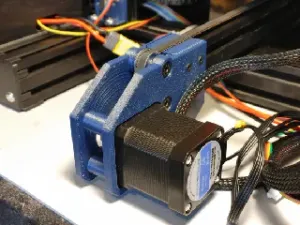
A printable motor mount for the Neptune 3 Pro. It allows the mounting of bigger Nema 17 motors. With the normal motor mount the bed hits motors that are longer than the standard one. Idlers with an 8.5mm width (flat side to flat side) are used to guide the belts.
Versions:
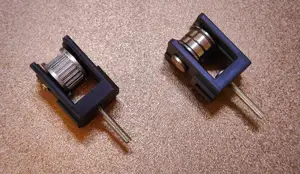
- Motor Mount_T-3mm_B-5mm One toothed 3mm bore idler at the top, one smooth 5mm bore idler at the bottom.
- Motor Mount_T-3mm_B-3mm One toothed 3mm bore idler at the top, one smooth 3mm bore idler at the bottom.
The model in the picture uses a 5mm bore idler without teeth and a 3mm bore idler with teeth.
REQUIRED HARDWARE
Idlers
- 1 x Idler with teeth (w: 8.5mm, bore: 3mm / 5mm)
- 1 x Idler without teeth (w: 8.5mm, bore: 3mm / 5mm)
- 1 x 20 teeth pulley (can be taken from original motor)
- 2 x Idler screw
- For 5mm bore: M5x20mm countersunk head screw
- For 3mm bore: M3x25mm cap head screw
- 2 x threaded insert
- For 5mm bore: M5 threaded insert (w: 8mm, l: 5mm)
- For 3mm bore: M3 threaded insert (w: 5mm, l: 5mm)
Mounting hardware
- 6 x M3 threaded insert (w: 5mm, l: 4mm)
- 4 x M3x16mm cap head screws (for holding two halfs together)
- 4 x M3x4-8mm cap head screws (for mounting the motor, the stock ones could work but I haven't tested it)
- 2 x screws for mounting to frame (from original motor mount)
Other
- 1 x Nema 17 stepper motor
- A longer gt2 belt
- Buckles for gt2 belt (or a printed belt clamp/lock, this is used to mount the belt to the bed carriage)
PRINTING
- Print the two halfs with the chosen bore widths
- Print in a strong and heat resistant material (ABS was used here)
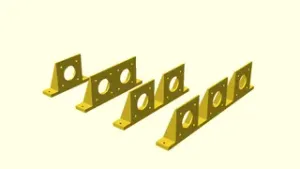
- Print in this orientation and add support (see picture). Both halfs need support at the same spots. The rest can be printed as overhangs if the printer's capable of it. If that's not the case, add more support.
ASSEMBLY
- Install all threaded inserts and let them cool down
- Install the motor using the four mouting screws
- Install pulley on the motor shaft with it being able to slide up and down
- Allign the idlers
- Put the top half on and align the screws with the threads
- Tighten down the four screws holding the halves together
- Tighten the screws of the idlers until they sit tight but the idlers still spin freely
- Allign pulley with idlers and tighten it down with a pair of pliers and an allen key. This step can be a bit difficult because you have to tighten the pulley while the motor is already installed. You will have to tighten one of the grub screws and then rotate the motor shaft (using the pliers) to tighten the other one down. I'd recommend to begin with the one on the flat side of the shaft.
- Attach the y endstop the way it was on the original motor mount (together with the plastic piece)




Названия используются только для указания источника результата. Polyzon не аффилирован с перечисленными площадками.