
Бесплатно 
Prusa Core One Rivet Tool (unofficial)
Printables


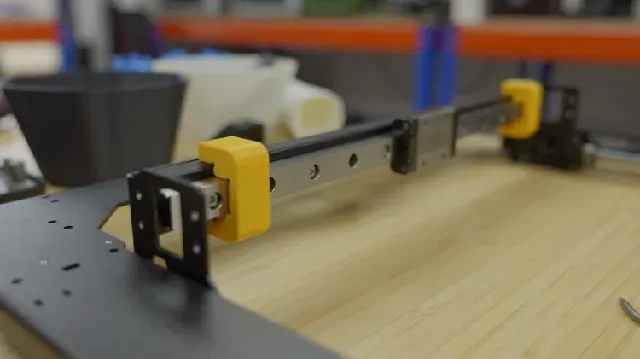
Having done a full disassembly and reassembly of the Prusa Core without instructions I felt in a good position to provide some assembly jigs to help you when you decide to do the same, or just for maintenance etc.
X Rail Jig
- Print TWO pieces. - Place the rail onto the gantry beam and lightly add all the screws allowing the rail to move. - Place the jigs on, near the ends of the rail, avoiding the screw positions. - With the jigs in place, tighten the screws. - Remove the jigs. Y Rods Jig
- Print TWO pieces - Place the rods, gantry, and bearings all onto the gantry frame and lightly screw into place allowing some wiggle room. - On the left side, add the jigs to each end of the rod, with the bearing in the middle. - With the jigs in place, tighten the screws on the left side. - Remove the jigs. - Slide the gantry to one end and tighten the screws on the right side at that end. - Slide the gantry to the other end, tighten the screws on the right side at that end. Notes
- There are some small gaps above the rail and the linear rod. This is deliberate, since contact in this position would prevent the jig from sitting in the correct position. - I don't have full detailed positional data for these jigs, but I've used sensible dimensions that I'm 99% sure are the target dimension for this assembly. - Printing with just two perimeters and 10-15% infill should be fine.






Названия используются только для указания источника результата. Polyzon не аффилирован с перечисленными площадками.