
Бесплатно 
Jonsbo N5 Front 140mm Fan Mount
Printables


Note: If for whatever reason I take a long time to answer DMs (IDK why Printables doesn't send me emails when someone DMs me), please contact me through Discord or Reddit .
Updates
Update 4:
Finally! I've added a new kind of bracket that slots 2 magnets to improve stability, specially for heavy fans. Get the regular or 30mm flavor in the download section!
Update 3:
Added a single-piece version: In case you have a huge printer, don't mind printing supports or are going to use a print service, use this one. You'll save the trouble of having to deal with the fan brackets.
Update 2:
Added a thicker version (7mm thicker than the base version) for 30mm fans or a normal 25mm fan + a Noctua NA-IS1-14 5mm fan spacer.
Update 1:
New versions of the brackets added. The one named “Thick” is beefier and will not bend as much as the thinner one. And the “thin” bracket is to allow for clearance with the wooden grille.
Also, I made some minor changes to the adapter. If you already printed it and it works you don't need to reprint it.
Changes are:
- Magnet slots now have a bit more room. - It's really hard to account for tolerances since these magnets could be different between manufacturers and each printer is calibrated differently, but I'd rather you use a bit of hot glue than it not fitting. - Reduced the top lip so there's not that big of a gap. - Made the right side tab a bit smaller so it's easier for it to snap into place. Existing prints can be cut by 1-2mm.
Description:
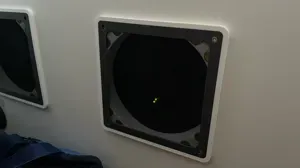
This custom adapter replaces the original wooden fan grille and allows you to mount two 140mm fans behind the stock wood panel, enhancing airflow while preserving the N5’s signature look.
The adapter was designed with the idea to route a fan extension cable through the front USB port opening, so you don’t have to drill into the steel chassis. To do this, you’ll need to remove the front panel board to make space. Keep in mind you'll also lose the USB-C and headphone ports!
Alternatively, drill a hole large enough for the fan header to pass through or figure out another way to route the fan cable.
To cover all options, I’ve included two versions :
- If you're routing the cable through the USB port, print the version with the cable slot . - If you're drilling a hole, print the version WITHOUT the cable slot . And two variants:
- For regular 25mm fans, print the normal variant . - For thicker 30mm fans like the Phanteks T30-140, print the 30mm variant . - This can also be used with 25mm fans and Noctua NA-IS1-14 5mm fan spacers . Plus, each combination has a single-piece version if you are able to print it or use a commercial print service!
What to print:
- 1x left side. - 1x right side. - 2x thick fan brackets. - 1x magnetic fan brackets. - 1x thin fan bracket. (Optional) What you’ll need:
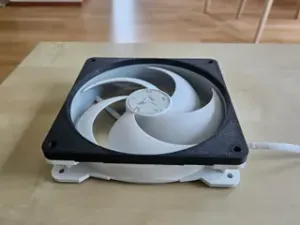
- 2x 140mm fans . High static pressure fans recommended. I used a pair of Arctic P14 MAX. - 6x 10x20x3mm neodymium magnets . Pretty common size. You'll find them on Amazon and eBay. - If you have a different size and want a custom fit, just reach out! I'll be happy to tweak the model. - 1x Fan splitter . If you’re using Noctua fans, you already have one. - 1x Fan extension cable . To route through the USB hole. - 12x-16x fan screws . How to print:
- Print vertically. - Enable supports touching build plate only . - All overhangs are chamfered for easy printing without supports. - Tested with a 0.6mm nozzle at 0.32mm layer height , but a 0.4mm or 0.8mm nozzle will work too. How to Assemble:
Insert the magnets into the slots:
The orientation of the two magnets that contact the case isn't critical but the ones that secure the wooden grille do require correct alignment . Check the polarity first and insert the magnets in the same orientation. If needed, there are small holes to easily remove the magnets.
Mount the fans to the print:
- Place the fans where they go on the printed part. - Screw them in. - While doing this, make sure the fan cables and splitter are arranged so you can plug them in easily later. Align the groove:
- There’s a small groove where the two pieces meet. - Make sure they line up so everything fits cleanly. Attach the brackets to the fans:
- Look at the back side of each fan (the side with the motor braces). - Screw the brackets into that side. - Put 1x magnetic bracket on the top . - Put 1x thick bracket on the bottom . Optional brackets:
If you want the adapter to be more rigid:
- Add brackets to the front side of the adapter. - Put 1x thick bracket on the top . - Put 1x thin bracket on the bottom . Refer to the pictures or leave a comment if you have any doubt! :)





Названия используются только для указания источника результата. Polyzon не аффилирован с перечисленными площадками.
Комментарии 0
Загружаем комментарии…