
Бесплатно 
Core One Belt tensioner pulley with heat-set threaded insert, added clearance
Printables


What is galling?
galling
noun : a type of wear caused by friction between metal surfaces, often leading to parts sticking or seizing. Example: "Galling can lead to a nut and bolt binding under high pressure."
adjective : extremely irritating or frustrating, vexing. Example: "It was galling to tear down half the machine just to reach that one seized nut and bolt."
— From some exasperated mechanic’s dictionary, probably.
Update history
Update 6 August 2025 : modified the screw-in insert outer thread to print cleanly (version 3.1). V3.1 OpenSCAD script updated with this change.
Update 31 July 2025 : Added a model for a screw-in threaded insert, in addition to the original model for a heat-set threaded insert. V3 OpenSCAD script updated with this new model.
Update 22 July 2025 : V2 OpenSCAD script updated to make the insert dimensions parametric to allow for other sizes, and to replace the original ‘bolt_hole’ module with a fully programmed ‘teardrop_hole’ module. STL updated to stay in sync with the script, but it is functionally identical to the first version.
What is this modified part for?
It replaces the stainless square nut in the original belt-tensioner-pulley part with a longer threaded brass insert, with the aim of preventing the tensioner screw from binding on the nut. The nut slot is filled, and the bolt channel is adjusted to make inserting the threaded insert quick and accurate, with a strong result that resists pull-out.
Two STLs are provided - one for a heat-set insert and one for a screw-in insert.
Background
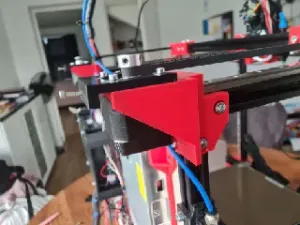
There have been numerous reports of the square nut in the belt-tensioner-pulley turning inside its slot, making it impossible to adjust the tension, and requiring a significant amount of work to destructively remove the original part. If it happens to you and you don't have another printer to print a replacement, you'll have to buy a replacement part from Prusa. TIP: If this does happen to you, if you still have useable tension once the nut starts spinning, i.e. not necessarily the RIGHT tension, but enough to keep on printing temporarily, print a replacement BEFORE you destroy the old one, otherwise you'll be left with your printer out of commission.
It seems likely that the reason for the nut turning in the slot is that the nut has seized on the tension screw, due to a phenomenon called ' galling '.
One solution to this is to lubricate the screws before inserting them into the tensioner pulleys. TIP: It's worth doing this the next time you need to adjust your belt tension. If your belt tension is ok, don't touch them, but the next time you need to adjust belt tension, make it the first thing you do - gradually, and evenly, release the tension on both sides so that the tension screws can be removed and lubricated.
This model
Another, perhaps longer-term solution is to replace the stainless square nut with a brass insert, since brass is less likely to gall in contact with the stainless bolt. That's what this model is about. Think of it as a preventative measure, and consider fitting it BEFORE you experience the galling issue.
Note that this is an experimental modification - I don't have enough experience with it yet to be certain that it will stand up to the belt tension, nor that it will solve the ‘galling’ problem. Use at your own risk.
Having said that, I've now been running this modification for over a month, and it's working perfectly - no sign of the insert pulling out at the higher tension suggested in the web app, and no sign of the screw starting to bind. I've been trying various alternative mounts (for VFA tests), all with this threaded insert approach, so I've had them in and out of the printer numerous times without any problems at all. And all the theory supports the idea that a long brass insert will be better than a thin stainless nut, both for carrying the load and resisting galling.
I've included the short OpenSCAD script that I wrote to make this part, in case you wish to modify it. It relies on Prusa's original STL, so I've included that as well.
Two STLs are provided. The original upload catered only for a heat-set threaded insert - perhaps the most commonly used type of insert in 3D printing, but it requires a soldering iron with a suitable tip to heat the insert enough to melt the surrounding plastic. The model has now been updated to also include an STL that suits a screw-in threaded insert, sometimes referred to as a self-tapping insert, that requires no special tools for the insertion. The screw-in model also carries less risk of misalignment because the seat that the insert screws into has a modelled M5 thread, and since no melting of the surrounding plastic is required the alignment should remain perfect. I now prefer the screw-in insert, for both the ease of installation and the guaranteed alignment.
Installation of the heat-set inserts
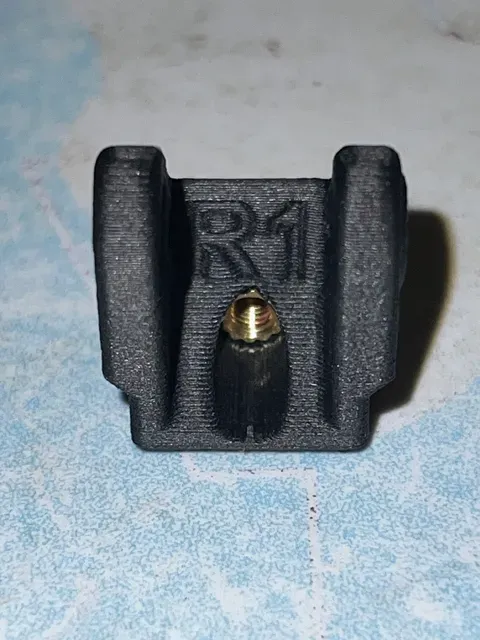
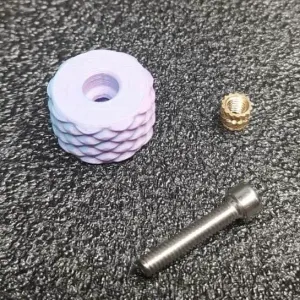
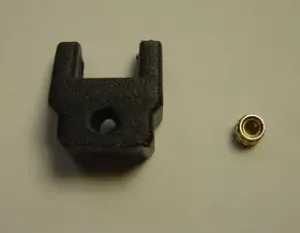
I used brass M3 threaded inserts with an overall length of 5.7mm, an outside diameter of 4.6mm, and a ‘nose’ diameter of 4.1mm.
M3 4.6mm x 5.7mm heat-set threaded insert.
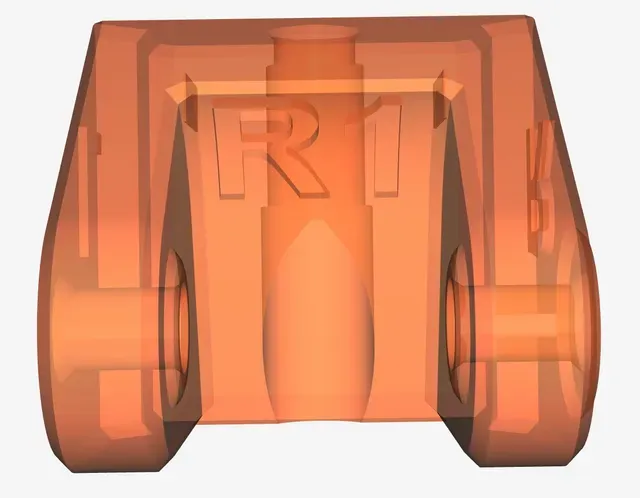
This modification leaves a shoulder for the threaded insert to sit against, so that it shouldn't pull out under tension. This requires the insert to be inserted from the pulley side. The pocket for the insert is shaped so that the insert will sit in the correct position and with the correct alignment so that it only needs to be pushed in straight with a soldering iron.
X-ray view, showing the shape of the insert pocket and the shoulder at the top
Threaded insert sitting in the ‘pocket’ before full insertion with a soldering iron.
Take care not to let the soldering iron tip melt the surrounding plastic, check that the insert is pushed fully home up to the shoulder, and also check that it has gone in straight by inserting a long M3 screw and adjusting the insert if necessary while the plastic is still soft. Note that doing this into PC-CF with 100% infill is harder than putting an insert into ABS or PETG for instance. Also check that the plastic around the insert hasn't bulged into the space where the pulley and belt will run - push it down while it's still soft, if necessary, or clean it up with a knife blade. I screwed the long M3 screw partially into the insert before applying the soldering iron, so that I could use pliers to pull the insert into place once heated, rather than doing all the pushing with the soldering iron.
Specific threaded insert tips are available for most soldering irons. In this case I had good success with a simple tapered soldering iron bit - I keep one that I never use for soldering, so that the insert's threads don't get clogged with residual solder.
Use the tension screw to help pull in and align the insert while heating with a soldering iron.
You should aim to push the insert in so that it butts up against the 1.5mm shoulder on the screw side. For the insert pictured above this will result in it being slightly under-flush with the top of the slanted hole on the pulley side. The cross-section below gives an indication where the insert should end up. In practice, the positioning is not as critical as the alignment, because there will be melted plastic gripping the knurling, and probably some melted plastic pushed ahead of the ‘nose’ of the insert to act as an additional shoulder.
The target location for a heat-set insert.
Installation of the screw-in inserts
N.B. This type of insert is much harder to find in brass - most suppliers offer galvanised carbon steel, which have a similar appearance, but the colour most likely comes from zinc galvanising. The layer of zinc will be better for galling resistance than stainless steel but is softer than brass and therefore not as hard-wearing. However, the carbon steel underneath the galvanising layer is very hardwearing and is also better than stainless from a galling perspective. My interpretation: look for brass inserts if possible, but galvanised carbon steel is still better than the stainless nut.
I used zinc-plated carbon steel M3 screw-in inserts with an overall length of 6mm and an external M5 thread (0.5mm pitch).
M3 6mm x M5x0.5 screw-in threaded insert.
Note that the slot in one end is what enables the insert to cut its own thread into the plastic, and it should be screwed into the hole with this end leading. The slot is not intended to allow a flat-blade screwdriver to be used to screw the insert in. Special tools are available to insert screw-in inserts, but it's quite possible to do the job without such a tool. Normally, a short M3 screw fully inserted into the insert will allow the insert to be screwed in. However, the insert can tend to ‘grip’ the screw when tightened, such that removing the screw may bring the insert back out with it. A good solution is to place a washer between the head of the screw and the insert, to limit the insert's grip on the screw so that it can be removed easily. Since the washer likely has a larger diameter than the insert, this approach only allows the insert to be screwed in flush with the outer surface.
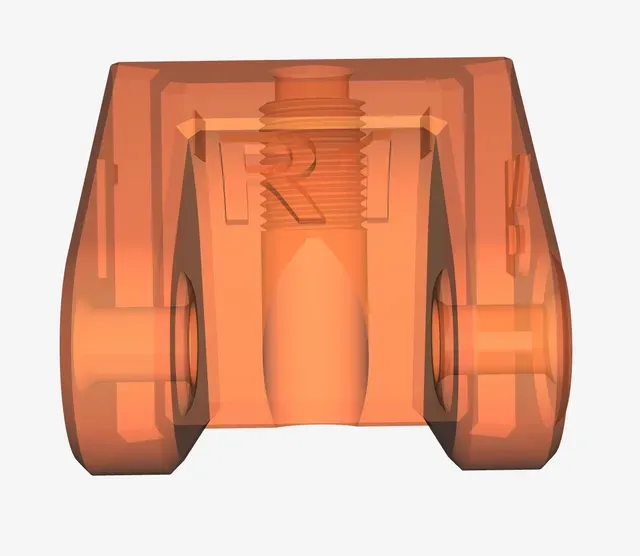
In this model, as with the heat-set insert, a shoulder is left on the screw side of the part, to prevent the insert from pulling out under tension. This requires the insert to be inserted from the pulley side. Moreover, the hole profile on the pulley side is slanted, and the insert needs to be under-flush, so the screw+washer approach will not work here. Instead I suggest using a spare insert to do the job of the washer - wind it onto an M3x12 screw in reverse, i.e. with the slot towards the screw head, and then use this to screw a second insert fully home against the shoulder. The screw+reversed insert can then be removed easily. Should the reversed insert remain in the threaded hole when the screw is removed, it can be removed with a flat blade screwdriver, courtesy of the backwards-facing slot.
X-ray view, showing the threaded pocket for the screw-in insert, and the shoulder at the top



Названия используются только для указания источника результата. Polyzon не аффилирован с перечисленными площадками.