
Бесплатно 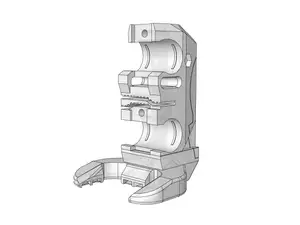
E3D V6 Hotend Fan Duct | Prusa MINI X-Carriage Replacement
Printables


I don't charge for my functional models. Please consider purchasing some of my paid models as a way to support both my work, and this great website: https://www.printables.com/@ninjamida/store
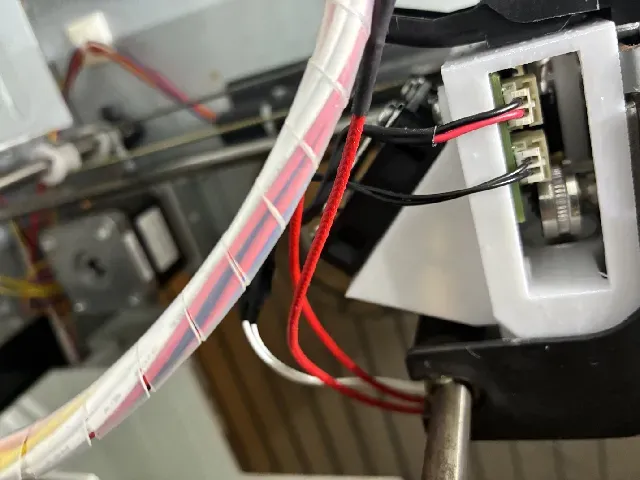
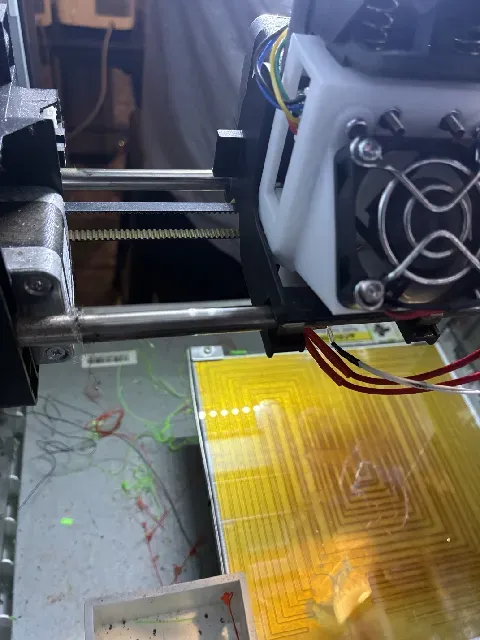
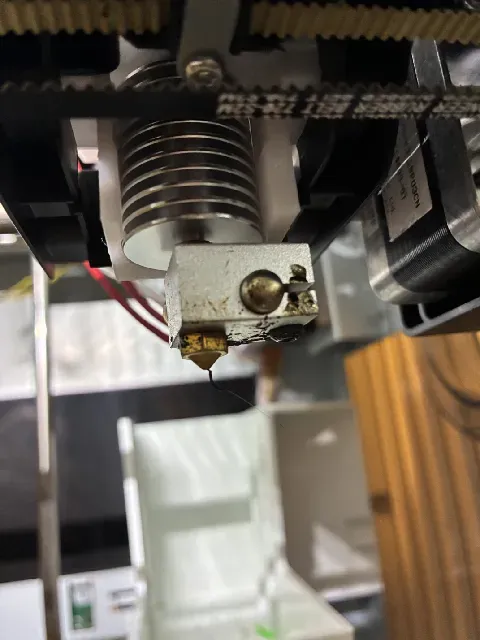
Modification to mount an E3D V6 hotend in a Da Vinci 1.0 3D printer. My understanding is that the carriage on the Da Vinci 1.0A is identical and this should work for it too. (If you're after one for the Da Vinci Pro, check out the source models that this is remixed from - one of them is for the Pro.)
Difficulty of install : If your E3D hotend does not come with the right connectors on the thermistor and/or heater cartridge, you will need to install those connectors on them (or splice the cables with the original ones, which is how I did it). This is the only hardware aspect of the mod that goes beyond basic screws and clip-ins. You will also need to install custom firmware (Repetier) on the printer. This is relatively simple compared to many of the Da Vinci E3D mods out there. You will not need to fully disassemble the printer - the part that this replaces is removable without disassembling anything else (besides disconnecting a couple of easily-accessed cables).
WARNING - This is tested, but only briefly (basic tests and a few quick simple prints). It appears to work, but I take no responsibility if it doesn't work for you (or damages your printer or other hardware).
Assembly / install instructions follow; please be aware that I'm not super familiar with all the terminology for 3D printing hardware yet, so I've probably used the wrong names for things in a few places. Please let me know if there's any such cases and I'll tidy them up.
Preparation / Heads-ups
- As far as I'm aware, there is no way (without further hardware mods) to make this viable on a Da Vinci running stock firmware, not even the “unlocked” version that XYZWare released when they went out of business. You will need to install Repetier .
- You will lose about 22mm of print size on the Z axis, and about 12mm on the Y axis, by installing this mod. There are other E3D V6 mods - albeit more difficult to install - for the Da Vinci 1.0 out there that avoid these issues.
Hardware required
- 8x M3x16 screws (two can be salvaged from the stock mount)
- 2x M3x6 (I think) screws (can be salvaged from the stock mount)
- 2x M3 hex nut
- Torx T10 screwdriver (for disassembly of stock mount)
- And of course, an E3D V6 (or clone) hotend, with a 12V heater element
You may also need the necessary equipment to splice the new hotend's thermistor and heater with the cables from the Da Vinci's original ones, depending on what plugs (if any) they have - the E3D V6 clone I ordered came with the wrong plug on the thermistor and no plug at all on the heater. (It is possible to wire it directly to the motherboard, but that's beyond the scope of my instructions - the model should still be useful though.)
Some of the M3x16s can be replaced with shorter lengths (the two used to mount the PCB in particular would look a lot nicer with a more-exact length, though M3x16 still works just fine) if available. M3x10 is too short; I didn't have access to anything inbetween to try.
Printing
- Print one copy of each file.
- I personally used PETG for this, so that's the only material I can outright confirm everything works correctly for. However, I would think it would work fine in ABS. Probably best not to use PLA.
- I used 0.2mm layer heights, including the first layer.
- Supports may or may not be required for the main unit depending how well your printer handles bridges and overhangs. I printed it with manually-painted supports on the inside of the hex nut slots, the bottom of the long bridges on each side, and the slanted surface on the (print orientation) bottom.
- Supports are required for the clamp. They should not be necessary for the fan shroud.
- Other settings shouldn't matter too much as long as they generally produce good prints.
Removal and disassembly of old print head
- Unload filament, if it's loaded, and power off the printer and allow the hotend to cool.
- Unplug the cables going into the side of the print head (two small ones on one side, one larger one on the other side).
- Unplug the heater cable (white wires with a fabric-like covering).
- Pinch the plastic clip at the top rear of the print carriage (where the filament goes through). While holding this, grab the sides of the main unit and pull it out - a fair bit of force is needed here. You should angle the top of it towards the back of the printer, then pull it out.
- Remove the nut on the hotend pipe, then remove the hotend (it just pulls out once the nut is removed). The hotend and nut can be discarded.
- Remove the two screws holding the fan and its grill in place (M3x16, can be reused for the new mount). Remove the fan and put it aside.
- Remove the two screws holding the fan mount to the rest of the unit (M3x6, can be reused for the new mount). The fan mount can be discarded.
- Remove the two screws holding the PCB in place (M3x10, not useful here). Remove the PCB and put it aside. I forget exactly how I got it out of the casing, it was a bit of a pain, I think I pushed it partly out one side then angled it to come out the front?
- The rest of the original mount can be discarded or stripped for spare parts.
Assembly and installation of new print head
- Insert the heatsink of the E3D V6 hotend into the main body of the mount. Some force is needed. (Remove the heat block if it's attached.)
- Using two M3x16 screws, attach the clamp in place across the top of the heatsink.
- Using two M3x16 screws (or shorter if available - M3x12 is probably long enough, M3x10 is too short), secure the PCB board inside the frame. Use two M3 hex nuts on the reverse side (there are slots for them to fit into). Try to line the filament sensor up with the heatsink's intake.
- Using four M3x16 screws (if you want, you can get away with just two), attach the fan to the shroud, then remove it again. (The shroud will be installed, and the fan mounted on it, later; however, we do this now to loosen up the holes for the screws.)
- Install the unit into the print carriage. Pulling up on the release tab (see step 4 of the removal instructions for the old head), slide the unit into the print carriage at an angle, then push the top in and release the tab. It's very tricky to get this in place (especially the first time), but take note of the little notches near the bottom - there are tabs on the print carriage that fit into these. If done right, the top will be secure and fairly up-against the print carriage; the bottom may or may not have a bit of wiggle room. (The tab on the fan shroud will hold it in place once installed.)
- Using two M3x6 screws, attach the fan shroud to the mounting holes on the back of the unit.





Названия используются только для указания источника результата. Polyzon не аффилирован с перечисленными площадками.