
Бесплатно 
PARAMETRIC TUBE END CAPS WITH V1 ENGINEERING LOGO
Printables
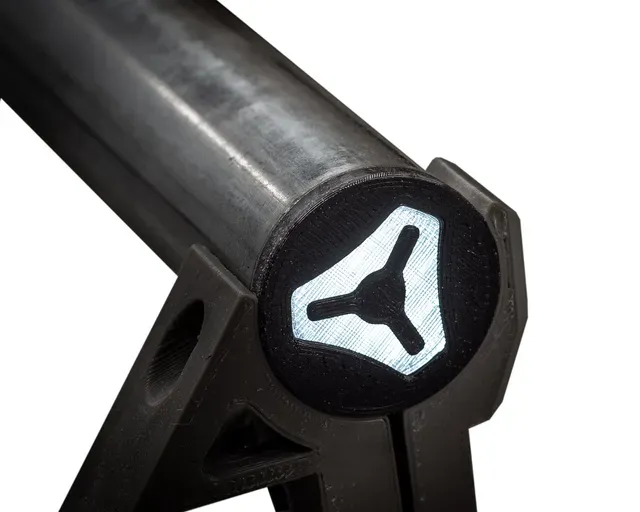
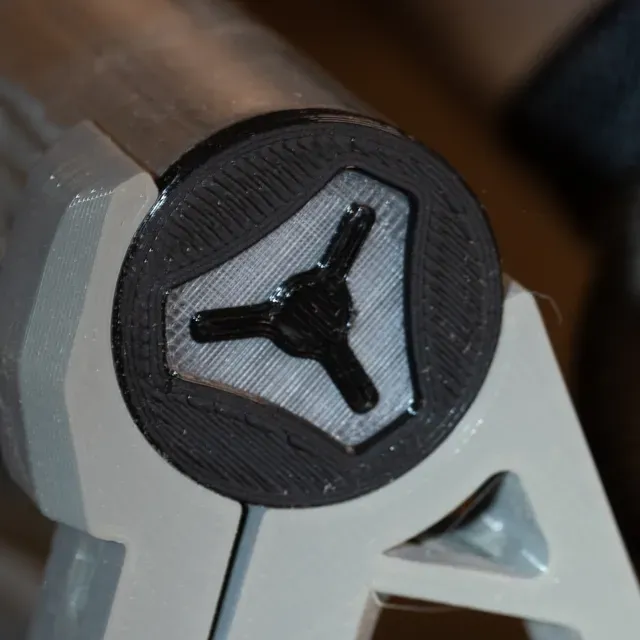

DESCRIPTION
Thank-you to Ryan @V1Engineering for his incredible support, and of course for allowing the use of these logos!
This started as a joke. It was around halloween time and I thought it might be cool to project a V1 logo onto my shed wall, which led to a few more diversions.
For the complete evolution including suggestions for installing lights please visit this thread on the V1 Engineering Forums. There has been some discussion about layer direction - my personal preference is to alternate clear layers others differ on that!
These are really simple to print models have only three parameters and can be easily scaled, or modified using the original Onshape files to suit your tube sizes or perhaps for other purposes - a drilled hole for a logo comes to mind.
NOTE - All of the models for download are a fixed size 32.4mm OD, 1.4mm Wall Thickness, 4mm End Cap thickness. Full instructions on how to modify these files are included in the “DOWNLOAD LINK” document.
MODEL VARIATIONS
1 - PARAMETRIC V1 NO MMU - MANUAL COLOUR CHANGE
This model comes in two parts - therefore some gentle assembly is required. Print the LENS disk in clear filament, with a single colour change at 0.8mm height - complete the print with the logo centre in the same colour that you will use for the rest of the body.
Print the body separately, the lens should be a snug press fit (take care to align the lug so that it sits in the correct orientation. A single drop of superglue somewhere on the inside join will secure it well enough.
2 - 1 - PARAMETRIC V1 MULTI COLOUR PRINT
As described - if you have a multi colour machine, or a multi print head machine, hopefully you know how to align and slice the three parts of this model. PLEASE NOTE this model has a number of differences to my “standard” multicolour version to scale better for backlighting - it can be used with solid colour, but the other version has a thicker cap end and will be more robust.
It is possible to print using manual colour changes if you are technically savvy - I have had great success manually swapping filaments on my Mk4 and CoreOne using instructions from @ jonnieZG posted HERE on the Prusa Forums
3 - BONUS PARAMETRIC LIGHT MOUNT (light not included!)
This light mount will be a loose fit inside your tube - if you prefer tighter, just add tape, the parameter inputs are described in the download document and will result in a 1mm clearance. More information regarding the light can be found on the V1engineering Forum HERE.
HOW TO MODIFY THE FILES.
Here is a brief summary. Please download the SOURCE CODE FILE in “downloads” for a simple set of instructions.
You will need to open an OnShape account if you do not have one, and log in. When you access the linked files click on the BLUE button and the file will be yours to edit!
PARAMETERS
#A_OVERALL_DIAMETER - This is the measured outer diameter of your tube - the cap will match the tube OD. Note that the little flutes on the caps have a slight draft, making the cap tighter as it goes in.
#B_ WALL_THICKNESS - The drawing will scale so that the outer edge of the tapered flutes matches the wall thickness.
If you have measured accurately this will be a snug push, or gentle tap fit. Do make a test and make any adjustments as necessary - I like to have them “bump tight” any tighter and you may not be able to get them out - any looser and they'll probably do that by themselves!
#C_ END CAP THICKNESS - This is the thickness of the cap that is visible after installation. It's variable because there are instances where less is desirable although below 2mm will not provide a consistent result.
They are simple prints, so take your time to print a test or two so that you can get the size exact.
MATERIAL
I've used PLA for all my caps to date and have had no issues whatsoever.




Названия используются только для указания источника результата. Polyzon не аффилирован с перечисленными площадками.