
Бесплатно 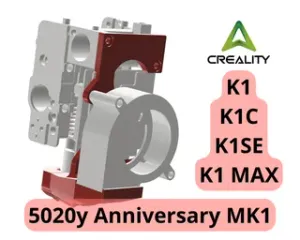
5020y Anniversary MK1 for Creality K1, K1C, K1SE, K1 MAX
Printables


This 3D model is still under development!
##########################
Update 28.10.2025
Aded models for Cartographer 3D mount for Stock and BCJ X Carriages
##########################
Hi everyone! I made 5015y Anniversary MK1. This is a redesigned version of the part cooling duct for using a 5015 blower fan.
Original version: https://www.printables.com/model/1445684-5020y-anniversary-mk1-for-creality-k1-k1c-k1se-k1
It is the 5015 fan lightweight toolhead cover for Creality K1, K1C, K1SE, K1 MAX with Creality K2 PLUS hotend for K1/Unicorn and Volcano nozzles.
There are versions available for the K1 and Volcano nozzles and for the standard carriage and the BCJ carriage .
How to install Creality K2 Plus Hotend on Creality K1/c/max/se : https://telegra.ph/Ustanovka-hotenda-ot-Creality-K2-Plus-na-Creality-K1cmaxse-05-13-2
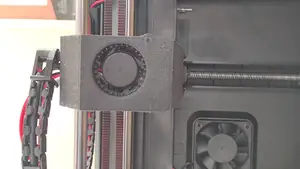
The video features the 5020 fan, but it works the same with the 5015:
Printing settings:
This 3D Model was printed with ASA and ABS filaments.
Klipper settings:
BOM:
1x 24V 5015 blower with ball bearings;
1x N-channel field-effect transistor (MOSFET) for 2 wire fans. Bipolar PNP and NPN transistors will not work;
2x heat-set inserts M3 (4.6-5mm OD);
3x screws M3x25 for mount fanduct and fan;
1x M3 screw from stock toolhead to mount fanduct from side;
2x M3x6 screws for toolhead top BCJ mount;
or 2x M3 stock screws for toolhead top Stock mount.
Assembly Guide
Prepare the Fan:
Melt the heat-set inserts into the fanduct, as shown in the images.
Wiring: Solder the wires to the fan and the MOSFET , following the provided connection diagram.
Installation: Install the cover and connect the fan wires.
Mounting: Attach the fan to the cover using screws.
2-Wire Fans Only (Noise Reduction): To eliminate PWM noise, open the printer.cfg file, locate the output_pin: fan0 section, and change the cycle_time value to 0.1000 .
This is only a small part of all those test models that I modified :)
I'd be very grateful if you could buy me a coffee
It would motivate me to continue working on my projects, of which I've already accumulated quite a bit. I'd appreciate any criticism in the comments.
Thanks everyone.






Названия используются только для указания источника результата. Polyzon не аффилирован с перечисленными площадками.
Комментарии