
Бесплатно 
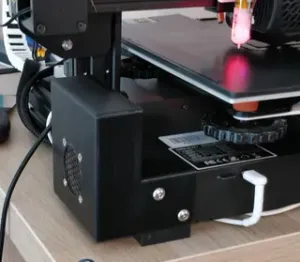
Ender 3 Series Mainboard Enclosure(s)
Printables


Version 4 Release Notes:
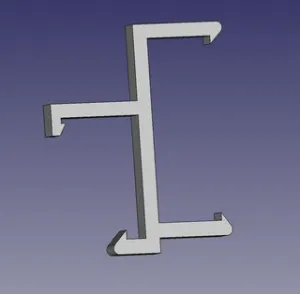
- A more optimized design for the part that goes into the V slot. File size reduced and errors in the .stl file fixed. - Increased clearance from the USB-A port of the Pi to the wall of the bottom shell from 27mm to 32mm. Most cables should be compatible now, but it's best to double-check. - Two new variants of the top piece have been added. Experimental_Airflow_1 has an exhaust on top going straight out, and Experimental_Airflow_2 has an exhaust going to the back of the machine. This could improve cooling slightly. If you'd like, you can test them out and give me feedback.
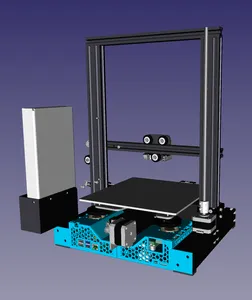
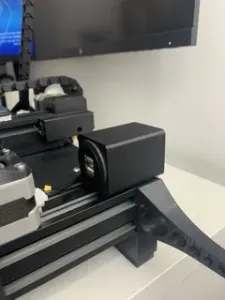
Raspberry Pi mount for Ender 3/pro/neo
I created this mount so that I could attach my Raspberry Pi 3b+ to my Ender 3 Pro seamlessly. I haven't tried it on an Ender 3 or Ender 3 neo since I don't own those printers, but it should be compatible.
I opted for a passively cooled setup with just a small heatsink on the CPU, and it didn't cause any problems from my testing. The temperature was below 65°C during printing/idle and below 70°C when I was updating it.
I used standard M2 and M3 screws for this project. I avoided using uncommon M2.5 screws for holding down the RPI. Because of this choice, it's recommended for you to use M2 washers so that you don't damage the PCB of your rpi
For powering the Pi, I used a buck converter to convert the 24V of the PSU into 5V and hid it inside the PSU. I used two jumper wires to connect it to the 4th and 6th GPIO pins
Double-check your wiring. Powering the Pi through the GPIO bypasses the power protection circuit
image: raspberrypi.com
Warning: There is 32mm of clearance from the USB-A port to the wall of the bottom shell. Most cables are compatible, but ensure that you test-fit your cable beforehand. Due to the limited clearance, you will have to plug the cable in before putting your Pi into the shell. The cable I recommended works flawlessly.
Hardware
- 3 M3x8 Screws to hold the top - 4 M2x8 Screws to hold the rpi in place (you can use two) - 4/2 M2 washers (highly recommended) - 1 flat right-angle micro USB cable to connect the RPI to the MCU 30cm/1 foot (I accidentally ordered a left-angle cable, it will just look uglier) - 2 Terminal connectors to connect the PSU to the buck converter - A few heat shrinks/electrical tape - 2 30cm jumper wires with at least one end being female Here are the links from Aliexpress (non-affiliate) :
Micro USB cable right angle 30cm flat
https://bit.ly/3WYmW5Q
Terminal connectors
https://bit.ly/4qYR9PI
M2/M3/M4/M5 Bolt and Nut kit (get at least 880 pcs, otherwise you won't get M2)
https://bit.ly/3LEwGQg
Jumper wire kit (30cm variant)
https://bit.ly/47J0xQ8
Compatible Raspberry Pis
Literally everything other than Pi 1A and Pi 1B. You COULD use a zero w / zero2w, but it would require you to use a dongle or UART. Here is the entire list if you still wanna check.
- Raspberry Pi 1 Model A+/B+ - Raspberry Pi 2 Model B - Raspberry Pi 3 Model B/B+/A+ - Raspberry Pi 4 Model B - Raspberry Pi 5




Названия используются только для указания источника результата. Polyzon не аффилирован с перечисленными площадками.
Комментарии