
Бесплатно 
Voron V0.2 Fridge Door / Colony Clacker Stealth Skirts 2.8" Waveshare screen
Printables
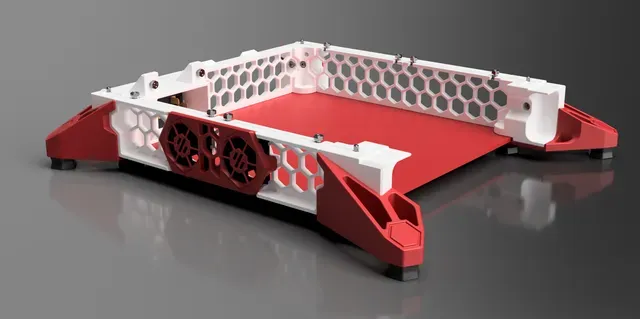
A NEW YEAR - LETS GO BIG!!!
INTRODUCING THE "WIDE BOY"
This is a set of skirts that I've been working on for some time (may have got a bit side tracked too) but it here and now you can have it too!
As our printers have been steadily getting faster there has been a need to wider foot prints to keep your baby printer stable and not walk off the table. So i wanted to create a wider stance (with my own flair) to do just that. I'm a big fan of the OEM look to the skirts and feet and wanted to create something that would add to it but not take away anything.
TO NOTE
THESE SKIRTS ARE MADE TO WORK WITH COLONY CLACKER DOOR AS THIS IS BECOMING THE NORM THESE DAYS.
THIS SET ONLY COMES WITH THE FEET AND SIDE SKIRTS - THEY WILL WORK WITH ANY OF MY COLONY CLACKER / FRIDGE DOOR FRONT SKIRTS (so no need to reprint everything!)
Right now that we've done the intro - lets get in to it...
For the Fan Skirts it helps to have it laid flat on a surface.
3 x heat inserts need to be placed here.
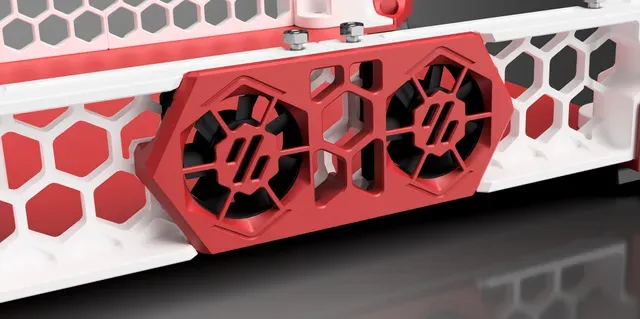
Add 2 x 3010 axial fans of your choice (make sure to have the wires facing towards each other so they come through the middle)
Add the A and B parts Fan Skirts
3 x M3 x 10 BHCS Screws secure the Fan Cover to the Fan Skirts sandwiching the fans and are now ready for install.
For the Extended Feet we need to add 2 x Threaded Inserts to each one EXCEPT THE MAINS INLET (We will get to that one soon)
Using an M3 x 16 BHCS secure the FRONT Extended Feet in place (dont worry we will cover the rear one soon too)
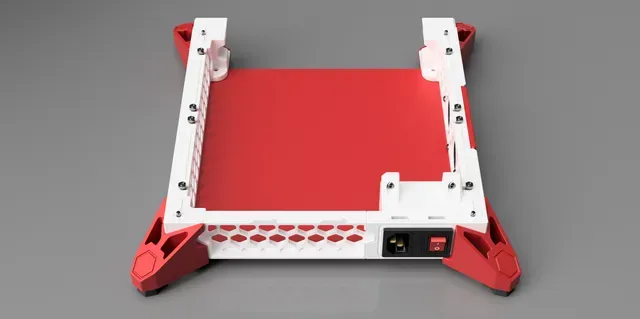
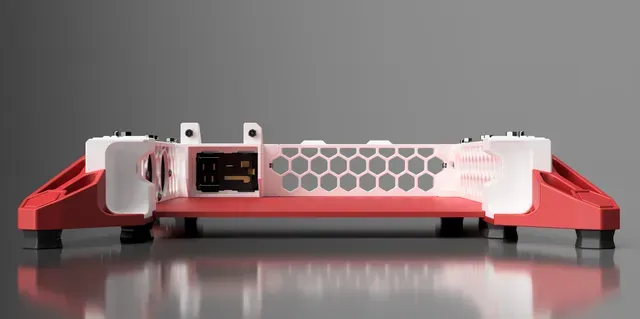
As you may have noticed the Mains Inlet Extended Foot does not have a Screw Fixing - This is because of the proximity of Mains Wiring and has been done for YOUR SAFTY (lets face it 110 - 240vac is not a fun time) So for this there is a breakaway clip on the Extended Foot that clicks into place on the Mains Inlet Foot as marked in the pictures.
OK IT'S INSTALL TIME!!!
Start off with the Side Skirts / Fan Skirts and all Four Feet installed as Per the Picture above.
This is also a good opportunity to install your Front Skirts / Screen / Headless Skirt
Slide in the Bottom Panel - Slotting it into the Front Feet and under the Extended Feet.
It should look like this
Slot on Both the Rear Extended Feet and secure the Rear Right Extended Foot with 1 x M3 x 16 BHCS just inside where the Rear Skirts goes.
Final step is to add your 8 x TPU Printed Feet
Why 8? I hear you say... well there is some real science behind this decision but it helps to....
1. spread the load 2. reduce the strain on the fixings securing the foot to the frame 3. helps make a more stable printer that wont more for love not money 4. it looks Cool!
at this point to can install the Rear Skirt and flip your V0 back onto it's new feet and admire what you've done!
As with all Voron Prints please follow the Voron Printed Parts Guide
4 perimeters
5 top / bottom layers
40% infill
0.2mm layers
ALL PARTS HAVE BEEN PRELAID ON A V0 BED FOR EASY PRINTING!
if you like my work and want to help fund some of my time and rolls of plastic i use to make these mods, please consider dropping me a donation via my KO-FI (link in my bio) every £1 really helps.
Thank you and Happy Printing!




Названия используются только для указания источника результата. Polyzon не аффилирован с перечисленными площадками.
Комментарии