
Бесплатно 
Caliper Catcher
Printables

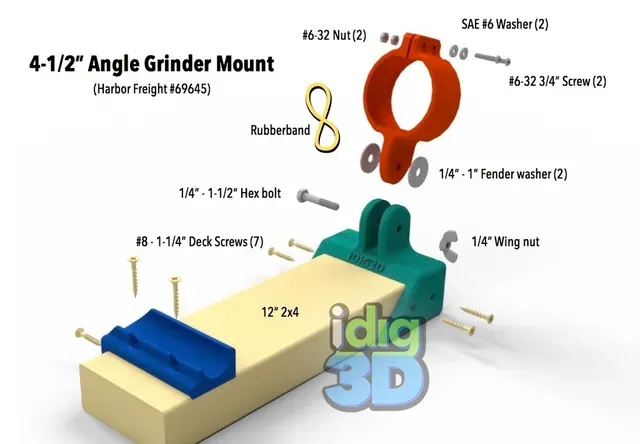


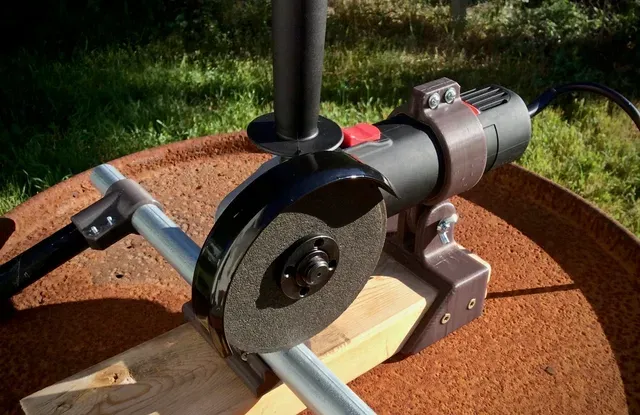




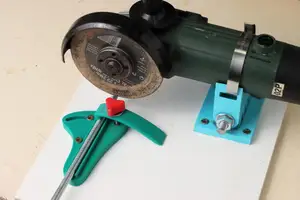
Looking for a better way to cut 3/4" EMT conduit, I could buy an expensive blade for my reciprocating saw or find a better way. I saw an angle grinder mount and decided to make my own to fit the grinder I have. UPDATE -- added a guide for 2020 extrusion.
WARNING: use at your own risk. Be safe.
If you find this useful and want to encourage my insanity, buy a cup of coffee for me, a bag of coffee, or you pick the value . Thanks!
I made mount for my over 10 years old Harbor Fright angle grinder and it works well. Then I ran across a coupon for a new Harbor Fright angle grinder for $10. I made a mount for the new one, too.
Print Settings
Printer:
Creality CR-10
Rafts: No
Supports:
No
Resolution: 0.2-0.25mm layers
Infill:
25-60% -- 4 or more outlines
Notes:
Designed to be printed without supports and with close tolerances.
PLA seems strong enough for the prints I made. PETG may be better. Post-Printing
Designed for Harbor Freight Angle Grinder model #69645 -- often on sale for $15 or less with a coupon. Also, have a clamp for my, much older, #03150 grinder.
Needed hardware:
1 - 1/4-20 1-1/2" hex bolt
1 - 1/4-20 wing nut
2 - 1/4 - 1" fender washers
2 - #6-32 3/4" screws
2 - #6 washers
2 - #6-32 nut
7 - #8 1-1/4" deck screws
1 rubberband
12" section of 2x4
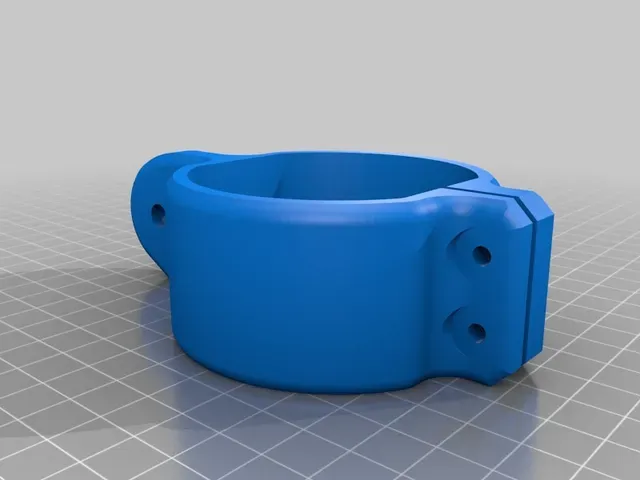
Insert the #6 screws into the washers and into the holes on the clamp. Add the nuts to the opposite side and tighten down pulling the nuts into the pockets.
Loosen the screws and open the clamp up.
Wrap the rubberband around the end of the grinder once or twice
Place the clamp part over the rubberband on the grinder. May not be necessary for new grinder, but my old one needed a little extra grip.
Tighten the screws down evenly. Make sure the grinder is held securely.
Using 4 deck screws, screw the base into the end of the 2x4 section.
Next, start the hex bolt in the base--on the side with the hex hole. Add a washer, the clamp, and then the other washer. Push the bolt all the way through and tighten with the wing nut.
Finally, with the grinder with the cutoff wheel attached, lower it and align the conduit guide so the conduit would be aligned where needed.
Be safe.
Category: Tools





Названия используются только для указания источника результата. Polyzon не аффилирован с перечисленными площадками.