
Бесплатно 
Volume Knob
Printables



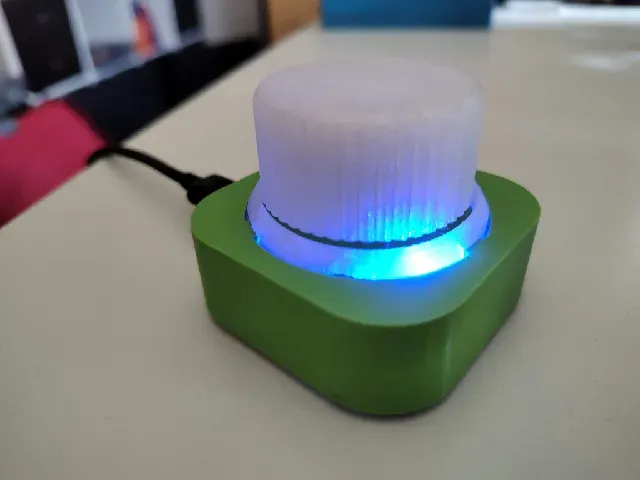


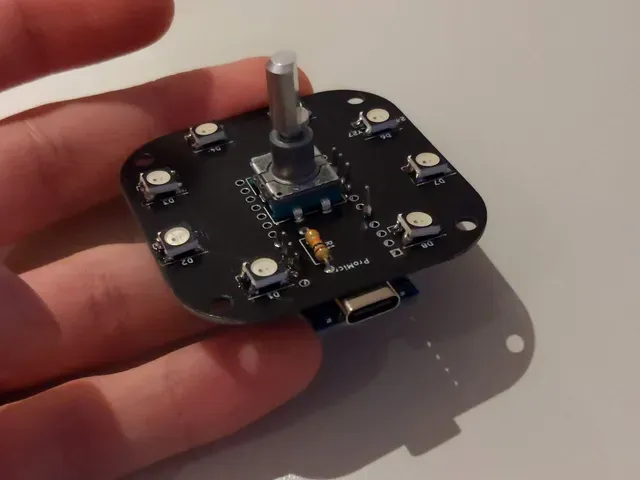
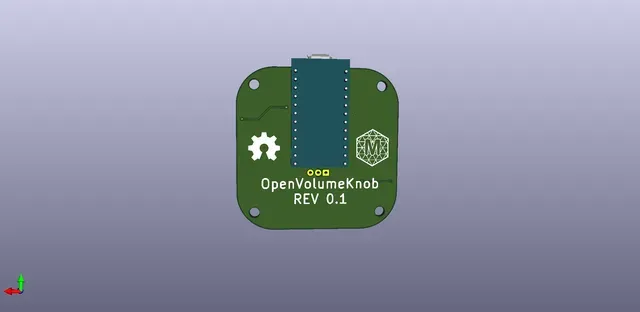

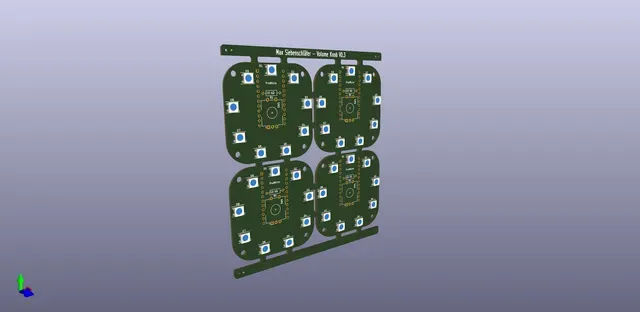
An Arduino pro micro project to control volume or mute the sound. You also use rgb to have a nice experience.
Regular Mode:
Animation-Modes:
Assembly of the Volume Knob V2
This instruction is for those interested in assembling the Volume Knob V2, as shown in Figure 1. Firstly, gather all the necessary components from the sourcing list below. The enclosure parts should be created by 3D printing. You can download the files from the provided link .
- 1 x Arduino Pro Micro(USB-C) blue version - 8 x SK6812 LEDs (5050 Chip) - 1 x ALPS Rotary Encoder with integrated Switch - 1 x 10k Ohm Resistor - 4x M3X16 screws - 4x M3 threaded inserts - 1x PCB - 1x soldering iron It will cost around €20 per Volume Knob. If you want to find more information, you can go to my GitHub page .
3D Printing:
You can print all the parts from PLA besides the transfuser that should be transparent. (Optional) use the special feature to edit the bottom pattern. I liked the Octagram Spiral that
Assembly:
The exploded drawing displays the parts that are included in the assembly. The grey components (1,2,3,5) represent the 3D printed components. The green component (4) is the assembled PCB, which can be bought.
Solder the rotary encoder, Arduino Pro Micro and the 10k ohm resistor onto the PCB (4) at the designated locations.
Component 3 features four inner holes. Use a soldering iron and embed the four M3 threaded inserts into these four openings.
Insert the transparent ring (2) firmly into the three elongated holes on component 3, connecting the components with a snap-fit mechanism. Apply gentle pressure to ensure a secure fit.
Assemble the PCB (4) by inserting it in from the bottom with the USB-connector facing towards the cutout. Insert component 5 into the middle-part, then use four M3 screws to secure the bottom-part in place.
Lastly, push the tubular part of the control knob with the Play/Pause symbol (1) onto the cylindrical rotary encoder. This connection should be press-fit, requiring no adhesive.
Software:
You have a limited amount of control. The software is arranged in a system like on the picture.
You have the selection of 25 different colors and 5 different animation modes to choose from.
Program the Arduino with the Arduino IDE
#include <HID-Project.h> #include <Encoder.h> #include <Adafruit_NeoPixel.h> #include <OneButton.h> #include <EEPROM.h>
#define PIN 7 //Datapin for the LEDs #define NUMPIXELS 8 //number of LEDs in the row
//Color Options byte color[25][3] = {{255,0,0},{255,64,0},{255,128,0},{255,191,0},{255,255,0},{191,255,0},{128,255,0},{64,255,0},{0,255,0},{0,255,64},{0,255,128},{0,255,191},{0,255,255},{0,191,255}, {0,128,255},{0,64,255},{0,0,255},{64,0,255},{128,0,255},{191,0,255},{255,0,255},{255,0,191},{255,0,128},{255,0,64},{255,0,0}}; //Array with the different color-values would be better to do this with a function int row = 0; //pointer, which color is selected ##das is kein Pointer
//Rotary Encoder const int CLK = 6;//Clockpin Encoder const int DT = 5; //Datepin Encoder const int SW = 2; //Button of the Encoders int pos = 0; //the variable for the Encoder-function to give back long oldPosition = -999; //position for the rotary encoder bool turnLeft = false; //State for turning left //I use this variables to check that you have to move two incerements to get one move in the volume bool turnRight = false; //State for turning right
//variable for the first mode int newPos = 0; //the selected LED that should light up int oldpos = 0; //the last lit up LED, You need this to turn the LED off after you jump to the next one ##Name nicht eindeutig, oldPosition-oldpos
//Rainbow-Mode uint16_t r, m;
//Florian-Mode byte florian[3][3] = {{0,255,0},{255,255,0},{255,0,0}}; //green yellow red for the traffic light mode int volumeInPercent = 0;
//Settings-menu int menu = 0; //0 = Sound-Mode, 1 = color selection, 2 = modi-selection int mode = 1; //1-7 = Rotating-Pixel, 9-15 = rgb-wheel fade, 17-23 = rgb-wheel with the moving colors, 25-31 = percent red, yellow, green for different noise levels, 33-39 = simular to the first mode but you have 3 LEDs and the pixels stay on int brightness = 255; //of LEDs from 0-255
//Generall Objects OneButton EncoderSwitch(SW,true); //Libary that adds functions for LongPress, DoubleClick etc. Encoder myEncoder(DT,CLK); Adafruit_NeoPixel pixels(NUMPIXELS, PIN, NEO_GRB + NEO_KHZ800);
void setup(); void loop(); void volumeControl(); void colorSelection(); void modeSelection(); void showPixels(); void onePixelFade(); void rgbWheelFade(); void rgbWheelMoving(); void pixelFadeStay(); void clicked(); void longPress(); int TurnEncoder(int len); uint32_t Wheel(byte WheelPos); void resetLEDs(); void lightAll(int r, int g, int b);
void setup(){ Serial.begin(9600); Serial.println("Consumer setup..."); Consumer.begin();
//Rotary Encoder with Switch Serial.println("Rotary Encoder setup..."); pinMode(SW, INPUT); EncoderSwitch.attachClick(clicked); EncoderSwitch.attachLongPressStop(longPress);
//LEDs pixels.begin();
//Read saved settings row = EEPROM.read(0); mode = EEPROM.read(1);
for(int i = 0; i<50;i++){ //for a special mode doesn't work till now ##geht hier ein direktes auf 0 setzten nicht ? Consumer.write(MEDIA_VOL_DOWN); } Consumer.write(MEDIA_VOL_UP); Consumer.write(MEDIA_VOL_UP); volumeInPercent = 4; }
void loop(){ if(menu == 0){ volumeControl(); } else if (menu == 1) { colorSelection(); } else if (menu == 2) { modeSelection(); } showPixels(); EncoderSwitch.tick(); //the libary reads the encoder value and gives back an int delay(10); }
void volumeControl(){ int i = TurnEncoder(NUMPIXELS); if(i != -1){ newPos = i; brightness = 255; if(newPos > oldpos && newPos != NUMPIXELS-1 && oldpos != 0 || newPos == 0 && oldpos == NUMPIXELS-1){ //solves the issue from 0 to NUMPIXELS-1 and NUMPIXELS-1 to 0 Consumer.write(MEDIA_VOL_UP); volumeInPercent -= 2; if(volumeInPercent < 0){ volumeInPercent = 0; } } else if(newPos < oldpos && newPos != 0 && oldpos != NUMPIXELS-1 || newPos == NUMPIXELS-1 && oldpos == 0){ Consumer.write(MEDIA_VOL_DOWN); volumeInPercent += 2; if(volumeInPercent>100) { volumeInPercent = 100; } } } }
void colorSelection(){ int i = TurnEncoder(25); //turns the Encoder with the length of the array if(i != -1){ row = i; lightAll(color[row][0],color[row][1],color[row][2]); } }
void modeSelection(){ int i = TurnEncoder(NUMPIXELS*4); //6 Positions for every mode with a blank spot between the modes if(i != -1){ mode = i; brightness = 255; } }
void showPixels(){ //function for the different Modis you could select if((menu == 0 || menu == 2 )&& mode > 0 && mode < NUMPIXELS){ //The first mode with only one pixel lit up that fades the color after some time onePixelFade(); } else if((menu == 0 || menu == 2)&& mode > NUMPIXELS && mode < NUMPIXELS*2){ //the rgb-wheel fade rgbWheelFade(); } else if((menu == 0 || menu == 2) && mode > NUMPIXELS*2 && mode < NUMPIXELS*3){//the rgb-wheel with the moving colors rgbWheelMoving(); } else if((menu == 0 || menu == 2) && mode > NUMPIXELS*3 && mode < NUMPIXELS*4){ //simular to the first mode but you have 3 LEDs and the pixels stay on. pixelFadeStay(); } if(mode == NUMPIXELS || mode == NUMPIXELS*2 || mode == NUMPIXELS*3 || mode == NUMPIXELS*4 || mode == NUMPIXELS*5 || mode == 0 && menu == 2){ //The blank spots in the mode-menu where no animations should be shown resetLEDs(); } pixels.setBrightness(brightness); pixels.show(); //Only time I update the pixels }
void onePixelFade(){ int value = 0; if(menu == 0){ value = newPos; } else if(menu == 2){ value = mode; } if(value != -1 && (menu == 2 || menu == 0)){ pixels.setPixelColor(oldpos, pixels.Color(0,0,0)); pixels.setPixelColor(value, pixels.Color(color[row][0],color[row][1],color[row][2])); oldpos = value; } if(brightness <= 1){ resetLEDs(); } for(int i = 0; i < NUMPIXELS; i++){ if(pixels.getPixelColor(i) != pixels.Color(0,0,0)){ brightness = brightness - 1; i = NUMPIXELS; } } }






Названия используются только для указания источника результата. Polyzon не аффилирован с перечисленными площадками.