
Бесплатно 
Samson SR850 3.5mm socket mod cap
Printables

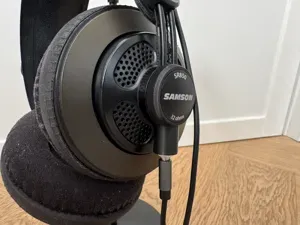
This model allows you to add a removable cable to the Samson SR850 headphones in case your cable breaks, or you need a longer/shorter cable.
You will also need some wires and a Philmore model 504K or 504KB, or an equivalent panel-mount 3.5mm jack.
Part preparation:
- Once your parts are printed, cut 3 small wires at around 1.5 inches, and strip off around 1/8 inch insulation.
- Solder each wire onto the terminal on the 3.5mm jack. Keep note of which wire is left, right, and ground
- Unscrew the nut from the headphone jack
- Insert the 3 wires through the small hole in the headphone jack so that the wires exit through the hole in the "wing" top part that fits into the headphones.
- Thread the wires completely through the hole
- Push the headphone jack down so that it lines up with the larger hole on the bottom
- Push the threaded end of the headphone jack through the large hole on the bottom, and tighten the nut on the threads
- Push the insert firmly into place on top of the headphone jack
Assembly guide:
- Remove the Samson logo on the left ear, it is a circular piece of plastic held in place by 2 plastic pegs, so you can just use your fingernail to remove it.
- Unscrew the philips screw to remove the plastic cover
- Remove the heat shrink from the one loose wire (the one connected to the cord and going in the center headphone) in the plastic case
- Desolder all 3 wires from the headphone cable (Be careful on the ground wires not to remove the wire that is attached to the headphone band! just disconnect the wire connected to the headphone cable)
- Solder the 3 wires to the points on the headphones:
- the small wire that goes in the center is the left channel
- the wire that goes to the headphone band is the right channel
- the wire that is connected to 2 wires is ground
- Put the 3d printed piece in place, route wires, and reassemble


![3.5mm Aux mount Cable Creation [Now in twin-tone!]](https://cache.polyzon.org/api/img?url=https%3A%2F%2Fmakerworld.bblmw.com%2Fmakerworld%2Fmodel%2FUSc68d90ceff2841%2Fdesign%2F2025-06-16_d228dbdc533438.jpg&w=300)


Названия используются только для указания источника результата. Polyzon не аффилирован с перечисленными площадками.