
Бесплатно 
Bowden Speed Loader for Prusa XL and CORE One and similar for loading filament
Printables
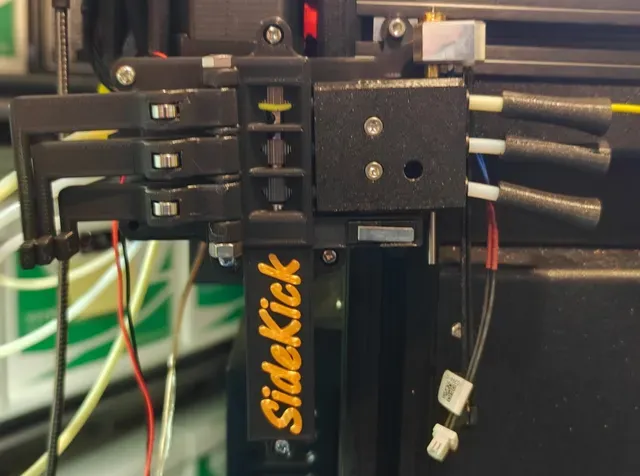

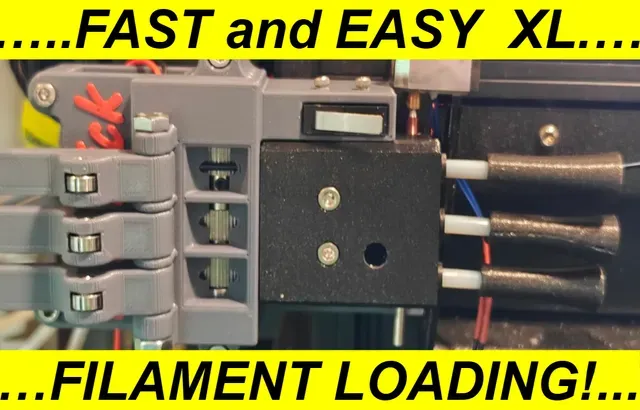
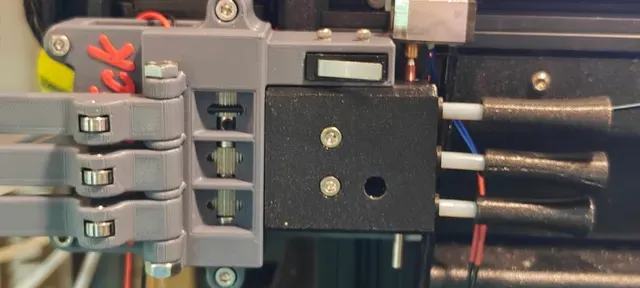

Easy, convenient, and FAST filament loading for your Genuine Prusa XL! Just insert the filament into the sensor and past the loading gears then press the associated paddle to simultaneously provide clamping force on the filament and trigger the power switch! Installs quickly and easily, without any need to change the OEM sensor set up! No more slowly pushing filament a couple inches at a time. No more having to figure out the correct orientation, lining up the teeth on the Bowden Speed Loader, and holding steady while loading.
About
Although I did have a lot of requests for this, it wasn't until I came up with a way to have one motor, battery, switch, and gear for all three filaments, on the side of the XL, in a way that will fit on the side, that I decided to start working on it. I also wanted to use as many of the same parts from the Bowden Speed Loader as possible. Unfortunately, there are still many new parts to get.
The design goals for this project changed over time, but my main priority was to avoid having to change the OEM hardware in any significant way. This also included being able to install and remove it without dismantling, even unplugging, the filament sensors. Since it was to be battery powered, the battery needed to be easy to change in situ. It also had to be securely mounted to the frame of the XL. I was able to keep the GA12-N20 gearmotor, but also designed a version for a motor with a bit more speed and torque.
Some people may wish that it were more automated. I don't have the skills, nor the desire to learn them, to design the electronics and code needed to do something like that. Maybe someone will remix my design into something like that, but powering from an external supply rather than a battery is fairly simple, with some additional 9v battery clips and an appropriate power supply.
STL, STEP, and Fusion360 files are all provided so that the design can be more easily adapted to other size parts. Specifically, I've parameterized the gears, in case you have another set of gears you want to try. A Bondtech style drive gear, as on the BSL, can be used, but then a different spur gear will be needed, and the mesh distance may change, so be sure your gears mesh properly before adjusting the CAD. The gears in the CAD are only representative, and should NOT be printed, because they won't work properly, if at all.
As per the license, I'd really appreciate credit to me for the basic concept of this design on any remixes. My Fusion360 skills are intermediate at best, so expect to have to do more editing after changing any gear specs.
Usage
To use, simply insert the filament through the filament sensor and ensure that it goes into the gears of the SideKick. Press the paddle that aligns with the filament you just loaded. There is no need to fold the other paddles back, but if you prefer to do so, they will fold all the way back and out of the way. As long as you don't apply pressure to the other paddles, all will be well.
To unload filament, since the spool needs to be rotated backward, I usually just remove the spool and rewind it manually, taking care not to let the end of the filament loose once it leaves the XL sensors. The SideKick is NOT an unloading tool for that reason.
Printing Instructions
There are no special settings or materials needed for this build. All models should be printed in the provided orientation, and no supports should be needed. I designed this to be as easy to print and assemble as possible. If you decide to use something other than PLA, be sure to account for material shrinkage rates, even for PETG, as the tolerances for hardware are fairly tight, so if your prints shrink much, stuff might not fit or close up completely after assembly. Just download the set of files for the version you're printing, make sure you have the right number of spacers, and don't forget to print at least one PTFE jig, and send it!
There are two build options. You then have the option of powering it with a 9v battery, alkaline or rechargeable, or use an external 9v or 12v power supply. Batteries are convenient, but a little slower and slow down more at the end as the load increases, and need to be replaced or recharged occasionally. External power is great, but more expensive and complex to install.
Power Options
9V Battery
Each option is designed to be powered by a simple 9v battery. Alkaline seem to offer better power from start to finish of loading, but are a continuing expense to replace them. Rechargeables are nice in that they can be recharged but seem to lack a little oomph as compared to Alkaline. Though, maybe that's just the batteries I have.
External Power Supply
If you prefer, power can be easily provided by a low cost variable voltage power supply and some additional 9v battery clips. Look for the brick style adjustable supplies that come with a variety of connectors, specifically the one with screw terminals to easily connect to lead wires. Loading speed will be much better from beginning to end, and you never have to recharge or replace the batteries! I'm not going to link a specific model, but just search for " 12v adjustable universal power supply " and you'll get many similar results. Check out the remixes for a model that you can print to install a DC jack in place of the battery!
Powered by the XL?
You could absolutely do this if you know what you're doing. With an appropriate voltage/buck converter and the right connections to the XL power supply, the SideKick could easily be powered by the XL itself. I'm not going to suggest that or show people how, because I don't want to get it wrong, or have people blame me if THEY do it wrong. But, if you know what you're doing, I'm pretty sure you can figure it out. ;)
Something else?
I look forward to all the cool ideas people come up with in their remixes! USB power? Power from the XL PSU? Something with logic? GO FOR IT!
Direct Drive
This is the recommended version because it uses a slightly larger gearmotor that is directly connected to the extruder gears, providing high speed and torque.
Bill of Materials
Quantities are for one SideKick. Double if making a SideKick for both sides. Links are to Amazon and are NOT affiliate links.
Blurolls Kit!
Blourolls has agreed to make a complete hardware kit for the direct drive SideKick! Now you can easily source all the parts you need without buying extras you don't! Hit this link, and don't forget to post a make! :)
https://www.blurolls3d.com/products/sidekick-prusa-xl-filament-loader-designed-by-mrflippant
Note that the Option 1 for $14.90 has everything you need for a battery powered SideKick other than the battery, but you can certainly devise your own external power. Option 2 for $19.90 adds a 24v to 12v converter. I don't provide instructions on using this, so do not buy that version unless you know what you are doing.
Hardware List
- Two MR115-2RS Ball Bearings ID 5mm x OD 11mm x Width 4mm
- Three 683ZZ Ball Bearing ID 3mm x OD 7mm x Width 3mm
- Three OD 11mm 5mm bore Extruder Gear for 3D Printer Compatible for Ender 3 et al
- One Micro Limit Switch (6.4mm x 20mm x 10mm)
- One 3mm to 5mm shaft coupler, 20mm long
- One 5mm x 60mm steel rod or D-shaft
- DC 12V 1000RPM Gear Box 050 Motor (25 x 16 x 12 mm)
- One 9v battery
- One 9v battery connector





Названия используются только для указания источника результата. Polyzon не аффилирован с перечисленными площадками.