
Бесплатно 
HOテル Lamp (Cyberpunk 2077 Hoteru glowing sign)
Printables





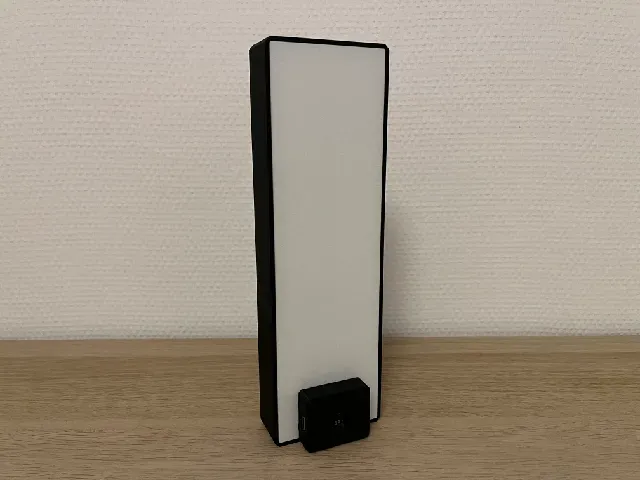
A HOテル Lamp powered by a USB-C ESP32 D1 Mini and four 4x4 WS2812B LED Matrices , running WLED for full RGB lighting control and an easy Home-Assistant integration .
This is the vertical version of the lamp. An alternative horizontal version is available here .
Featuring:
- Optional and reversible ESP32 D1 mini case (allows the USB-C connector to face left or right; removable if you prefer to drive the lamp with another controller).
- Easy front and back plate assembly with print-in-place locking tabs and built-in supports .
- Light-blocking walls on the front plate , enabling per-letter illumination with minimal light bleed.
Bill of Materials
The lamp was designed to fit the following components:
- USB-C ESP32 D1 Mini
- 30x30 mm , 4x4 WS2812B LED Matrix (4 total, one per letter)
You will also need:
- Wires: 5 cm x 15
- Optional: a small 3-pins connector ( JST-XH 2.5 mm crimped connectors work well) to make assembly and disassembly easier.
Printing recommandations
- The H , O , テ and ル light diffusers should be printed on a smooth build plate (smooth PEI or similar) using a light-diffusing color (e.g., white PLA). Using a textured plate will change the appearance of the letters, which might be desirable depending on the style you want.
- Do not enable slicer-generated supports , especially on the backplate, as they may interfere with the built-in model supports.
Instructions
1. Electronics
1.1. ESP32
Solder three 5 cm wires to the ESP32 on the following headers:
- GND
- 5V
- IO16 ( as recommended by the WLED documentation )
Then crimp or solder the wires to the JST-XH connector.
Finally, follow the official WLED documentation to install WLED on your ESP32:
- WLED installer site (recommanded method)
- WLED documentation
If your ESP32 is not recognized (no COM port), you may need to install the CP210x USB to UART driver .
1.2. LED matrices
Solder the 4 LED Matrices in serie, using ~5 cm wires as follows:
- GND → GND
- 5V/VCC → 5V/VCC
- OUT → IN
On the first matrix (the one with the unsoldered IN pad), solder the three 5 cm wires to:
- GND
- 5V/VCC
- IN
Then crimp or solder the wires to the JST-XH connector, making sure to follow the pin order below so that, once both connectors are plugged together, the wiring matches properly:
- ESP32 GND → Matrix GND
- ESP32 5V → Matrix 5V/VCC






Названия используются только для указания источника результата. Polyzon не аффилирован с перечисленными площадками.