
Бесплатно 
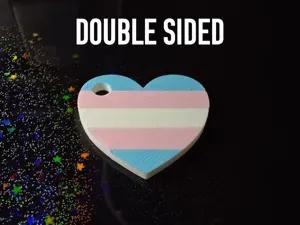
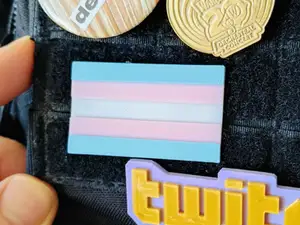
Trans Flag Keychain (no AMS required)
Printables


Introduction:
Happy Pride Month, everybody! These instructions are very similar to the instructions for THIS model , but I have modified them slightly to account for the five stripes of the trans flag rather than the 6 stripes of the Pride flag. Remember: Despair is something to fight! Even when we're all exhausted. This flag is a small way we can make the world a better place. Signify who you are and who you support while filtering out the folks who wish harm on you and the people you love.
Unfortunately, it is an absolute nightmare to print. Fortunately, my day job is writing documentation, so I'm going to do my best to make it as easy as it can possibly be.
Model Specifications:
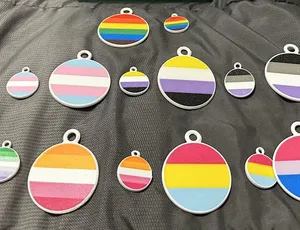
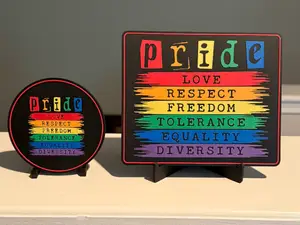
Size: This model is intended to be resizable. If you make it square, it can be a coaster. If you make it small, it can be a magnet or a pin. If you make it roughly brick-sized and fill it with cement, it can be used to build a stone wall.
Parts: 5
Supports: No, but you may need to print it with a brim or use glue.
Creation Instructions:
Method 1: Print Pauses and Filament Changes
This method is how you could make this flag if you DON'T have a tool changer or Automatic Material System (AMS). These instructions are for PrusaSlicer, but you should be able to adapt them for other slicers as well.
- Download the .3mf and ensure that your printer configuration is correct.
- Do not reorient the model. You can rotate it and move it around, but make sure it's gay up and down. It must be printed vertically for the color changes to work, and I am going to give you a formula to find the layers where you'll need to swap filaments
- Slice the model. Whachaaaa! (That's the sound of slicing.)
- Now we're going to do some math! Hooraaaaay!
- First, find the total number of layers in the model. The easiest way to do this is to slice it and look in the top right of the Preview screen. In my case, it's 147.
- Divide that number by 5. Cross your fingers or claws or toe beans that you get a whole number.
- The number you get will be the number of layers up the print you put a pause in, rounded to the closest whole number. In the case of the base model, 147 / 5 = 29.4, so in the Preview screen, I'm going to grab the little + sign in the top right and pull it aallll the way down to layer 29.
- Right click and add a pause.
- If you're sort of swimming in the math here, don't worry. I am too. I'm pretty sure I used incorrect wording up in step 7. But you get what I'm trying to do, right? We're trying to add pauses at 1/5 of the print, 2/5 of the print, 3/5 of the print, and so on. In the base model, this is where those pauses fall:
- Put the calculator away when you're done. Slice the model again. Feel free to make the "whachaaaa" sound yourself this time.
- Double check everything. Just in case.
- Save it and get the file to your printer, however you usually do that. DON'T START THE PRINT YET.
- Load the first filament, and then make certain that you have the next 2 colors easily accessible. The longer the print remains paused, the more visible the pause is and the more fragile the print becomes. You don't want to leave it paused for 4 hours while you run down to the filament store in the next town over to get some light blue. Make sure you've got the yellow on hand.
- Start the print. Wait nearby for the telltale sound of silence. Or the beep.
- When the printer pauses, change to the next filament and start it up again.
- If the print breaks off the plate, sigh deeply, rub the back of your neck and then rub a glue stick on your print bed, and restart the print. If it breaks off AGAIN, make a different frustrated sound, go back to the model, add a 4mm brim, and reslice.
- Good luck!
Method 2: Toolchanger or AMS
This method is significantly more straightforward. Designate the bottom part as your light blue filament, the next part as your pink, the middle as your white, the next should go back to pink, and the top should be blue. Then print it.
Please leave a like, a make, or a comment! And let me know if I got anything wrong. Happy Pride!



Названия используются только для указания источника результата. Polyzon не аффилирован с перечисленными площадками.