
Бесплатно 
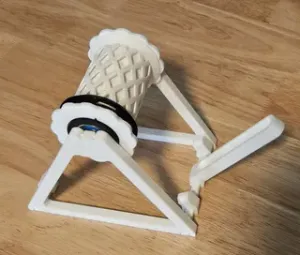
Vertical Filament Guide for Rewinding Gravity Spool Holder | PC4-M4 Coupler
Printables


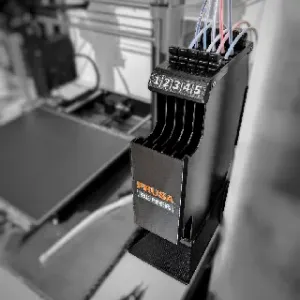
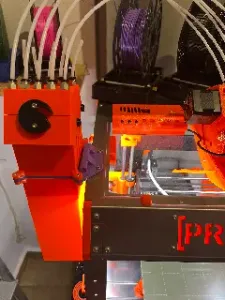
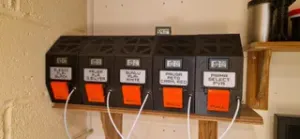
This MMU buffer casette can stay in place during filament loading. Especially convinient if the spool you want to change, is located at one of the middle slots. The filament feeds right through and gets sorted automatically inside. Works reliably with coily filament and molten filament tips too.
It uses the same hardware as the genuine Prusa casettes, so this can be used as a drop in replacement. No extra hardware needed.
It is compatible with all prusa buffer types like MMU2, MMU3 and all similar buffer systems in general. Although the casettes can directly be used with the original buffer unit, a segmenter plate with a different design is included also. You are going to find .step files for modification too
Note: You can just use the automatic cassettes with your existing buffer as is. Swaping the segmenter has no impact on the functionallity and is only for esthetic reasons. If you need a guide for assembly of the segmenter, buffer or use in general, please see original Prusa MMU buffer for more detail and Parts needed. https://www.printables.com/model/531604-mmu3-printable-parts
Printing: Print all parts in the given orientation. 0.2 layerhight works well. If you are using a 0.6mm nozzle, print all parts with 2-walls. Print with 3-walls if you are using a 0.4 nozzle. No support needed. You can print all parts in one single color but „MMU painting“ some features, makes it look more interesting.
Assembly: You need to harvest the original prusa casettes for hardware parts. For assembly, see pictures down below.
1) Print all parts as needed and prepare hardware parts from Prusas cassettes.
2) Insert the axle pin into the center hole at Base part
3) Slide the bearing over the axle pin
4) Take the drum part and press it onto the bearing. Depending on your printers tolerances you might need a firm push. It is held in place by friction fit afterwards.
5) Insert the Number part in its seating slit at the Base part
6) Put the Deflector part in its seating at the Base part. Mount it in place with one M3 bolt. Depending on the lenghts of bolts you are actually using, the washer part is optional. Only needed if bolts are longer than 5mm
7) Put the Cover part on top of the Base
8) Add remaining M3 Bolts and tighten them. Also insert the bowden tube holder clips
9) Done :)
How to Use:
1) Insert cassettes in the MMU buffer unit
2) Attach the bowden tube, coming from your spool, to the bottom port (port is marked with an arrow at the front side). You can secure the bowden tube in place with a retainer clip. The retainer clip is optional but recommended.
2b) Also attach the bowden tube, running to your printer MMU unit. Make sure it is attached to the top port . (This step is not shown with a picture)
3) Feed the filament, coming from the spool, through the buffer. The cassettes are marked with arrows on all sides. Always make sure the filament is fed in the direction shown by the arrows. Note: Keep pushing the filament, until it gets pulled by your MMU unit. If you pull on the filament before it gets to the printer/MMU unit, you might need to remove the filament completelly. Then start feeding filament again.
4) During filament swapping, the printer pushes its filament into the MMU buffer, like before. In this case however, the cassettes can stay in place during spool change. Just take the filament out and push new one through, as you like.
All done now. Enjoy using it :)
CHANGE LOG 01.09.2026 Optimized drum to Drum_V2. It sits now a little lower in the base in order to reduce drum tilting with heavy spools (>1kg). Also Drum_V2 hub got optimized to make inserting bearing easier. Base got smal changes to design grooves for better prinatbility and seating for axle pin got tightened. This is now Base_V2 Since Cover_V2 and Deflector_V3 already exist, the .3mf and .step files feature now the newest parts and are named to "MMU Buffer V2"
CHANGE LOG 24.08.2026 Added Deflector_V3 and also Cover_V2. Because a comment by @Breakmate_845735, the deflector seats now a little closer to the drum. this is to prevent filament from getting fed back into the groove. Also the Cover_V2 now features a "closed design" and also optimized filament path. This prevents coily filament getting stuck between Cover and Drum and reduces friction during loading. Added a "legacy parts" folder in order to have a place for old version parts
CHANGE LOG 13.08.2026 Added Number plates with the numbers rotated 180° "Upside Down"
CHANGE LOG 10.08.2026 Added Deflector_V2. It now features a smal additional bar at the bolt hole, in order to press it down in its seating area more firmly.
Feel free to check this article with some useless additional info https://www.printables.com/article/automatic-mmu-buffer-wd19Ord




Названия используются только для указания источника результата. Polyzon не аффилирован с перечисленными площадками.